Using Windows 10
- By Ed Bott and Craig Stinson
- 4/9/2019
- An overview of the Windows 10 user experience
- Navigating Windows 10
- Using and customizing the taskbar
- Using and customizing Action Center
- Switching tasks
- Reviewing, revisiting, resuming with Timeline
- Switching between virtual desktops
- Managing and arranging windows
- Using a keyboard and mouse in Windows 10
- Using Windows 10 on a touchscreen device
- Using the Windows Ink workspace
- Working with fonts
Reviewing, revisiting, resuming with Timeline
Timeline, introduced in version 1803, extends Task View into the past, showing thumbnails for the places you have been and the things you have done within the most recent 30 days. If you forget where you found that important article on the Internet, or if you saved your notes somewhere (but who knows where?), relax; Windows knows. Press Windows key+Tab or click the Task View button. Then scroll down below the thumbnails for your current apps to get to your timeline. Figure 3-12 shows the beginning two days of a user’s timeline.
)
Figure 3-12 Each tile in Timeline represents an activity or site to which you can return. Initially, two rows of tiles appear for each day heading; you can click links beside the headings to see more.
Each tile represents the combination of an app, a piece of content, and a specific time. Clicking a tile takes you back to the activity in question.
Timeline initially displays two rows of tiles per day, and it selects the activities that it considers to be most “relevant.” If you don’t find what you’re looking for, click the link beside the head to display all activities for the selected day. When you do this, Timeline divides the full day’s activities into hourly subgroups. If you’re still not finding what you need, press Ctrl+F to get to the search box in the upper-right corner of the display.
The scrollbar at the right side of the display is annotated by date. If you want to rediscover what you were up to on a particular day, drag the annotated scrollbar until that date appears.
What if you don’t want to be reminded of certain activities or don’t want others to see what you’ve been doing? You can remove any tile by right-clicking it and choosing Remove. Or you can suppress an entire day’s (or hour’s if you have expanded a day) history by right-clicking a tile and choosing the command at the bottom of the context menu (Clear All From Earlier Today, for example). Timeline also ignores any Microsoft Edge browsing you do in an InPrivate session.
Timeline is a good example of a feature that is evolving as this book goes to press and one that can be expected to undergo more changes in the future. In its debut with Windows 10 version 1803 in the summer of 2018, Timeline supported Microsoft Edge, the document-oriented components of Microsoft Office (Word and Excel, for example, but not Outlook), Photos, News, Notepad, and Maps. Adobe Acrobat DC and VLC Media Player were among third-party programs supporting Timeline, and you can certainly expect to see others arrive as time passes. Stay tuned.
One of the most useful things about Timeline is its ability to track activities across all systems that share a common Microsoft account. If you leave the office in medias res, you can pick up where you left off on another device in another location.
On first use, when you scroll to the bottom of Timeline’s array of tiles, you might encounter the message shown in the next illustration:
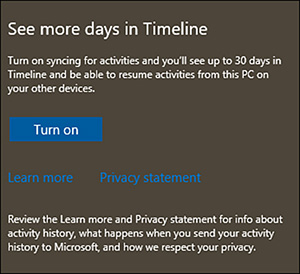
Clicking Turn On in this dialog box enables the syncing of Timeline data across devices and, at the same time, extends Timeline’s reach from four days to thirty.
Settings for Timeline are located at Settings > Privacy > Activity History:
)
With the first and second check boxes selected, Timeline is enabled, and your sites and activities can be revisited on any device sharing a common Microsoft account. If you open an activity requiring a modern app on a device where that app is not installed, Windows will assist you to install it.
In the Show Activities From Accounts section of the page, you can enable or disable tracking for particular Microsoft accounts, in the event that you have multiple—a work account and a school account, for example. Finally, the Clear button at the bottom of the page provides a way to erase your current history and start fresh.