Plan for Exchange Online and Skype for Business Online
- By Orin Thomas
- 4/6/2018
Skill 4.3: Plan for Exchange Online
This skill deals with planning how to implement a variety of features in Exchange Online. This includes understanding what client prerequisites are required to ensure that users are able to access archive mailboxes, configuring in-place hold and litigation hold, allowing and blocking access to OWA, and allowing and blocking access to ActiveSync.
Plan client requirements for archive
In Chapter 3, “Configure Exchange Online and Skype for Business Online for end users,” you read about archive mailboxes. Users can access archive mailboxes on a computer running Outlook or Outlook Web App through a browser, but are unable to access the archive mailbox when using Outlook on a mobile device or accessing Outlook Web App through a browser on a mobile device. Archive mailboxes can be used with the following versions of Outlook:
Outlook 2016
Outlook 2013
Outlook 2010
Outlook 2007
The archive mailbox appears in Outlook as a folder, as shown in Figure 4-35.
)
FIGURE 4-35 Move to archive mailbox
There are several methods that users can use to transfer items to the archive mailbox. These include:
Move messages manually Users of clients that support archive mailboxes can manually move messages to the archive mailbox. This process is labor-intensive. Figure 4-36 shows moving an item to an archive mailbox.
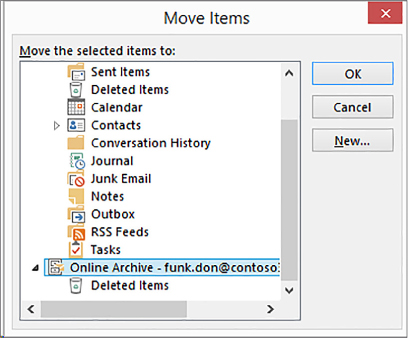
FIGURE 4-36 Move to archive mailbox
Use Inbox rules to move messages Messages can be moved to the archive mailbox using inbox rules. This requires the user to configure the Inbox rule, as shown in Figure 4-37.
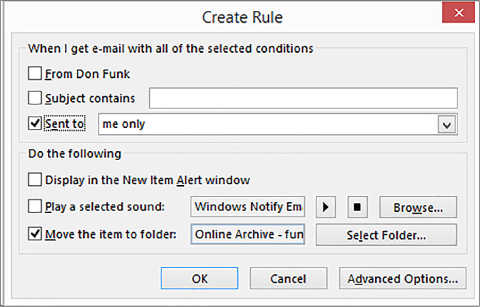
FIGURE 4-37 Create Rule
Have retention policies move messages The default retention policy assigned to each Exchange Online mailbox automatically moves messages that are two years or older to the archive mailbox.
Importing messages from PST files Users are able to manually import data from PST files on their local computers into the archive mailbox. Having the data stored centrally in Office 365, rather than on a specific computer, is also beneficial for users who want to ensure that the message data in the .pst file is backed up and available on other computers.
Users can import PST files into their archive mailbox by performing the following steps:
In Outlook, select the Archive folder.
Click File, and then click Open & Export.
On the Open page, shown in Figure 4-38, click Import/Export.
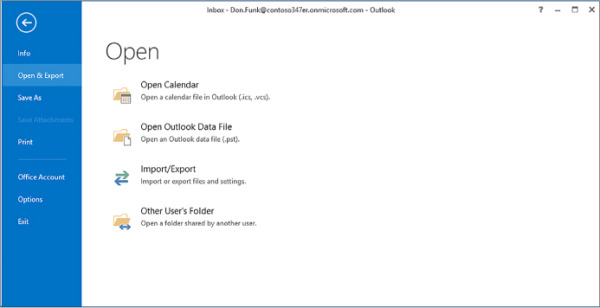
FIGURE 4-38 Import/Export
On the Import And Export Wizard, click Import From Another Program Or File, as shown in Figure 4-39, and then click Next.
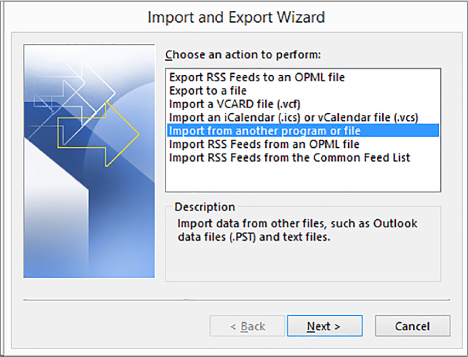
FIGURE 4-39 Import From Another Program Or File
On the Import A File page, select Outlook Data File (.pst), as shown in Figure 4-40, and click Next.
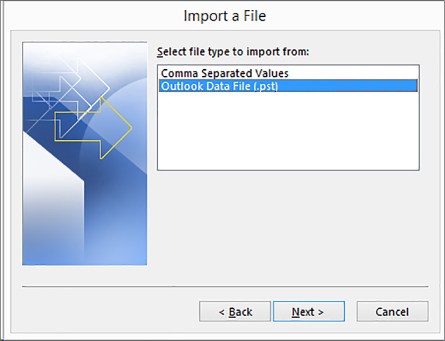
FIGURE 4-40 Import Outlook Data File
Select the .pst file that you will import.
Under Options, select between the following methods of dealing with duplicates, as shown in Figure 4-41.
Replace Duplicates With Items Imported
Allow Duplicates To Be Created
Do Not Import Duplicates

FIGURE 4-41 Duplicate Options
Click Next. On the Import Outlook Data File page, ensure that the option to Import items into the same folder is set to Online Archive, as shown in Figure 4-42.
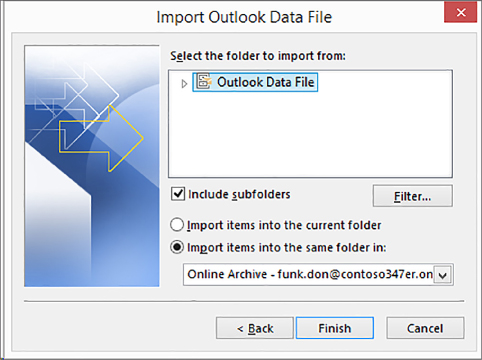
FIGURE 4-42 Import to archive
Click Finish.
)
In-place hold and litigation hold
Litigation hold is a feature introduced in Exchange Server 2010 that allows preservation of data for eDiscovery. The feature is available in Exchange Server 2013, Exchange Server 2016, and Exchange Online. You apply litigation hold on a per-mailbox basis. For example, if you want to preserve the contents of all conversations between Don, Kim, and Dan, using the litigation hold functionality, you would need to place all three mailboxes on litigation hold.
In-place hold allows holds be applied on the basis of a query. For example, you could put an in-place hold on all conversations between Don, Kim, and Dan, but the hold would not apply to items outside the contents defined by the in-place hold query.
Enable litigation hold
Litigation hold, also termed legal hold, is used when one or more users at an organization is subject to an internal investigation, legal discovery, or other procedure that requires the organization to preserve the stage of their Exchange Online mailbox. Litigation hold is necessary to avoid tampering with evidence. For example, if a person has sent abusive email messages from the email account associated with their Exchange Online mailbox, placing the mailbox on litigation hold ensures that any potential email messages containing abusive content will not be deleted by the person subject to the investigation.
When a mailbox is placed on litigation hold, the following occurs:
Content in the archive mailbox is preserved.
Original and modified versions of items are preserved.
Deleted items are preserved for a specified period or until the hold is removed.
Items in the recoverable items are preserved.
When a mailbox is placed on litigation hold, its storage requirements increase dramatically. Not only are deleted items stored, but so are the original versions of modified items, as well as the modified versions. To ensure that all items are kept and the mailbox remains functional, the quota applied to the recoverable items folder is increased from 30 GB to 100 GB. Even though the quota on the recoverable items folder is increased, Microsoft recommends that administrators monitor mailboxes placed on litigation hold to ensure that issues related to the exhaustion of applied quotas do not arise.
When you place a mailbox on litigation hold you can specify the duration of the hold. The person requesting the litigation hold should specify whether the litigation hold will be of a specific duration or indefinite. You should also ensure that documentation requesting the implementation of the hold is in order because a company’s human resources or legal department usually requests litigation hold. To leave the mailbox on litigation hold indefinitely, leave the litigation hold duration field empty, as shown in Figure 4-43.
)
FIGURE 4-43 Litigation Hold
It is important to note that litigation hold can take up to 60 minutes to be enforced. You need to take this period into account in scenarios where you need to immediately preserve the contents of a mailbox and you suspect that the person subject to the litigation hold might attempt to scrub evidence. You should talk to your organization’s human resources department about putting policies in place that provide enough time for a litigation hold to be enacted before the person subject to that hold is informed that this has occurred.
To put an Exchange Online mailbox on litigation hold, perform the following steps:
In the Recipients section of Exchange Admin Center, select the Mailboxes area, and then select the mailbox of the user for which you wish to configure a litigation hold. Figure 4-44 shows the Dan Jump mailbox selected.
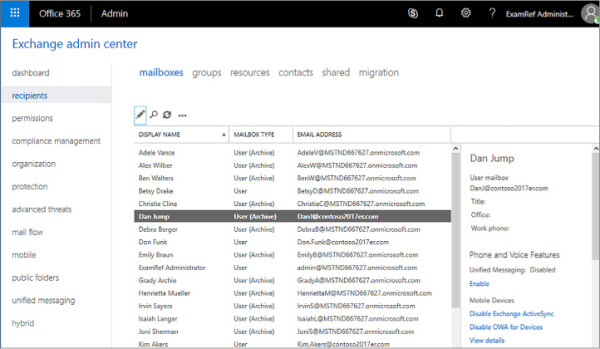
FIGURE 4-44 List of Mailboxes
Click the Edit (Pencil) icon to access the Mailbox Properties page.
On the Mailbox Properties page, click Mailbox Features.
Under Litigation Hold: Disabled, shown in Figure 4-45, click Enable.
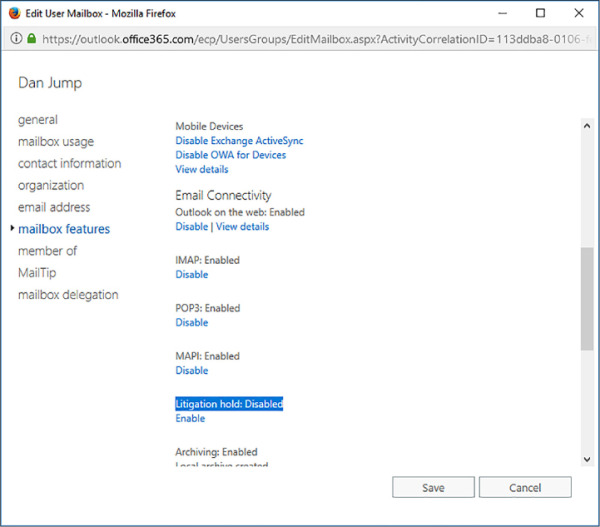
FIGURE 4-45 Enable Litigation Hold from Mailbox Features
On the Litigation Hold dialog box, shown in Figure 4-46, enter the litigation hold duration. If the litigation hold is to be indefinite, ensure that you do not enter a figure in this field. You can also provide a note about the litigation hold and a URL, which is used to inform the user that their mailbox has been placed on hold. You can also provide a URL to provide the user with more information. Click Save to enact the litigation hold.
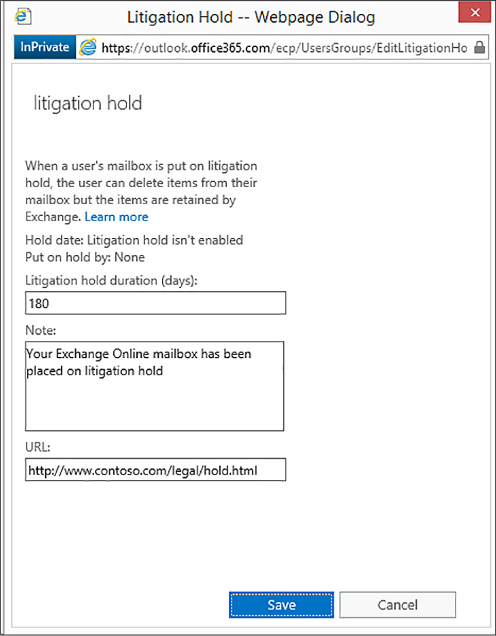
FIGURE 4-46 180-day Litigation Hold
Click Save on the User Mailbox properties page to enact the litigation hold.
)
)
If the Office 365 user account associated with a mailbox that is placed on litigation hold is deleted, the mailbox is converted into an inactive mailbox. Inactive mailboxes store the contents of the deleted user’s mailbox and retain all mailbox items for the duration of the hold at the time when the hold was applied. For example, if a 90-day hold is placed on a mailbox, and the Office 365 user account is deleted five days later, the contents of the inactive mailbox will be preserved for another 85 days. Inactive mailboxes are unable to receive new email messages and are not displayed in address books or other lists.
Remove litigation hold
Removing a user from litigation hold means that all deleted items that have exceeded their retention period will be purged. The original versions of items that have since been modified will also be deleted once litigation hold is removed. Once litigation hold is removed, the quota on the recoverable items folder will also return to 30 GB from 100 GB.
To remove a user from litigation hold, perform the following steps:
In the Recipients section of Exchange Admin Center, select the mailboxes area, and then select the mailbox of the user for which you wish to remove the litigation hold.
Click the Edit (Pencil) icon.
In the Mailbox Features section of the mailbox properties dialog box click Disable under Litigation Hold: Enabled.
On the Warning dialog box, warning you that you are about to disable litigation hold, click Yes.
Click Save to apply the change to the user’s mailbox.
Manage litigation hold with PowerShell
You use the Set-Mailbox Windows PowerShell cmdlet to place a mailbox on litigation hold. For example, to place the mailbox don.funk@contoso2017er.com on indefinite litigation hold, issue the following command:
Set-Mailbox don.funk@contoso2017er.com –LitigationHold $True
You can use the LitigationHoldDuration parameter to configure a duration for the litigation hold. For example, to place the kim.akers@contoso2017er.com mailbox on litigation hold for 180 days, issue the following command:
Set-Mailbox kim.akers@contoso2017er.com –LitigationHold $True –LitigationDuration 180
You can use a combination of the Get-Mailbox and the Set-Mailbox cmdlets to put all of the mailboxes in the organization on litigation hold. You might need to do this if your organization is subject to litigation and the contents of all user mailboxes must be preserved. For example, to place all user mailboxes in the organization on hold for a period of 90 days, issue the following Windows PowerShell cmdlet:
Get-Mailbox -ResultSize Unlimited -Filter {RecipientTypeDetails -eq "UserMailbox"} | Set-Mailbox -LitigationHoldEnabled $true -LitigationHoldDuration 90
You can remove a mailbox from litigation hold using the Set-Mailbox Windows PowerShell cmdlet. For example, to remove the litigation hold on the mailbox don.funk@contoso2017er.com, issue the following command:
Set-Mailbox don.funk@contoso2017er.com –LitigationHoldEnabled $False
Configure OWA access
Outlook Web App (OWA), also termed Outlook On The Web, allows users to access their Office 365 Exchange Online mailbox through a web browser. While a large number of Office 365 users access their Exchange Online mailbox through the Outlook client software on their computer or mobile device, in some scenarios, such as when they are using a kiosk computer in an airport, they will want to access their mailbox through a web browser.
Allowing access to Office 365 Exchange Online mailboxes through OWA does provide users with convenience, but also exposes the organization to risk. Many users do not exercise due care when using computers in airports or Internet cafés. There are many instances where user credentials have been captured by malware installed on these computers provided for public use. These credentials can be used at a later point in time by attackers to access organizational data because they can gain access to OWA or even a user’s Office 365 subscription. For this reason, many organizations disable OWA. Because smartphone users are able to access Office 365 Exchange Online mailboxes through the Outlook app, available in each vendor’s App Store, fewer users require access to OWA when away from their trusted computers.
To disable OWA, perform the following steps:
In the Recipients area of the Exchange Admin Center, select the user for which you wish to disable ActiveSync.
Click the Edit (Pencil) icon.
In the Mailbox Features section, click Disable under Outlook On The Web: Enabled, as shown in Figure 4-47.
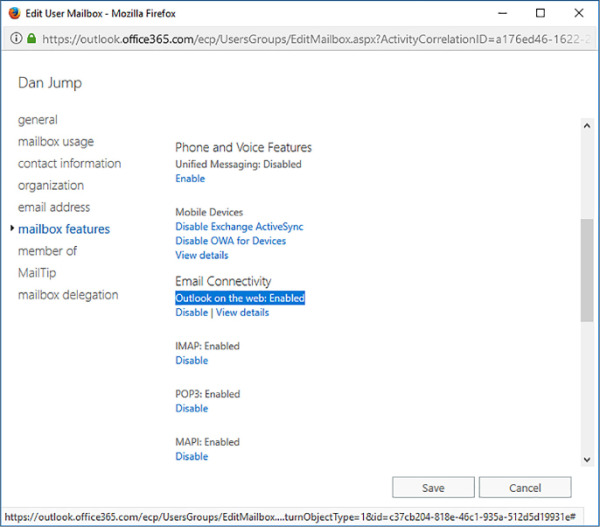
FIGURE 4-47 Disable Outlook On The Web
On the Warning dialog box, click Yes.
Click Save to save the changes to the Office 365 Exchange Online mailbox.
)
You use the Set-CASMailbox Windows PowerShell cmdlet to enable and disable OWA on a per user basis. For example, to disable OWA for the dan.jump@contoso2017er.com account, issue the command:
Set-CasMailbox dan.jump@contoso2017er.com –OwaEnabled $False
You can use the Get-Mailbox cmdlet with the Set-CasMailbox cmdlet to disable OWA for all mailbox users. To do this, issue the following command:
Get-Mailbox -ResultSize Unlimited -Filter {RecipientTypeDetails -eq "UserMailbox"} |
Set-CasMailbox –OwaEnabled $False
To enable OWA for the dan.jump@contoso2017er.com account, issue the command:
Set-CasMailbox dan.jump@contoso2017er.com –OwaEnabled $True
Configure ActiveSync
ActiveSync is a protocol, primarily used by mobile devices, that allows access to email, calendar, contacts, and tasks. ActiveSync is enabled by default on Office 365 Exchange Online mailboxes. In some scenarios, you might wish to disable ActiveSync.
To disable ActiveSync on a specific mailbox, perform the following steps:
In the Recipients area of the Exchange Admin Center, select the user for which you wish to disable ActiveSync, and click the Edit (Pencil) icon on the toolbar.
In the Mailbox Features section, shown in Figure 4-48, click Disable Exchange ActiveSync.
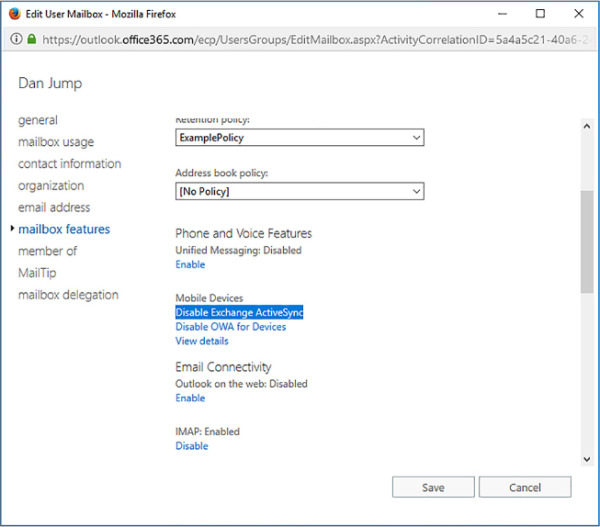
FIGURE 4-48 Disable ActiveSync
On the Warning dialog box, click Yes.
Click Save to close the User Mailbox properties page.
)
)
)
)
)
)
)
)
You can use the Set-CASMailbox Windows PowerShell cmdlet to enable or disable ActiveSync. For example, to disable ActiveSync for the don.funk@contoso2017er.com mailbox, issue the command:
Set-CASMailbox –Identity don.funk@contoso2017er.com –ActiveSyncEnabled $False
You can use the Get-Mailbox cmdlet in conjunction with the Set-CasMailbox cmdlet to disable ActiveSync for all users in an organization. To do this, issue the command:
Get-Mailbox -ResultSize Unlimited -Filter {RecipientTypeDetails -eq "UserMailbox"} |
Set-CasMailbox –ActiveSyncEnabled
$False
To enable ActiveSync for the don.funk@contoso2017er.com mailbox, issue the command:
Set-CASMailbox –Identity don.funk@contoso2017er.com –ActiveSyncEnabled $False
Mobile Device Management
Mobile Device Management (MDM) for Office 365 allows you to manage certain devices that interact with Office 365. You can control how Office 365 email and documents are accessed and Office 365 MDM allows you to remotely wipe devices to eradicate sensitive organizational information.
Office 365 MDM supports the following devices:
iOS 7.1 and later
Android 4 and later
Windows 8.1 (limited)
Windows 10 (requires that the device be joined to the Office 365 Azure AD instance)
Windows 10 Mobile (requires that the device be joined to the Office 365 Azure AD instance)
You can use Office 365 MDM policies to configure the following policies shown in Figure 4-49:
)
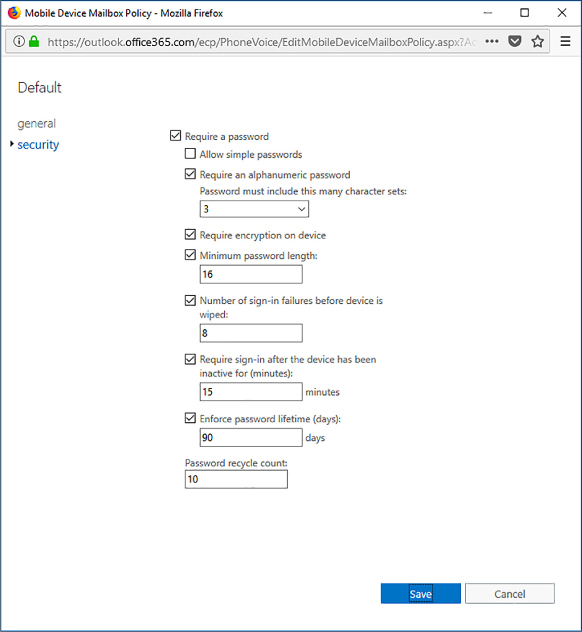
FIGURE 4-49 Mobile Device Mailbox Policy
Require a password
Allow simple password
Require an alphanumeric password (specify number of character sets required)
Require encryption on device
Minimum password length
Number of sign-in failures before device is wiped
Require sign-in after the device has been inactive for (minutes)
Enforce password lifetime (days)
Password recycle count
Data Loss Prevention
Data Loss Prevention (DLP) policies allow you to accomplish the following goals:
Identify information that is sensitive across a variety of locations including Exchange Online, SharePoint Online, or OneDrive for Business Sensitive information can include credit card numbers, passport numbers, or any readily identifiable combination of characters.
Prevent accidental sharing of information Block access to documents that contain sensitive information from being accessed by unauthorized people, including those outside the organization. Block email messages that include sensitive information from being sent.
Monitor and protect sensitive information in desktop versions of Excel 2016, PowerPoint 2016, and Word 2016 Identify sensitive information as it is generated and apply DLP policies.
View DLP reports showing content that matches your organization’s DLP policies Allows you to determine how well your organization is complying with specific DLP policies. Also allows you to view false positive reports.
DLP policies can be configured to protect some or all SharePoint sites or OneDrive accounts. At present it isn’t possible to select specific mailboxes, so if you choose to apply DLP policies to Exchange Online, it will apply to Exchange Online in its entirety.
DLP policies
DLP policies contain one or more rules. A rule includes conditions, actions, user notifications, user overrides, and incident reports.
Conditions determine the type of information being searched for and whether to take an action. Conditions can include:
A type of sensitive information, as shown in Figure 4-50. This can include common types of sensitive information, such as credit card numbers, national ID numbers, and passport numbers. Detection goes beyond looking for a specific string of numbers, but also includes contextual content examination and regular expressions.
A specific label is applied to the content. A label may be applied manually or through another mechanism such as a transport rule.
Content is shared with people outside the organization. A determination is made as to the identity of the person trying to access the information.
)
FIGURE 4-50 DLP conditions
Actions determine what occurs automatically when specific sensitive information is detected. Figure 4-51 shows access to the content being restricted. Depending on the action options selected, this would block access to the document to everyone except the primary site collection administrator, document owner, and the person who last modified the document or would just apply to blocking people from outside the organization. This action would also block a message that contained the sensitive information, either in the message body, or as an attachment, from being sent.
)
FIGURE 4-51 DLP actions
User notifications, shown in Figure 4-52, determine what happens when a rule is triggered. You can choose to have no notification occur, to send a notification to the user who sent, shared, or modified the content, or to send a notification to a specific person, such as a compliance officer. You can customize the notification. If the rule applies to content generated in Word, Excel, PowerPoint, Outlook, OWA, SharePoint Online or OneDrive for Business, a policy tip text may be configured that will inform the person interacting with the content that the content includes sensitive information.
)
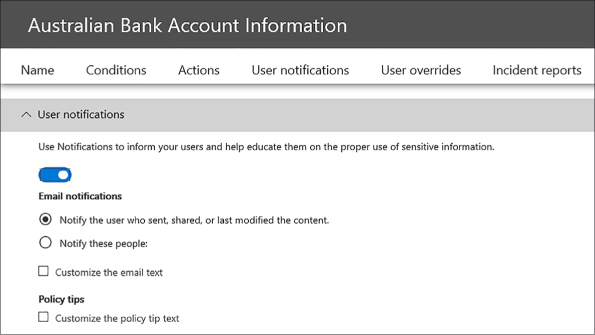
FIGURE 4-52 DLP notification
You can also configure the rule to allow users to override the restriction. You can allow them to provide a business justification to override the rule, or to submit a false positive report as a method of overriding the restriction. User override options are shown in Figure 4-53.
)
FIGURE 4-53 User override
Incident reports allow you to have a report generated and to be sent when the rule is triggered. For email message, the report includes the original message that triggered the rule. You can configure the following items for the report, as shown in Figure 4-54.
)
FIGURE 4-54 User override
The Name Of The Person Who Last Modified The Content
The Types Of Sensitive Content That Matched The Rule
The Rule’s Severity Level
The Content That Matched The Rule, Including The Surrounding Text
The Item Containing The Content That Matched The Rule
Rules are assigned a priority based on the order in which the rule is created. You can’t change the priority of a rule, other than by deleting and re-creating the rule. If content matches multiple rules, the rules are processed in priority order, and the most restrictive action is applied.
 EXAM TIP
Remember the Windows PowerShell cmdlets used to configure and manage litigation hold.