Plan for Exchange Online and Skype for Business Online
- By Orin Thomas
- 4/6/2018
Skill 4.2: Recommend a mailbox migration strategy
This skill deals with migrating mailboxes from an on-premises messaging solution, which in most cases will be Microsoft Exchange, to Exchange Online. To master this skill, you’ll need to understand the different migration options and the conditions why you would choose one migration method over another.
Remote move migration method
You use a remote move migration when you have an Exchange hybrid deployment. A hybrid deployment is where you have coexistence between an on-premises Exchange deployment and an Exchange Online deployment. You have to use a hybrid deployment and use the remote move migration method when you need to migrate more than 2,000 Exchange Server 2010, Exchange Server 2013, or Exchange Server 2016 mailboxes to Exchange Online.
With a hybrid deployment, you get the following advantages:
User accounts are managed through your on-premises tools.
Directory synchronization connects your on-premises Exchange organization with Exchange Online.
Users are able to use single-sign on to access their mailbox whether the mailbox is hosted in the on-premises Exchange organization or Exchange Online.
Email is routed securely between the on-premises Exchange deployment and Exchange Online.
Free/busy calendar sharing between users with mailboxes hosted in the on-premises Exchange organization and mailboxes hosted in Exchange Online.
Prior to performing a remote move migration you need to ensure the following prerequisites are met:
A hybrid deployment has already been configured between your on-premises Exchange organization and Exchange Online.
You need to have been assigned the appropriate permissions. For mailbox moves in a hybrid deployment, this means that you need to have an account that is a member of the Organization Management, or the Recipient Management role groups.
You need to have deployed the Mailbox Replication Proxy Service (MRSProxy) on all on-premises Exchange 2013 or Exchange 2016 Client Access servers.
Once these prerequisites have been met, you can move mailboxes from your on-premises Exchange deployment to Exchange Online by performing the following steps:
Create migration endpoint Migration endpoints host connection settings for an on-premises Exchange server running the MRS proxy service.
Enable MRSProxy service The MRSProxy service is hosted on on-premises Client Access servers. This service can be enabled using Exchange Administration Console by selecting the Client Access server, editing the properties of the EWS virtual directory, and ensuring that the MRS Proxy enabled check box is selected.
Move mailboxes You can move mailboxes using the Office 365 tab in EAC on the on-premises Exchange server by creating a new migration batch in Exchange Admin Console, or by using Windows PowerShell. When moving mailboxes, you move some, not all mailboxes, at a time in groups, which are termed batches.
Remove completed migration batches Once migration of a batch is complete, remove the migration batch using Exchange Administration Center, or Windows PowerShell.
Re-enable offline access for Outlook Web App If users have been migrated from on-premises Exchange Server to Office 365, it is necessary to reset the offline access setting in their browser.
Staged migration method
In a staged migration, you migrate mailboxes from your on-premises Exchange organization to Office 365 in groups, termed batches. You would select a staged migration in the following circumstances:
Your organization has more than 2,000 on-premises mailboxes hosted in Exchange 2007.
Your organization intends to completely move its messaging infrastructure to Office 365.
Your available migration period is in the timeframe of several weeks to several months.
After migration completes, you still manage user accounts using on-premises management tools and have account synchronization performed with Azure Active Directory.
The primary domain name used for your on-premises Exchange organization must be configured as a domain associated with the tenancy in Office 365.
Staged migration involves the following general steps:
You create a CSV file that includes a row for every user who has an on-premises mailbox that you want to migrate. This is not every user in the organization, just those who you will migrate in a particular batch.
Create a staged migration batch using Exchange Admin Center, or using Windows PowerShell.
Trigger the migration batch. Once the migration batch is triggered, Exchange Online performs the following steps:
Verify that directory synchronization is enabled and functioning. Directory synchronization migrates distribution groups, contacts, and mail enabled users.
Verifies that a mail-enabled user exists in Office 365 for every user listed in the batch CSV file.
Converts the Office 365 mail-enabled user to an Exchange Online mailbox for each user in the migration batch.
Configures mail forwarding for the on-premises mailbox.
Once these steps have been completed, Exchange Online sends you a status report informing you of which mailboxes have migrated successfully and which mailboxes have not migrated successfully. Successfully migrated users can start using Exchange Online mailboxes.
Once migration is successful, you convert the mailboxes of successfully migrated on-premises users to mail-enabled users in the on-premises Exchange deployment.
You configure a new batch of users to migrate and delete the current migration batch.
Once all users have been migrated, the administrator assigns licenses to Office 365 users, configures MX records to point to Exchange online, and creates an Autodiscover record that points to Office 365.
Decommission the on-premises Exchange deployment.
Cutover migration method
In a cutover migration, all mailboxes in an on-premises Exchange deployment are migrated to Office 365 in a single migration batch. Cutover migrations migrate global mail contacts as well as distribution groups. Cutover migrations are suitable when:
You intend all mailboxes to be hosted in Office 365 when the migration completes.
You intend to manage user accounts using Office 365 tools.
You want to perform the migration period in less than a week.
Your organization has less than 2,000 mailboxes.
Your on-premises messaging solution is Exchange Server 2007 or later. Exchange Server 2003 reached the end of extended support in April 2014 and Exchange Server 2007 on April 11, 2017.
The primary domain name used for your on-premises Exchange organization must be configured as domain associated with the tenancy in Office 365.
You can perform a cutover migration using the Exchange Admin Center or by using Windows PowerShell.
The cutover migration method involves the following general steps:
An administrator creates empty mail-enabled security groups in Office 365.
An administrator connects Office 365 to the on-premises Exchange deployment. This is also termed creating a migration endpoint.
An administrator creates and starts a cutover migration batch using Exchange Admin Center or Windows PowerShell.
Once the migration batch is triggered, Exchange Online performs the following steps:
The address book of the on-premises Exchange deployment is queried to identify mailboxes, distribution groups, and contacts.
New Exchange Online mailboxes are provisioned.
Distribution groups and contacts are created within Exchange Online.
Mailbox data, including email messages, contacts, and calendar items, are migrated from each on-premises mailbox to the corresponding Exchange Online mailbox.
Exchange Online forwards the administrator a report providing statistics including the number of successful and failed migrations. The migration report includes automatically generated passwords for each new Exchange Online mailbox. Users are forced to change passwords the first time they sign in to Office 365.
Incremental synchronization occurs every 24 hours, updating Exchange Online with any new items created in the on-premises mailboxes.
Once migration issues have been resolved, the administrator changes the MX records to point to Exchange Online.
Once mail flow to Exchange Online has been successfully established, the administrator deletes the cutover migration batch. This terminates synchronization between the on-premises mailboxes and Office 365.
Administrator performs post migration tasks, including assigning Office 365 licenses, creating an Autodiscover DNS record, and decommissioning on-premises Exchange servers.
IMAP migration
IMAP migrations use the IMAP protocol to move the contents of on-premises user mailboxes to Exchange Online. IMAP migrations are suitable where the on-premises mail server is not running Exchange Server, but is instead running an alternate mail server solution.
IMAP migration is supported for the following on-premises messaging solutions:
Courier-IMAP
Cyrus
Dovecot
UW-IMAP
IMAP migrations involve the following general steps:
A tenant administrator creates Office 365 user accounts and assigns them Exchange Online user licenses. This provisions the user accounts with Exchange Online mailboxes.
The tenant administrator creates a CSV file. This CSV file includes a row for each on-premises user who will be migrated to Exchange Online using IMAP. This CSV file needs to include the passwords used by each on-premises IMAP mailbox user. It is recommended that you reset user passwords for on-premises IMAP mailbox users to simplify this process.
The administrator creates and then triggers an IMAP migration batch. This can be done using the Migration dashboard, as shown in Figure 4-34, or through Windows PowerShell.
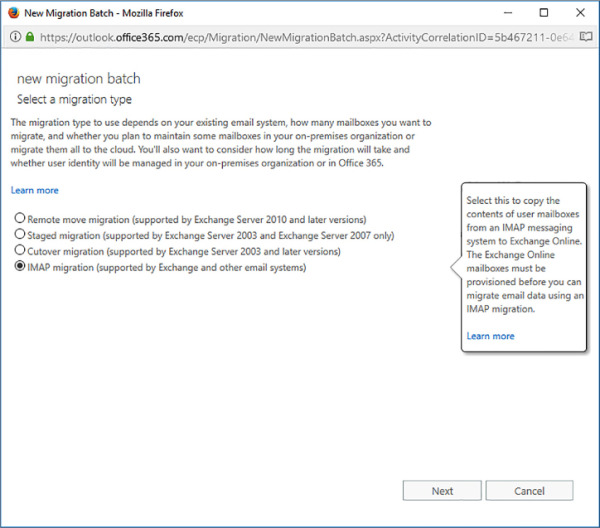
FIGURE 4-34 IMAP Migration
Once the migration batch is initiated, the following occurs:
Exchange Online creates a migration request for each user in the CSV file.
Each migration request includes the credentials for the user in the on-premises IMAP messaging system.
Messages from each user’s IMAP mailbox are copied to the corresponding Exchange Online mailbox until all data is migrated.
Exchange Online provides a status email to the administrator informing them of the status of the migration. This email contains statistics about the number of mailboxes successfully migrated, how many could not be migrated, and any error reports.
Exchange Online and the IMAP messaging system are synchronized every 24 hours to move any new messages from the on-premises environment to Exchange Online.
Once all migration issues have been resolved, the administrator updates MX records to point to Exchange Online. Once mail is flowing to Exchange Online, the administrator deletes the migration batches.
)
Import service
Network upload allows you to import PST files into Office 365. This can be done either by directly uploading the files or by shipping hard drives to Microsoft and having them import data directly.
To import PST files, perform the following steps:
In the Data governance section of the Security & Compliance center, use the Import section to create a Shared Access Signature (SAS) key, also known as the SAS URL. This key provides the necessary permission and location to upload PST files to an Azure storage location.
Download and install the Azure AzCopy tool. Use AzCopy with the SAS URL to upload one or more PST files to Azure.
Once uploaded, review the list of PST files that have been successfully transferred to Office 365. You can do this with Azure Storage Explorer.
Create a mapping file that maps uploaded PST files to Office 365 mailboxes. This file must be in CSV format.
Create a PST import job from the Data governance section of the Security & Compliance center. You specify the mapping file when creating this job.
Run the job to import the data into the appropriate Office 365 mailboxes.
Migration comparison
Table 4-2 lists the difference between the different methods you can use to migrate from an on-premises messaging environment to Exchange Online.
TABLE 4-2 Migration type comparison
| On-premises messaging environment | Number of mailboxes | Will user accounts be managed on-premises | Migration method |
| Exchange 2007 to Exchange 2016 | Less than 2,000 | No | Cutover migration |
| Exchange 2007 | Less than 2,000 | No | Staged migration |
| Exchange 2007 | More than 2,000 | Yes | Staged migration or remote move migration in hybrid deployment |
| Exchange 2010 or Exchange 2016 | More than 2,000 | Yes | Remote move migration in hybrid deployment |
| Non-Exchange on-premises messaging system | No maximum | Yes | IMAP migration |