How to Change the Appearance of a Workbook in Microsoft Excel 2016
- By Curtis Frye
- 10/16/2015
- Format cells
- Define styles
- Apply workbook themes and Excel table styles
- Make numbers easier to read
- Change the appearance of data based on its value
- Add images to worksheets
- Skills review
- Practice tasks
Apply workbook themes and Excel table styles
Microsoft Office 2016 includes powerful design tools that you can use to create attractive, professional documents quickly. The Excel product team implemented these capabilities by defining workbook themes and Excel table styles. A theme is a way to specify the fonts, colors, and graphic effects that appear in a workbook. Excel comes with many themes.
Change a workbook’s overall appearance by using an Office theme
When you start to format a workbook element, Excel displays a palette of colors with two sections: standard colors, which remain constant regardless of the workbook’s theme, and colors that are available within the active theme. If you format workbook elements by using colors specific to a theme, applying a different theme changes the colors of those elements.
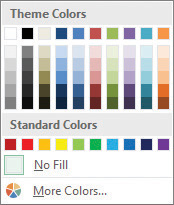
Select theme-specific or standard colors
You can change a theme’s colors, fonts, and graphic effects. If you like the combination you create, you can save your changes as a new theme that will appear at the top of the themes gallery.
TIP

When you save a theme, you save it as an Office theme file. You can also apply the theme to other Office 2016 documents.
Just as you can define and apply themes to entire workbooks, you can apply and define Excel table styles. After you give your style a descriptive name, you can set the appearance for each Excel table element, decide whether to make your new style the default for the current document, and save your work.
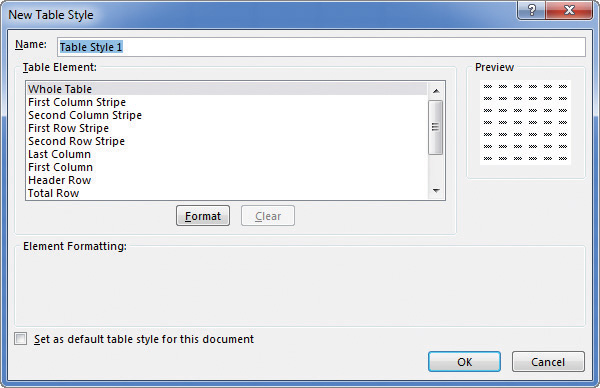
Define new Excel table styles in the New Table Style dialog box
TIP
To remove formatting from a table element, click the name of the table element and then click the Clear button.
To apply a table style
- Click any cell in the list of data you want to format as a table.
- On the Home tab, in the Styles group, click the Format as Table button, and then click the table style you want to apply.
In the Format As Table dialog box, verify that Excel has identified the data range correctly.
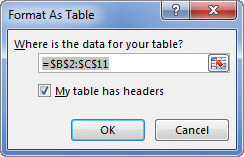
Verify that Excel has identified your table data correctly
- Select or clear the My table has headers check box to reflect whether or not your list of data has headers.
- Click OK.
To apply a table style and overwrite existing formatting
- Click any cell in the list of data you want to format as a table.
- Click the Format as Table button, and right-click the table style you want to apply.
- On the shortcut menu that appears, click Apply and Clear Formatting.
- Click OK.
To create a new table style
- Click the Format as Table button, and then click New Table Style.
- In the New Table Style dialog box, enter a name for the new style.
- Click the table element you want to format.
- Click the Format button, change the element by using the controls in the Format Cells dialog box, and then click OK.
- Click OK to close the New Table Style dialog box.
To modify an existing table style
Click the Format as Table button, right-click the table style you want to modify, and then click Modify.
Important

You can’t modify the built-in Excel table styles, just the ones you create.
- In the Modify Table Style dialog box, edit style elements you want to modify.
- Click OK.
To delete a table style
Click the Format as Table button, right-click the table style you want to delete, and then click Delete.
Important
You can’t delete the built-in Excel table styles, just the ones you create.
- In the message box that appears, click OK.
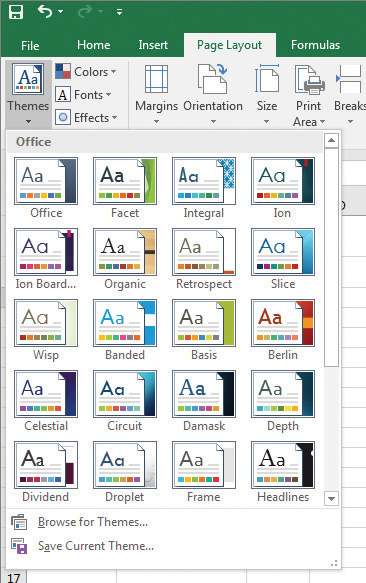
To apply an Office theme to a workbook
- On the Page Layout tab of the ribbon, in the Themes group, click the Themes button.
- Click the theme you want to apply.
To change the fonts, colors, and effects of an Office theme
- Click the Colors, Fonts, or Effects button.
- Click the set of colors, fonts, or effects you want to apply.
To create a new Office theme
- Use the controls in the Themes group to change the fonts, colors, or effects applied to the current theme.
- Click the Themes button, and then click Save Current Theme.
- Enter a name for your new theme.
- Click Save.
To delete a custom Office theme
- Click the Themes button, and then click Save Current Theme.
- In the Save Current Theme dialog box, right-click the theme you want to delete, and then click Delete.
- Click Cancel.