Implement and manage threat protection
- By Ed Fisher
- 10/1/2020
- Skill 2.1: Implement an enterprise hybrid threat protection solution
- Skill 2.2: Implement device threat protection
In this sample chapter from Exam Ref MS-500 Microsoft 365 Security Administration, the authors cover the five objectives about Microsoft Threat Protection. They address how to protect a hybrid organization, how to protect devices, how to protect applications, and how to protect the SaaS applications and data within Office 365.
This chapter is all about Microsoft Threat Protection and includes five objectives. They address how to protect a hybrid organization, how to protect devices, how to protect applications, and how to protect the SaaS applications and data within Office 365.
Skills in this chapter:
Skill 2.1: Implement an enterprise hybrid threat protection solution
Skill 2.2: Implement device threat protection
Skill 2.3: Implement and manage device and application protection
Skill 2.4: Implement and manage Office 365 ATP
Skill 2.5: Implement Azure Sentinel for Microsoft 365
Skill 2.1: Implement an enterprise hybrid threat protection solution
Enterprise hybrid threat protection is about addressing the challenges facing an organization with applications and identities that are served from both on-premises infrastructure and cloud solutions, such as Office 365. Identity is the new security boundary, and the goals of this objective are detecting when attempts are made to compromise identities, as well as ensuring authenticated users are not abusing their access.
Planning an Azure Advanced Threat Protection (ATP) solution
Azure ATP requires some pre-work in order to successfully deploy, including ensuring that your domain controllers meet the hardware requirements, have the necessary software prerequisites installed, and have the required connectivity to Azure ATP endpoints in the cloud.
Capacity planning
You need to download and run the Azure ATP Sizing tool, TriSizingTool.exe, from Microsoft and run it from a workstation or server that can connect to all domain controllers in your environment. Doing so will evaluate the CPU utilization, available RAM, and network I/O, and it will make recommendations where more hardware needs to be added to domain controllers that are to run the Azure ATP agent.
The minimum hardware recommendations include:
CPU. At least two cores.
RAM. At least 6GB.
Disk space. A minimum of 5GB free and at least 10GB free is recommended.
Those are really the bare minimums, and if your Active Directory has a larger number of objects, you should expect to need more. For the best performance, your domain controllers should have enough RAM to cache the entire NTDS.DIT in memory on top of the operating system requirements and any other software running on the domain controllers, so it is common for the Azure ATP Sizing tool to recommend more RAM.
If you cannot run the Azure ATP Sizing tool, there is a manual method you can use to estimate hardware needs, which is documented at https://docs.microsoft.com/en-us/azure-advanced-threat-protection/atp-capacity-planning#manual-sizing, but you really should use the tool to automate this process.
If the tool identifies domain controllers that require more resources than you have available to allocate, you can consider deploying Azure ATP using the Azure ATP Standalone deployment. With this approach, you deploy one or more additional servers that will run the Azure ATP Standalone agent and you mirror (span) the network switch port for your domain controllers to a monitor interface on the Azure ATP Standalone server. One Azure ATP Standalone server can monitor multiple domain controllers in this way, as long as network traffic from all the domain controllers does not exceed the capacity of the Standalone server, which is estimated at 100,000 packets per second. This out-of-band deployment makes it harder for an attacker to determine that they are being watched, but it comes with the additional costs of deploying more servers.
 EXAM TIP
Deploying the Azure ATP Standalone sensor has pros and cons. The pros include not needing to deploy additional software to domain controllers to upgrade their hardware and that the out-of-band deployment can make it harder for an adversary to detect. The cons include the additional cost, the need for a mirror port, and that you lose the ability to directly capture ETW events on the domain controller, which are necessary for certain detections, including LDAP-based reconnaissance. You can get around this by configuring event forwarding from domain controllers to the standalone sensor, but that does increase the complexity of your deployment.
Prerequisites
The Azure ATP agent can be installed on domain controllers, including RODCs, running the following operating systems:
Server 2008 R2 SP1 (not including Server Core)
Windows Server 2012
Windows Server 2012 R2
Windows Server 2016 (including Windows Server Core but not Windows Nano Server)
Windows Server 2019 (including Windows Core but not Windows Nano Server)
Server 2019 requires that KB4487044 be installed. In all cases, .Net Framework 4.7 will be installed if it is not already present and might require a reboot.
The Azure ATP standalone agent can be installed on servers running the following operating systems:
Windows Server 2012 R2
Windows Server 2016 (including Server Core) single standalone agent can be used to monitor multiple domain controllers, assuming that there is sufficient hardware, and the network switch supports mirroring traffic from multiple ports and can be used to monitor domains with a functional level of 2003 or later. The server running the standalone agent can be domain-joined or it can run in workgroup mode. If it is in workgroup mode, ensure that time synchronization is set up with the domain(s) to monitor.
It should have at least two network interface cards. One will be used for management, while the other will be connected to the span port, so it can monitor network traffic for the domain controller(s).
You also need to ensure that all domain controllers or standalone agents that you will deploy have Internet connectivity to the appropriate Azure endpoints. If you are using a proxy server or other web filtering solution, permit connectivity to the endpoints documented at https://docs.microsoft.com/en-us/azure-advanced-threat-protection/configure-proxy.
See Table 2-1 for an overview of the required endpoints.
Table 2-1 Azure ATP service endpoints
Service Location |
*.atp.azure.com DNS Record |
US |
triprd1wcusw1sensorapi.atp.azure.com |
Europe |
|
Asia |
Install and configure Azure ATP
Installing and configuring Azure ATP involves connecting to the portal, providing information for your set up, downloading the installation package, and deploying it to the servers.
The Azure ATP portal
When you sign in to the portal for the first time, you will create the instance of Azure ATP for your environment. You will be prompted for the username (NetBIOS format), password, and Active Directory domain name for the service account you will use; this account should be a user account with Read-Only access to your environment. Once you enter the information, you can download the sensor setup file. This zip file will install either the Azure ATP agent on a domain controller or the Azure ATP Standalone agent on a non-domain controller, and it contains the installer and a configuration file. You will also have to copy the Access key, which is used to establish the initial connection to your Azure ATP instance. Once installed, all authentication is through certificates.
Azure ATP supports RBAC through three built-in security groups. To access the Azure ATP console, a user must be a member of at least one of these groups. At the time of this writing, custom RBAC is not available. The built-in roles are listed in Table 2-2.
Table 2-2 Azure ATP roles and capabilities
Capability |
Azure ATP Administrators |
Azure ATP Users |
Azure ATP Viewers |
Log in to the portal |
Yes |
Yes |
Yes |
Modify security alert status |
Yes |
Yes |
No |
Export security alerts |
Yes |
Yes |
Yes |
Download reports |
Yes |
Yes |
Yes |
Modify monitoring alert status |
Yes |
No |
No |
Modify Azure ATP configuration |
Yes |
No |
No |
Modify data sources |
Yes |
No |
No |
Modify updates |
Yes |
No |
No |
Modify scheduled reports |
Yes |
Yes |
No |
Modify tags |
Yes |
Yes |
No |
Modify exclusions |
Yes |
Yes |
No |
Modify language |
Yes |
Yes |
No |
Modify notifications |
Yes |
Yes |
No |
Modify detections |
Yes |
Yes |
No |
View profiles and alerts |
Yes |
Yes |
Yes |
Membership in the Azure ATP RBAC groups is managed through the Groups Management blade in the Azure Active Directory portal, as shown in Figure 2-1.
)
FIGURE 2.1 Azure Groups showing the Azure ATP security groups
EXAM TIP
Any user who is a Global Administrator or a Security Administrator is automatically an Azure ATP Administrator.
Manage Azure ATP Workspace Health
The Azure ATP portal includes a section on Workspace Health, where issues such as connectivity, disconnected sensors, or service account authentication are reported. The Health icon shown in Figure 2-2 will indicate whether there is any detected problem by displaying a red dot over the icon.
)
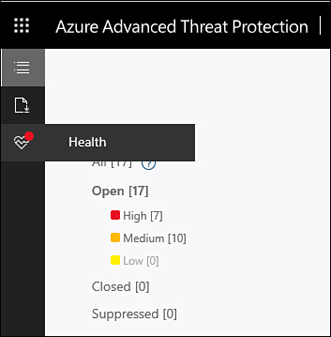
FIGURE 2.2 The Azure Advanced Threat Protection menu indicating a problem with Workspace Health
To access Workspace Health and view the issue, simply click the icon. Workspace Health will list the problem or problems detected and provide information on how to correct the issue. It’s important to check this to see if an agent is no longer reporting or if the account used by the service can no longer authenticate; you should remediate any problems immediately.
Generate Azure ATP reports
The Reports page in the Azure ATP portal lets you download four report types:
Summary. This is a summary of alerts and health issues.
Modifications To Sensitive Groups. Every modification to sensitive groups in Active Directory, including modifications that generated an alert.
Passwords Exposed In Cleartext. All LDAP authentications that exposed user passwords in cleartext.
Lateral Movements Paths To Sensitive Accounts. Sensitive accounts at risk of being compromised through lateral movement techniques.
By default, the report will show the last seven days’ data, but you can use the calendar selector to configure a custom date range. Reports are downloaded as Excel files. You can also schedule any of the reports on a Daily, Weekly, or Monthly basis and at a specific time, as shown in Figure 2-3.
)
FIGURE 2.3 Scheduling Azure ATP reports in the portal
Integrate Azure ATP with Microsoft Defender ATP
Azure ATP can integrate with Microsoft Defender ATP, integrating the UEBA capabilities on domain controllers with EDR capabilities on endpoints to enhance the protections provided by both. To enable this integration, you must do so in both the Azure ATP portal, and the Microsoft Defender ATP Security Center.
In the Azure ATP portal, under Configuration, simply switch the Integration With Windows Defender ATP slider to On and select Save, as shown in Figure 2-4.
)
FIGURE 2.4 Integrating Azure ATP with Microsoft Defender ATP (Windows Defender ATP)
Next, access Microsoft Defender ATP at https://securitycenter.windows.com, and under Settings > Advanced Features, enable Azure ATP Integration (see Figure 2-5) and click Save Preferences.
)
FIGURE 2.5 Integrating Microsoft Defender ATP with Azure ATP
Once enabled, if there is a detection in Azure ATP that involves an entity in Microsoft Defender ATP, an icon will appear in the profile for any detection in Azure ATP that will take you to the corresponding information in Microsoft Defender ATP.
Manage suspicious activities
Managing suspicious activities requires that you monitor Azure ATP and review alerts, either in the portal or in the summary emails. When you log in to the Azure ATP portal, you will automatically be taken to the Security Alerts Timeline if there are any Security Alerts. There, you will see alerts in chronological order, starting with the most recent. Alerts will include:
User, computers, and/or resources involved
The time of the activity
Severity
Status
You can hover your mouse pointer over the alert to surface the mini profile (integration with Microsoft Defender ATP is very valuable here), and you can share the security alert with others through email or download the alert. You can also click the alert to dive deeper into the timeline of the event.
Alerts are categorized as follows, which aligns with the phases in an attack-kill chain:
Reconnaissance
Compromised credentials
Lateral movement
Domain dominance
Data exfiltration
By default, preview detections are enabled so that you can see the newest insights. You can disable this in the Configuration blade, but it’s a good idea to keep these enabled so you are aware of things going on in the environment, even if they are not considered mainstream detections yet.
You can filter security alerts based on Status—All, Open, Closed, or Suppressed—and by Severity; your choices are High, Medium, and Low. You can choose Suppress Alerts or Exclude Entities From Raising Alerts if you need to reduce the noise from events that, in your specific case, are normal or allowed. For example, you might want to suppress alerts regarding a legacy application that must use LDAP authentication or suppress an administrator who runs a security scanning application against multiple machines. Also, you can delete events.