Azure Sentinel - An Introduction
- By Yuri Diogenes, Nicholas DiCola, Jonathan Trull
- 3/17/2020
- Architecture
- Adoption considerations
- Enabling Azure Sentinel
- Data ingestion
- Accessing ingested data
Enabling Azure Sentinel
Azure Sentinel is available in Azure Portal, and to enable it, you need a Log Analytics workspace. A Log Analytics workspace provides:
A geographic location for data storage.
Data isolation by granting different users access rights following the Log Analytics’ recommended design strategies for workspaces; these recommendations can be found at http://aka.ms/asbook/workspacedesign.
A scope for configuration of settings, such as pricing tier, retention, and data capping.
Although Azure Sentinel supports multiple workspaces for some scenarios, it is recommended that you use a centralized workspace because alert rules and investigations do not function across workspaces.
The following steps assume that you don’t have a workspace and that you will create one as part of the Azure Sentinel deployment:
Open Azure Portal and sign in with a user who has contributor privileges in the subscription in which the Azure Sentinel workspace resides.
Under All services, type Sentinel and click Azure Sentinel, as shown in Figure 2-2.
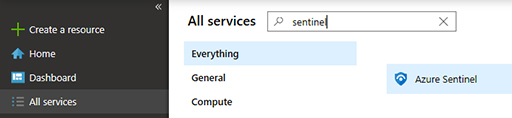
FIGURE 2-2 Accessing Azure Sentinel in Azure Portal
When Azure Sentinel launches for the first time, there is no workspace associated to it; the initial blade will look similar to Figure 2-3.
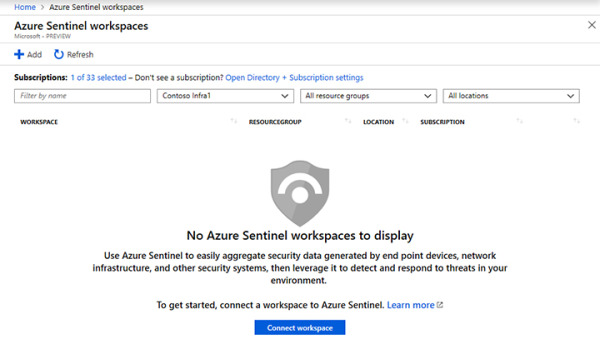
FIGURE 2-3 Azure Sentinel workspace selection page
At this point, you can either click the Add button or click the Connect Workspace button. Both options will lead you to the Choose a workspace to add to azure sentinel page, as shown in Figure 2-4.
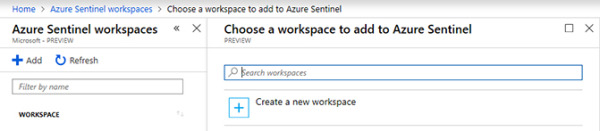
FIGURE 2-4 Adding a new workspace to Azure Sentinel
Click the Create a new workspace option; the Log analytics workspace page appears, as shown in Figure 2-5.
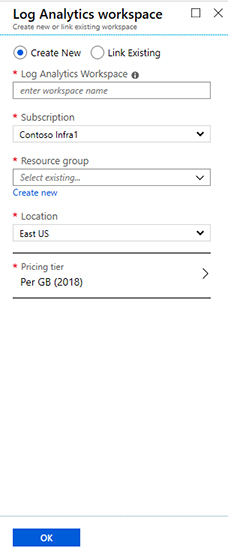
FIGURE 2-5 Creating a new workspace to be used by Azure Sentinel
In the Log Analytics Workspace field, type a name for the workspace.
In the Subscription field, select the subscription that you want to use.
From the Resource group drop-down menu, select the resource group you want to use.
From the Location drop-down menu, select the location where the workspace will reside.
For the Pricing tier, select Per GB.
After completing those fields, click the OK button.
On the Choose a workspace to add to Azure Sentinel page, select the workspace that you just created and click the Add Azure Sentinel button; the initial Azure Sentinel dashboard appears, as shown in Figure 2-6.
)
)
)
)
)
FIGURE 2-6 Initial Azure Sentinel page
Now that you have your workspace configured, you are ready to start ingesting data from different sources. We’ll cover that in the next section.