Implement data access
- By Rob Miles
- 10/11/2018
- Skill 4.1: Perform I/O operations
- Skill 4.2: Consume data
- Skill 4.3: Query and manipulate data and objects by using LINQ
- Skill 4.4: Serialize and deserialize data by using binary serialization, custom serialization, XML Serializer, JSON Serializer, and Data Contract Serializer
- Skill 4.5: Store data in and retrieve data from collections
- Thought experiments
- Thought experiment answers
- Chapter summary
Skill 4.2: Consume data
In the previous section we saw how to create files and store data in them. In this section you are going to look at data storage techniques that build on a file store to underpin working applications. Initially you will look at how a database engine can expose information to applications. Then you’re going to take a look at how to use XML and JSON to impose structure on a file of stored data. Finally, you are going to investigate web services, which allow a program to expose data to other programs over a network in a portable manner.
Retrieve data from a database
In Skill 3.2, in the “Use the Entity Framework to design your data storage” section you saw how to use a class-based design to express the data storage needs of an application to store information about music tracks. We designed a class called MusicTrack and then used the Entity Framework toolchain in Visual Studio to automatically create the underlying database.
Before you read any further you might like to revisit that section to remind yourself of what we were trying to do, and how we did it. If you want to use the database samples in this section you can perform the steps in Skill 3.2 to create your own local database file.
A single SQL database server can provide data storage to be shared between a large number of clients. The server can run on the same machine as the program that is using the database or the server can be accessed via a network connection. Developers can work with development version of the database server running on their machine, before creating a dedicated server for the published application. The MusicTracks application that we worked with in Skill 3.2 used a local database running on a machine in development mode. Later in this section we will consider how to manage the environment of an ASP application to allow it to use a remote database server when it runs on a production server.
Data in a database
The code next shows the MusicTrack class that is used in the MusicTracks application. The class contains data members that store the Artist, Title, and Length of a music track. The class also contains an integer ID value, which will be used by the database to allow it to uniquely identify each music track that is stored.
public class MusicTrack
{
    public int ID { get; set; }
    public string Artist { get; set; }
    public string Title { get; set; }
    public int Length { get; set; }
}
The Entity Framework toolchain uses the class definition to produce a table in a database that has the required data storage. Table 4.1 shows the database table that was created for the MusicTrack class. Each row in the table equates to an instance of the MusicTrack class. The table contains three songs. Each song has a different ID value. The database has been configured to automatically create ID values when a new MusicTrack entry is created.
TABLE 4-1 MusicTrack table
ID |
Artist |
Title |
Length |
1 |
Rob Miles |
My Way |
150 |
2 |
Fred Bloggs |
His Way |
150 |
3 |
The Bloggs Singers |
Their Way |
200 |
From a data design point of view a table in a database can be considered as a collection of objects. In other words, the table in Table 4-1 can be thought of as a list of references to MusicTrack objects in a C# program. Creating a program to read the data in a database table, however, is the same as accessing an element in a C# list. A program has to make a connection with the database and then send the database a command to request the MusicTrack information.
Read with SQL
The database in the MusicTracks application is managed by a server process that accepts commands and acts on them. The commands are given in a format called Structured Query Language (SQL). SQL dates back to the 1970’s. It is called a domain specific language because it is used solely for expressing commands to tell a database what to do.
SQL is very useful. For example, one day the user of your music track program might ask you to make the program produce a list of all the tracks by a particular artist. This would be easy to do if all the music tracks are held in a list. You can write a for loop that works through the list looking for tracks with a particular name. Then, the next day the user might ask for a list of tracks ordered by track length, and on the next day you might get asked for all the artists who have recorded a track called “My Way” that is longer than 120 seconds. Each time you are asked for a new view of the data you have to write some more C# to search through the list of tracks and produce the result. However, if the music track information is held in a database, each of these requests can be satisfied by creating an SQL query to obtain the data.
The first SQL query that we are going to perform on the MusicTracks database has the form shown next. The * character is a “wildcard” that matches all of the entries in the table. This command tells the database server that our program wants to read all of the elements in the MusicTrack table.
SELECT * FROM MusicTrack
Now that we have our SQL command, let’s discover how to present the command to the database. A program uses an SQL database in a similar way to a stream. The program creates an object that represents a connection to the database and then sends SQL commands to this object. The database connection mechanism is also organized in the same way as the input/output stream classes. The DbConnection class that represents a connection to a database is an abstract class that describes the behaviors of the connection in the same way that the Stream class is also abstract and describes the behaviors of streams. The SqlConnection class is a child of the DbConnection class and represents the implementation of a connection to an SQL database.
To make a connection to a database a program must create a SqlConnection object. The constructor for the SqlConnection class is given a connection string that identifies the database that is to be opened. Before we can begin to read from the database we need to consider how the connection string is used to manage the connection.
The connection string contains a number of items expressed as name-value pairs. For a server on a remote machine the connection string will contain the address of the server, the port on which the server is listening and a username/password pair that can authenticate the connection.
In the case of the MusicTracks application that we created earlier, this connection string was created automatically and describes a connection to a local database file held on the computer in the folder for the user. If you followed the steps in Chapter 3 to build your own application, the database file will be created on your machine.
The program in Listing 4-19 shows how a C# program can make a connection to a database, create an SQL query, and then execute this query on the database to read and print out information from the MusicTrack table. The program prints the Artist and Title of each music track in the database.
LISTING 4-19 Read with SQL
using System;
using System.Data.SqlClient;

namespace LISTING_4_19_Read_with_SQL
{
    class Program
    {
        static void Main(string[] args)
        {
            string connectionString = "Server=(localdb)\\mssqllocaldb;" +
                "Database=MusicTracksContext-e0f0cd0d-38fe-44a4-add2-359310ff8b5d;" +
                "Trusted_Connection=True;MultipleActiveResultSets=true";

            using (SqlConnection connection = new SqlConnection(connectionString))
            {
                connection.Open();
                SqlCommand command = new SqlCommand("SELECT * FROM MusicTrack",
                connection);

                SqlDataReader reader = command.ExecuteReader();

                while (reader.Read())
                {
                    string artist = reader["Artist"].ToString();
                    string title = reader["Title"].ToString();

                    Console.WriteLine("Artist: {0} Title: {1}", artist, title);
                }
            }
            Console.ReadKey();
        }
    }
}
The connection string in the program makes a connection to the MusicTracks database. Note that is important that the connection string is not “hard wired” into program source code. The program in Listing 4-19 is just an example, not how you should create production code. Anyone obtaining the source code of this program can view the connection string and get access to the database and anyone obtaining the compiled version of the program can use a tool such as ildasm to view the MSIL code and extract the connection. You would also have to change the code of the program each time you want to use a different database.
Connection string management in ASP.NET
The database connection string to be used by an ASP.NET application is held in the configuration information for the solution. This is stored in the file appsettings.json in the solution. The location of this file is shown in Figure 4-7, which shows the solution files for the MusicTracks application.
)
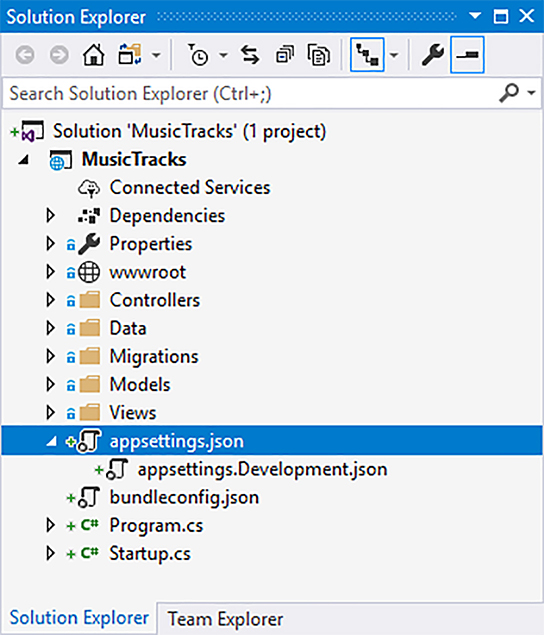
FIGURE 4-7 The appsetting.json file
The solution in Figure 4-7 has a setting file appsettings.Development.json that contains custom settings for use during development. If you add an appsettings.Production.json file to the solution, you can create settings information that will be used when the program is running on a production server. The appsettings.json file for the MusicTracks application on my machinecontains the following:
{
  "Logging": {
    "IncludeScopes": false,
    "LogLevel": {
      "Default": "Warning"
    }
  },
  "ConnectionStrings": {
    "MusicTracksContext": "Server=(localdb)\\mssqllocaldb;Database=MusicTracksContext-e0f0cd0d-38fe-44a4-add2-359310ff8b5d;Trusted_Connection=True;MultipleActiveResultSets=true"
  }
}
The ConnectionStrings element in the settings file contains the connection string for the MusicTracks database context. The database name that is created when the solution is created has a globally unique identifier (GUID) appended, so the name of the database on your machine will be different from mine. If you want to run the database samples that follow in this text you will have to copy your connection string into the example programs.
The setting information in a solution can contain the descriptions of environments that are to be used for development and production deployments of an application. The environments used for application deployment set out the database connection string and any other options that you would like to customize. For example, the development environment can use a local database server and the production environment can use a distant server.
The setting information to be used is when a server is started and determined by an environment variable on the computer that is tested when the program starts running. The word environment is being used in two different contexts in this situation, which can be confusing.
An ASP application environment determines the settings for logging, tracing, and debugging, and the database connection string that will be in force when the ASP application runs on a machine. A developer can also create their own settings values that can be used to give then more control over a particular environment.
An environment variable is a value that is maintained by the operating system and can be used by processes running on the machine. Environment variables managed by Windows 10 include the name of the computer and the file paths to be used to search for programs. The system environment variable ASPNETCORE_ENVIRONMENT can be set to values that will determine which environment an ASP application will select when it starts running. You can manage the setting of this variable in Visual Studio, in the Debug tab of the Properties page for an ASP application, as shown in Figure 4-8.
)
FIGURE 4-8 Setting the ASPNETCORE_ENVIRONMENT variable
In older ASP.NET applications the SQL settings are held in the web.config file, which is part of the solution. Developers then use XML transformations to override settings in the file to allow different SQL servers to be selected.
SQL query operation
A program can make a query of a database by creating an SqlCommand instance. The constructor for an SqlCommand is given a string, which is the SQL query and the database connection, as shown in the statement from Listing 4-19.
SqlCommand command = new SqlCommand("SELECT * FROM MusicTrack", connection);
The query is then executed as a reader command (because it is reading from the database). This operation returns an SqlReader instance as shown in the following statement.
SqlDataReader reader = command.ExecuteReader();
The SqlReader provides methods that can be used to move through the results returned by the query. Note that it is only possible to move forward through the results. The Read method moves the reader on to the next entry in the results. The Read method returns False when there are no more results. The individual items in the element can be accessed using their name, as shown here.
while (reader.Read())
{
    string artist = reader["Artist"].ToString();
    string title = reader["Title"].ToString();

    Console.WriteLine("Artist: {0} Title: {0}", artist, title);
}
The first SQL command selected all of the elements in a table. You can change this so that you can filter the contents of the table using a query. Listing 4-20 shows a query that selects only music tracks from the artist “Rob Miles.”
LISTING 4-20 Filter with SQL
SELECT * FROM MusicTrack WHERE Artist='Rob Miles'
Update data in a database
A program can use the SQL UPDATE command to update the contents of an entry in the database. The command below finds the track with the ID 1 and sets the artist for this track to ‘Robert Miles.’ You can use the ID to identify a specific element in a table because no two elements have the same ID. If the WHERE component of the command selected multiple entries in the database, they would all be updated.
UPDATE MusicTrack SET Artist='Robert Miles' WHERE ID='1'
When the update is performed it is possible to determine how many elements are updated. The program in Listing 4-21 shows how this is done.
LISTING 4-21 Update with SQL
using (SqlConnection connection = new SqlConnection(connectionString))
{
    connection.Open();
    dumpDatabase(connection);
    SqlCommand command = new SqlCommand(
       "UPDATE MusicTrack SET Artist='Robert Miles' WHERE ID='1'", connection);
    int result = command.ExecuteNonQuery();
    Console.WriteLine("Number of entries updated: {0}", result);
    dumpDatabase(connection);
}
SQL injection and database commands
Suppose you want to allow the user of your program to update the name of a particular track. Your program can read the information from the user and then construct an SQL command to perform the update. Listing 4-22 shows how this can be done:
LISTING 4-22 SQL injection
Console.Write("Enter the title of the track to update: ");
string searchTitle = Console.ReadLine();
Console.Write("Enter the new artist name: ");
string newArtist = Console.ReadLine();
string SqlCommandText =
    "UPDATE MusicTrack SET Artist='" + newArtist + "' WHERE Title='" + searchTitle + "'";
If you run the program in Listing 4-22, you will find that it does work. You can select a track by title and then change the artist for that track. However, this is very dangerous code. Consider the effect of a user running the program and then typing in the following information.
Enter the title of the track to update: My Way
Enter the new artist name: Fred'); DELETE FROM MusicTrack; --
The track title is fine, but the new artist name looks rather strange. What the user of the program has done is injected another SQL command after the UPDATE command. The command would set the new artist name to Fred and then perform an SQL DELETE command. The DELETE command does exactly what you would expect. It deletes the entire contents of the table.
This works because there is nothing to stop the user of the program from typing in the delimiter ‘ (single quote) to mark the end of a string and then adding new SQL statements after that. A malicious user can use SQL injection to take control of a database.
For this reason, you should never construct SQL commands directly from user input. You must use parameterized SQL statements instead. Listing 4-23 shows how they work. The SQL command contains markers that identify the points in the query where text is to be inserted. The program then adds the parameter values that correspond to the marker points. The SQL server now knows exactly where each element starts and ends, making SQL injection impossible.
LISTING 4-23 Parameterized query
string SqlCommandText = "UPDATE MusicTrack SET Artist=@artist WHERE Title=@searchTitle";

SqlCommand command = new SqlCommand(SqlCommandText, connection);
command.Parameters.AddWithValue("@artist", newArtist);
command.Parameters.AddWithValue("@searchTitle", searchTitle);
Asynchronous database access
The SQL commands that we have used have all used synchronous methods to evaluate queries and work through results. There are also asynchronous versions of the methods. A program can use the async/await mechanism with these versions of the methods so that database queries can run asynchronously. This is particularly important if your program is interacting with the user via a windowed interface.
The dumpDatabase method in Listing 4-24 uses asynchronous database commands to create a listing of the contents of the MusicTrack database. This method is part of a WPF (Windows Presentation Foundation) application that also allows database editing. Note that to use this example on your machine you will have to set the database connection string to make a connection to a database on your machine.
LISTING 4-24 Asynchronous access
async Task<string> dumpDatabase(SqlConnection connection)
{
    SqlCommand command = new SqlCommand(“SELECT * FROM MusicTrack”, connection);
    SqlDataReader reader = await command.ExecuteReaderAsync();
    StringBuilder databaseList = new StringBuilder();
    while (await reader.ReadAsync())
    {
        string id = reader[“ID”].ToString();
        string artist = reader[“Artist”].ToString();
        string title = reader[“Title”].ToString();

        string row = string.Format(“ID: {0} Artist: {1} Title: {2}”, id, artist, title);
        databaseList.AppendLine(row);
    }
    return databaseList.ToString();
}
Using SQL in ASP applications
If you examine the ASP MusicTracks application that we created at the start of Skill 3.2, you will not find any SQL commands in the code that implement the controller classes for this application. This is because database updates in an ASP application are performed using an Update method that accepts a modified instance of the class to be updated.
You can see this behavior in action by taking a look at the code in the Edit method in the MusicTrackController.cs source file, as shown next. The variable musicTrack contains the modified music track instance, as received from the web form. The variable _context contains the database context for this page. The code updates the database and catches any exceptions that may be thrown by this operation.
try
{
    _context.Update(musicTrack);     // update the database context with the edited track
    await _context.SaveChangesAsync(); // save all the changes
}
catch (DbUpdateConcurrencyException)
{
    // deal with exceptions
}
The ASP application uses embedded C# code in the web page (using a feature called Razor), which iterates through the database contents and presents a view of the data. The code shown next is part of the index.cshtml file for the MusicTracks application. Razor enables C# statements to be inserted into the HTML page description to programmatically generate some of the content. The C# elements on the page are preceded by an @ character. In the following code you can see how a foreach loop is used to iterate through the items in the database and call the DisplayFor method for each item.
@foreach (var item in Model) {
        <tr>
            <td>
                @Html.DisplayFor(modelItem => item.Artist)
            </td>
            <td>
                @Html.DisplayFor(modelItem => item.Title)
            </td>
            <td>
                @Html.DisplayFor(modelItem => item.Length)
            </td>
            <td>
                <a asp-action="Edit" asp-route-id="@item.ID">Edit</a> |
                <a asp-action="Details" asp-route-id="@item.ID">Details</a> |
                <a asp-action="Delete" asp-route-id="@item.ID">Delete</a>
            </td>
        </tr>
}
Figure 4-9 shows the web output generated by this code. Note that for each item that is displayed there are also links to the behaviors to edit, view the details, or delete the item. If you look at the earlier code you can see that the routing information for each link contains the ID of that item, which is how the server will know which item has been selected.
)
FIGURE 4-9 Track list in MusicTracks
Consume JSON and XML data
You have seen that it is very easy for a program to load the contents of a web page. In Listing 4-14 you found that the WebClient class can do this with a single method call. A lot of data resources are now provided to applications via a structured data documents that can be obtained in this way. There are two popular formats for such data, JavaScript Object Notation (JSON) and eXtensible Markup Language (XML). In this section you are going to see examples of each in use.
Consume JSON data
In Skill 3.1 in the “Using JSON” section, you saw that JSON (JavaScript Object Notation) is a means by which applications can exchange data. A JSON document is a plain text file that contains a structured collection of name and value pairs. You also discovered how to read and write JSON files using the Newtonsoft.Json library. Read that section again to refresh your memory about JSON before continuing with this section.
The program in Listing 4-25 consumes a JSON feed provided by the National Aeronautics and Space Administration (NASA). The feed is updated every day with a new picture or video from the NASA archives. The method getImageOfDay returns an object describing the image of the day for a particular address on the NASA site. It uses the Newtonsoft libraries described in Skill 3.1 to convert the text loaded from the NASA web page into an instance of the ImageOfDay class with all of the fields initialized.
LISTING 4-25 NASA JSON
public class ImageOfDay
{
    public string date { get; set; }
    public string explanation { get; set; }
    public string hdurl { get; set; }
    public string media_type { get; set; }
    public string service_version { get; set; }
    public string title { get; set; }
    public string url { get; set; }
}

async Task<ImageOfDay> GetImageOfDay(string imageURL)
{
    string NASAJson = await readWebpage(imageURL);

    ImageOfDay result = JsonConvert.DeserializeObject< ImageOfDay>(NASAJson);

    return result;
}
For this to work I had to create an ImageOfDay class that exactly matches the object described by the JSON feed from NASA. One way to do this is to use the website http://json2csharp.com. which will accept a web address that returns a JSON document and then automatically generates a C# class as described in the document.
The code that displays the image when the user clicks a button to perform the load is shown next. The method displayUrl asynchronously loads the image and displays it on the screen. The code also gets the descriptive text for the image and displays it in a text box.
private async void LoadButtonClicked(object sender, RoutedEventArgs e)
{
    try
    {
        ImageOfDay imageOfDay = await getImageOfDay(
                "https://api.nasa.gov/planetary/apod?api_key=DEMO_KEY&date=2018-05-29");

        if (imageOfDay.media_type != "image")
        {
            MessageBox.Show("It is not an image today");
            return;
        }

        DescriptionTextBlock.Text = imageOfDay.explanation;

        await displayUrl(imageOfDay.url);
    }
    catch (Exception ex)
    {
        MessageBox.Show("Fetch failed: {0}", ex.Message);
    }
}
The program works well, although at the moment it always shows the same image, which is specified in the address in the previous code. It would be easy to modify the program to display the image for a particular day. Note, that the program uses a demo API key to gain access to the NASA site. This can only be used for a few downloads an hour. If you want to use this service for your application you can apply for a free API key from NASA. Figure 4-10 shows the output from the program.
)
FIGURE 4-10 NASA image display
Consume XML data
In Skill 3.1 in the “JSON and XML” section we explored the difference between JSON and XML. The XML language is slightly more expressive than JSON, but XML documents are larger than equivalent JSON documents and this, along with the ease of use of JSON, has led to JSON replacing XML. However, a lot of information is still expressed using XML. In Skill 3.1 we saw an XML document that described a MusicTrack instance.
<?xml version="1.0" encoding="utf-16"?>
<MusicTrack xmlns:xsi="http://www.w3.org/2001/XMLSchema-instance" xmlns:xsd="http://www.w3.org/2001/XMLSchema">
  <Artist>Rob Miles</Artist>
  <Title>My Way</Title>
  <Length>150</Length>
</MusicTrack>
One way to consume such a document is to work through each element in turn. The System.XML namespace contains a set of classes for working with XML documents. One of these classes is the XMLTextReader class. An instance of the XMLTextReader class will work through a stream of text and decode each XML element in turn.
The program in Listing 4-26 shows how this is done. It creates a StringReader stream that is used to construct an XMLTextReader. The program then iterates through each of the XML elements that are read from the stream, printing out the element information.
LISTING 4-26 XML elements
string XMLDocument = "<?xml version=\"1.0\" encoding=\"utf-16\"?>" +
    "<MusicTrack xmlns:xsi=\"http://www.w3.org/2001/XMLSchema-instance\" " +
    "xmlns:xsd=\"http://www.w3.org/2001/XMLSchema\">  " +
    "<Artist>Rob Miles</Artist>  " +
    "<Title>My Way</Title>  " +
    "<Length>150</Length>" +
    "</MusicTrack>";

using (StringReader stringReader = new StringReader(XMLDocument))
{
    XmlTextReader reader = new XmlTextReader(stringReader);

    while (reader.Read())
    {
        string description = string.Format("Type:{0} Name:{1} Value:{2}",
            reader.NodeType.ToString(),
            reader.Name,
            reader.Value);
        Console.WriteLine(description);
    }
}
The output from this program gives each item in turn as shown next. Note that not all items have both names and values.
Type:XmlDeclaration Name:xml Value:version="1.0" encoding="utf-16"
Type:Element Name:MusicTrack Value:
Type:Whitespace Name: Value:
Type:Element Name:Artist Value:
Type:Text Name: Value:Rob Miles
Type:EndElement Name:Artist Value:
Type:Whitespace Name: Value:
Type:Element Name:Title Value:
Type:Text Name: Value:My Way
Type:EndElement Name:Title Value:
Type:Whitespace Name: Value:
Type:Element Name:Length Value:
Type:Text Name: Value:150
Type:EndElement Name:Length Value:
Type:EndElement Name:MusicTrack Value:
XML documents
It is possible to read information from an XML document by decoding each individual element, but this can be hard work to code. An easier approach is to use an XMLDocument instance. This creates a Document Object Model (DOM) in memory from which data can be extracted. Another advantage of a DOM is that a program can change elements in the DOM and then write out a modified copy of the document incorporating the changes.
The program in Listing 4-27 creates an XmlDocument instance from a string of XML describing a MusicTrack and then reads the artist and title information from it. The program checks to make sure that the document describes a MusicTrack before writing the information.
LISTING 4-27 XML DOM
XmlDocument doc = new XmlDocument();
doc.LoadXml(XMLDocument);

System.Xml.XmlElement rootElement = doc.DocumentElement;
// make sure it is the right element
if (rootElement.Name != "MusicTrack")
{
    Console.WriteLine("Not a music track");
}
else
{
    string artist = rootElement["Artist"].FirstChild.Value;
    Console.WriteLine("", artist);
    string title = rootElement["Title"].FirstChild.Value;
    Console.WriteLine("Artist:{0} Title:{1}", artist, title);
}
An XmlDocument contains a hierarchy of items with a rootElement object the top of the hierarchy. A program can access items in an element by using a string indexer that contains the name of the required item. In the next section we will discover how to use Language Integrated Queries (LINQ) to work with XML documents.
Retrieve data by using Windows Communication Foundation (WCF)
You have already seen how an application can consume data from a service by using an HTTP request to download a JSON or XML document. The NASA image reader in Listing 4-25 works by converting a response from a server into an instance of a class that contains a description of the image and the web address from which the image can be downloaded. To use the information provided by the NASA server, a client program contains a C# class that matches the JSON document that is received from the server.
A client of a web service also uses an instance of an object to interact with a server. However, in this case, the client can call methods on the object to read data and also update information on the server. The object that is created is called a “proxy object.” A call to a method on the proxy object will cause a request to be created that is sent to the service on the server.
When the server receives the request, it will then call the method code in a server object. The result to be returned by the method will then be packaged up into another network message, which is sent back to the client and then sends the return value back to the calling software. Don’t worry about how the messages are constructed and transferred. You just need to create server methods and calls from the client systems.
The service also exposes a description of the methods that it provides. This is used by the development tool (in our case Visual Studio) to actually create the proxy object in the client program. This means that you can easily create a client application.
Create a web service
To discover how all of this works let’s create a “Joke of the Day” service. This will return a string containing something suitably rib-tickling on request from the client. The user will be able to select the “strength” of the joke, ranging from 0 to 2 where 0 is mildly amusing and 2 is a guaranteed roll on the floor laughing experience.
The application will be made up of two parts, the server program that exports the service, and the client program that uses it. The server is created as a WCF (Windows Communication Foundation) Service application. The client will be an application that connects to the service and requests a joke.
The code next shows the single method that is provided by the service. This is part of the code in the server application. The GetJoke method accepts an integer and returns a string of text. The attributes [ServiceContract] and [OperationContract] denote that the interface and method are to be exposed as services.
using System.ServiceModel;

namespace JokeOfTheDay
{
    [ServiceContract]
    public interface IJokeOfTheDayService
    {
        [OperationContract]
        string GetJoke(int jokeStrength);
    }
}
Once you have the interface you now need a class that implements the method. This method will provide the service that the interface describes. As you can see from the code next, the method is quite simple, and so are the jokes. The input parameter is used to select one of three joke strings and return it. If there is no match to the input the string “Invalid strength” is returned.
public class JokeOfTheDayService : IJokeOfTheDayService
{
    public string GetJoke(int jokeStrength)
    {
        string result = "Invalid strength";
        switch (jokeStrength)
        {
            case 0:
                result =
"Knock Knock. Who's there? Oh, you've heard it";
                break;
            case 1:
                result =
"What's green and hairy and goes up and down? A gooseberry in a lift";
                break;
            case 2:
                result =
"A horse walks into a bar and the barman asks ‘Why the long face?";
                break;
        }
        return result;
    }
}
If you create a service you can use the WCF Test Client to invoke the methods and view the results. This tool allows you to call methods in the service and view the results that they return. Figure 4-11 shows the test client in use. You can see the results of a call to the method with a parameter of 1.
)
FIGURE 4-11 WCF Test Client
You can also view the service description in a browser as shown in Figure 4-12. This gives a link to the service description, as well some sample code that shows how to use it.
)
FIGURE 4-12 Service description in a browser
Joke of the Day Client
The client application can run on any machine that has a network connection and wants to consume the service. The client application needs to contain a connection to the JokeOfTheDayService. This is added to the client Visual Studio project as a reference like any other, by using the Solution Explorer pane in Visual Studio. Right-click on the References item and select Add Service Reference from the context menu, as shown in Figure 4-13.
)
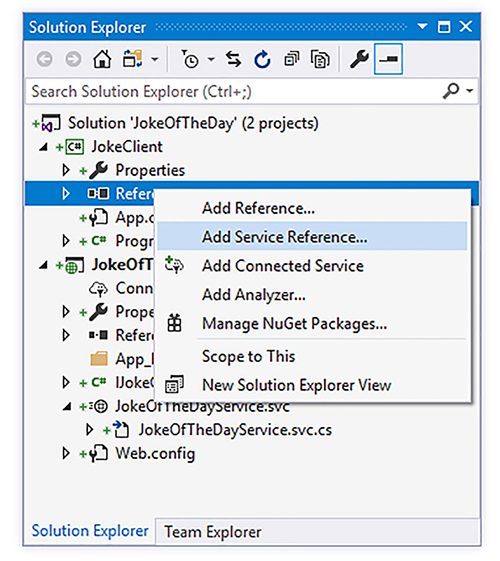
FIGURE 4-13 Adding a new service
At this point Visual Studio needs to find the description of the service that is to be used. The Add Service Reference dialog allows you to type in the network address of a service, and Visual Studio will then read the service description provided by the service. Figure 4-14 shows the dialog used to set up the client. You can see that the JokeOfTheDay service only provides one method. At the bottom of this dialog you can see the namespace that you want the service to have in the client application. Change this name to JokeOfTheDayService.
)
FIGURE 4-14 Adding a new service
Once the service has been added it now takes its place in the solution. Our application must now create a proxy object that will be used to invoke the methods in the service. The code next creates a service instance and calls the GetJoke method to get a joke from the service. Note that the example solution for Listing 4-28 contains two Visual Studio projects. One implements the server and the other the client.
LISTING 4-28 Web Service
using System;
using JokeClient.JokeService;

namespace JokeClient
{
    class Program
    {
        static void Main(string[] args)
        {
            using (JokeOfTheDayServiceClient jokeClient =
                   new JokeOfTheDayServiceClient())
            {
                Console.WriteLine(jokeClient.GetJoke(1));
            }

            Console.ReadKey();
        }
    }
}