Implement data access
- By Rob Miles
- 10/11/2018
- Skill 4.1: Perform I/O operations
- Skill 4.2: Consume data
- Skill 4.3: Query and manipulate data and objects by using LINQ
- Skill 4.4: Serialize and deserialize data by using binary serialization, custom serialization, XML Serializer, JSON Serializer, and Data Contract Serializer
- Skill 4.5: Store data in and retrieve data from collections
- Thought experiments
- Thought experiment answers
- Chapter summary
In this sample chapter from Exam Ref 70-483 Programming in C#, 2nd Edition, learn how C# programs store and manipulate data, review the use of Language Integrated Query (LINQ), and explore data collection facilities offered by the .NET framework.
A program can use variables to store values as it is running, but it needs a means of persisting data. We have already touched on data storage at several points in this book, in Skill 3.1 in the section “Choose the appropriate data collection type,” we considered how best to map information in our application onto the data types that C# offers. Later in the section “Using JSON,” we saw how data in objects can be serialized. And finally, in the “Use the Entity Framework to design your data storage” section we created classes that were automatically mapped into database tables for use in an application. Before you read this chapter, it is worth going over those topics so that they are fresh in your mind.
In this chapter we’re going to bring all of these different data storage and access abilities together and consider how a C# program can store and manipulate data; starting with the use and management of file storage before moving into databases, and then onto the use of Language Integrated Query (LINQ). Then we’ll take a look at serialization in detail and finally explore the data collection facilities offered by the .NET framework.
Skill 4.1: Perform I/O operations
In this section we will look at the fundamental input/output (I/O) operations that underpin data storage in applications. You will discover how files are managed by the operating system and the .NET Framework libraries that allow programs to store and load data. File access is a very slow activity when compared with the speed of modern processors, so we are also going to investigate the use of asynchronous i/o, which can be used to keep an application responsive even when it is reading or writing large amounts of data.
Read and write files and streams
A stream is a software object that represents a stream of data. The .NET framework provides a Stream class that serves as the parent type for a range of classes that can be used to read and write data. There are three ways that a program can interact with a stream:
Write a sequence of bytes to a stream
Read a sequence of bytes from a stream
Position the “file pointer” in a stream
The file pointer is the position in a stream where the next read or write operation will take place. A program can use the Seek method provided by the stream to set this position. For example, a program can search through a file stream connected to formatted records for one that has a particular name.
The Stream class is abstract and serves as a template for streams that connect to actual storage resources. It is a very good example of how C# classes can be used to deploy resources. Any object that can work with a Stream can work with any of the objects that behave like a stream. In Chapter 3 in Listing 3-24 we used a MemoryStream to capture the output of an encryption process into a byte array. It would be very easy to redirect the encrypted data produced in that program to a file or a network connection by using a different type of stream object. Figure 4-2 shows how the System.IO.Stream type is the base type for a large number of classes that provide different forms of stream connections.
)
FIGURE 4-1 Some of the Stream types
The child classes all contain the stream behaviors that allow data to be transferred, for example the Stream method Write can be used on any of them to write bytes to that stream. However, how each type of stream created is dependent on that stream type. For example, to create a FileStream a program must specify the path to the file and how the file is going to be used. To create a MemoryStream a program must specify the buffer in memory to be used.
Use FileStream
The FileStream object provides a stream instance connected to a file. The stream object instance converts calls into the stream into commands for the filesystem on the computer running the program. The file system provides the interface to the physical device performing the data storage for the computer. Figure 4-2 shows how this works. A call of the Write method in a stream object will generate a request to the file system to write the data to the storage device.
)
FIGURE 4-2 The Stream object
Listing 4-1 shows how a program can use a FileStream to create an output stream connected to a new or existing file. The program writes a block of byes to that stream. It then creates a new stream that is used to read the bytes from the file. The bytes to be written are obtained by encoding a text string.
LISTING 4-1 Using a FileStream
using System;
using System.IO;
using System.Text;

namespace LISTING_4_1_Using_a_FileStream
{
    class Program
    {
        static void Main(string[] args)
        {
            // Writing to a file
            FileStream outputStream = new FileStream("OutputText.txt", FileMode.
            OpenOrCreate, FileAccess.Write);
            string outputMessageString = "Hello world";
            byte[] outputMessageBytes = Encoding.UTF8.GetBytes(outputMessageString);
            outputStream.Write(outputMessageBytes, 0, outputMessageBytes.Length);
            outputStream.Close();

            FileStream inputStream = new FileStream("OutputText.txt", FileMode.Open,
            FileAccess.Read)
            long fileLength = inputStream.Length;
            byte[] readBytes = new byte[fileLength];
            inputStream.Read(readBytes, 0, (int)fileLength);
            string readString = Encoding.UTF8.GetString(readBytes);
            inputStream.Close();
            Console.WriteLine("Read message: {0}", readString);

            Console.ReadKey();
        }
    }
}
Control file use with FileMode and FileAccess
A stream can be associated with reading, writing, or updating a file. The base Stream class provides properties that a program can use to determine the abilities of a given stream instance (whether a program can read, write, or seek on this stream).
The FileMode enumeration is used in the constructor of a FileStream to indicate how the file is to be opened. The following modes are available:
FileMode.Append Open a file for appending to the end. If the file exists, move the seek position to the end of this file. If the file does not exist; create it. This mode can only be used if the file is being opened for writing.
FileMode.Create Create a file for writing. If the file already exists, it is overwritten. Note that this means the existing contents of the file are lost.
FileMode.CreateNew Create a file for writing. If the file already exists, an exception is thrown.
FileMode.Open Open an existing file. An exception is thrown if the file does not exist. This mode can be used for reading or writing.
FileMode.OpenOrCreate Open a file for reading or writing. If the file does not exist, an empty file is created. This mode can be used for reading or writing.
FileMode.Truncate Open a file for writing and remove any existing contents.
The FileAccess enumeration is used to indicate how the file is to be used. The following access types are available:
FileAccess.Read Open a file for reading.
FileAccess.ReadWrite Open a file for reading or writing.
FileAccess.Write Open a file for writing.
You can see these used in Listing 4-1. If a file stream is used in a manner that is incompatible with how it is opened, the action will fail with an exception.
Convert text to binary data with Unicode
A stream can only transfer arrays of bytes to and from the storage device, so the program in Listing 4-1 uses the Encoding class from the System.Text namespace. The UTF8 property of this class provides methods that will encode and decode Unicode text. We looked at Unicode in the section “String comparison and cultures,” in Skill 2.7.
Unicode is a mapping of character symbols to numeric values. The UTF8 encoding maps Unicode characters onto 8-bit values that can be stored in arrays of bytes. Most text files are encoded using UTF8. The Encoding class also provides support for other encoding standards including UTF32 (Unicode encoding to 32-bit values) and ASCII.
The GetBytes encoding method takes a C# string and returns the bytes that represent that string in the specified encoding. The GetString decoding method takes an array of bytes and returns the string that a buffer full of bytes represents.
IDispose and FileStream objects
The Stream class implements the IDisposable interface shown in Skill 2.4. This means that any objects derived from the Stream type must also implement the interface. This means that we can use the C# using construction to ensure that files are closed when they are no longer required. Listing 4-2 shows how this works.
LISTING 4-2 FileStream and IDisposable
using (FileStream outputStream = new FileStream(“OutputText.txt”, FileMode.OpenOrCreate,
FileAccess.Write))
{
    string outputMessageString = “Hello world”;
    byte[] outputMessageBytes = Encoding.UTF8.GetBytes(outputMessageString);
    outputStream.Write(outputMessageBytes, 0, outputMessageBytes.Length);
}
Work with text files
The filesystem makes no particular distinction between text files and binary files. We have already seen how we can use the Encoding class to convert Unicode text into an array of bytes that can be written into a binary file. However, the C# language provides stream classes that make it much easier to work with text. The TextWriter and TextReader classes are abstract classes that define a set of methods that can be used with text.
The StreamWriter class extends the TextWriter class to provide a class that we can us to write text into streams. Listing 4-3 shows how the StreamWriter and StreamReader classes can be used work with text files. It performs the same task as the program in Listing 4-1, but it is much more compact.
LISTING 4-3 StreamWriter and StreamReader
using (StreamWriter writeStream = new StreamWriter(“OutputText.txt”))
{
    writeStream.Write(“Hello world”);
}

using (StreamReader readStream = new StreamReader(“OutputText.txt”))
{
    string readSTring = readStream.ReadToEnd();
    Console.WriteLine(“Text read: {0}”, readSTring);
}
Chain streams together
The Stream class has a constructor that will accept another stream as a parameter, allowing the creation of chains of streams. Listing 4-4 shows how to use the GZipStream from the System.IO.Compression namespace in a chain of streams that will save and load compressed text.
LISTING 4-4 Storing compressed files
using (FileStream writeFile = new FileStream("CompText.zip", FileMode.OpenOrCreate,
 FileAccess.Write))
{
    using (GZipStream writeFileZip = new GZipStream(writeFile,
    CompressionMode.Compress))
    {
        using (StreamWriter writeFileText = new StreamWriter(writeFileZip))
        {
            writeFileText.Write("Hello world");
        }
    }
}

using (FileStream readFile = new FileStream("CompText.zip", FileMode.Open,
 FileAccess.Read))
{
    using (GZipStream readFileZip = new GZipStream(readFile,
    CompressionMode.Decompress))
    {
        using (StreamReader readFileText = new StreamReader(readFileZip))
        {
            string message = readFileText.ReadToEnd();
            Console.WriteLine("Read text: {0}", message);
        }
    }
}
Use the File class
The File class is a “helper” class that makes it easier to work with files. It contains a set of static methods that can be used to append text to a file, copy a file, create a file, delete a file, move a file, open a file, read a file, and manage file security. Listing 4-5 shows some of the features of the File class in action.
LISTING 4-5 The File class
File.WriteAllText(path: "TextFile.txt",   contents: "This text goes in the file");

File.AppendAllText(path: "TextFile.txt",   contents: " - This goes on the end");

if (File.Exists("TextFile.txt"))
    Console.WriteLine("Text File exists");

string contents = File.ReadAllText(path:"TextFile.txt");
Console.WriteLine("File contents: {0}", contents);

File.Copy(sourceFileName: "TextFile.txt",  destFileName: "CopyTextFile.txt");

using (TextReader reader = File.OpenText(path: "CopyTextFile.txt"))
{
    string text = reader.ReadToEnd();
    Console.WriteLine("Copied text: {0}", text);
}
Handle stream exceptions
Exceptions are situations where it is not meaningful for a given thread of execution to continue. The thread can raise an exception and pass control to a handler that will attempt to resolve the situation in a sensible way. You first saw exceptions in Skill 1.5, “Implement exception handling.” When creating applications that use streams you need to ensure that your code can deal with any exceptions that might be thrown by the stream. These can happen at any time during the use of a stream. Our application may try to open a file that does not exist, or a given storage device may become full during writing. It is also possible that threads in a multi-threaded application can “fight” over files. If one thread attempts to access a file already in use by another, this will lead to exceptions being thrown.
With this in mind you should ensure that production code that opens and interacts with streams is protected by try–catch constructions. There are a set of file exceptions that are used to indicate different error conditions. Listing 4-6 shows how a program can detect the FileNotFoundException and respond to that in a different way to other file exceptions.
LISTING 4-6 Stream exceptions
try
{
    string contents = File.ReadAllText(path: "Testfile.txt");
    Console.WriteLine(contents);
}
catch(FileNotFoundException notFoundEx)
{
    // File not found
    Console.WriteLine(notFoundEx.Message);
}
catch(Exception ex)
{
    // Any other exception
    Console.WriteLine(ex.Message);
}
Files storage
A given storage device, perhaps a disk drive or USB portable disk, can be divided into partitions. Each partition represents an area on the storage device that can be used to store data. A partition on a storage device is exposed as a drive which, on the Windows operating system, is represented by a drive letter. The drive letter is assigned by the operating system and is used as the root of an absolute path to a file on the computer.
The Disk Management application allows administrators to re-assign drive letters, combine multiple physical drives into a single logical drive, and attach virtual hard drives (VHD) created from drive images. Figure 4-3 below shows this program in use.
)
FIGURE 4-3 The Disk Management program
Each of the partitions on a physical storage device is formatted using a particular filing system that manages the storage of file. The program in Listing 4-7 shows how the DriveInfo class in the System.IO namespace can be used to obtain information about the drives attached to a system.
LISTING 4-7 Drive information
DriveInfo[] drives = DriveInfo.GetDrives();
foreach (DriveInfo drive in drives)
{
    Console.Write("Name:{0} ", drive.Name);
    if (drive.IsReady)
    {
        Console.Write("  Type:{0}", drive.DriveType);
        Console.Write("  Format:{0}", drive.DriveFormat);
        Console.Write("  Free space:{0}", drive.TotalFreeSpace);
    }
    else
    {
        Console.Write("  Drive not ready");
    }
    Console.WriteLine();
}
When I ran the program the following output was created:
Name:C:\   Type:Fixed  Format:NTFS  Free space:69709230080
Name:D:\   Type:Fixed  Format:NTFS  Free space:133386022912
Name:E:\   Drive not ready
Name:F:\   Type:Removable  Format:exFAT  Free space:41937928192
Name:G:\   Type:Fixed  Format:NTFS  Free space:44650496
Name:K:\   Drive not ready
Name:L:\   Drive not ready
Note that some of the drive letters have been allocated to removable devices. Drive F is a memory card from a camera. The drives that are shown as not ready do not presently have devices physically connected.
Use FileInfo
A file system maintains information about each file it stores. This includes the name of the file, permissions associated with the file, dates associated with the creation, modification of the file, and the physical location of the file on the storage device. The filesystem also maintains attribute information about each file. The attribute information is held as a single value with different bits in the value indicating different attributes. We can use logical operators to work with these values and assign different attributes to a file. The available attributes are as follows:
FileAttributes.Archive The file has not been backed up yet. The attribute will be cleared when/if the file is backed up.
FileAttributes.Compressed The file is compressed. This is not something that our program should change.
FileAttributes.Directory The file is a directory. This is not something our program should change.
FileAttributes.Hidden The file will not appear in an ordinary directory listing.
FileAttributes.Normal This is a normal file with no special attributes. This attribute is only valid when there are no other attributes assigned to the file.
FileAttributes.ReadOnly The file cannot be written.
FileAttributes.System The file is part of the operating system and is used by it.
FileAttributes.Temporary The file is a temporary file that will not be required when the application has finished. The file system will attempt to keep this file in memory to improve performance.
This information is exposed to C# programs by means of the FileInfo class. Listing 4-8 shows how a program can obtain the FileInfo information about a file and then work with the attribute information. The program creates a new file and then obtains the FileInfo object that represents the file. It uses the Attributes property of the FileInfo object to make the file readOnly and then removes the readOnly attribute.
LISTING 4-8 Using FileInfo
string filePath = "TextFile.txt";

File.WriteAllText(path: filePath, contents: "This text goes in the file");
FileInfo info = new FileInfo(filePath);
Console.WriteLine("Name: {0}", info.Name);
Console.WriteLine("Full Path: {0}", info.FullName);
Console.WriteLine("Last Access: {0}", info.LastAccessTime);
Console.WriteLine("Length: {0}", info.Length);
Console.WriteLine("Attributes: {0}", info.Attributes);
Console.WriteLine("Make the file read only");
info.Attributes |= FileAttributes.ReadOnly;
Console.WriteLine("Attributes: {0}", info.Attributes);
Console.WriteLine("Remove the read only attribute");
info.Attributes &= ~FileAttributes.ReadOnly;
Console.WriteLine("Attributes: {0}", info.Attributes);
You can use a FileInfo instance to open a file for reading and writing, moving a file, renaming a file, and also modifying the security settings on a file. Some of the functions provided by a FileInfo instance duplicate those provided by the File class. The File class is most useful when you want to perform an action on a single file. The FileInfo class is most useful when you want to work with a large number of files. In the next section you will discover how to get a collection of FileInfo items from a directory and work through them.
Use the Directory and DirectoryInfo classes
A file system can create files that contain collections of file information items. These are called directories or folders. Directories can contain directory information about directories, which allows a user to nest directories to create tree structures.
As with files, there are two ways to work with directories: the Directory class and the DirectoryInfo class. The Directory class is like the File class. It is a static class that provides methods that can enumerate the contents of directories and create and manipulate directories. Listing 4-9 shows how a program can use the Directory class to create a directory, prove that it exists, and then delete it. Note that if a program attempts to delete a directory that is not empty an exception will be thrown.
LISTING 4-9 The Directory class
Directory.CreateDirectory("TestDir");

if (Directory.Exists("TestDir"))
    Console.WriteLine("Directory created successfully");

Directory.Delete("TestDir");

Console.WriteLine("Directory deleted successfully");
An instance of the DirectoryInfo class describes the contents of one directory. The class also provides methods that can be used to create and manipulate directories. Listing 4-10 performs the same functions as Listing 4-9 using the DirectoryInfo class.
LISTING 4-10 The DirectoryInfo class
DirectoryInfo localDir = new DirectoryInfo("TestDir");

localDir.Create();

if(localDir.Exists)
    Console.WriteLine("Directory created successfully");

localDir.Delete();

Console.WriteLine("Directory deleted successfully");
Files and paths
A path defines the location of a file on a storage device. In all the example programs above we have simply given the path as a string of text. In this case the file or directory being created will be located in the same directory as the program that is running and will have the name given. If you want to store files in different places on the computer you need to create more complex paths.
Paths can be relative or absolute. A relative path specifies the location of a file relative to the folder in which the program is presently running. Up until now all the paths that we have specified have been relative to the current directory. When expressing paths, the character “.” (period) has a special significance. A single period “.” means the current directory. A double period “..” means the directory above the present one. You can use relative paths to specify a file in a parent directory, or a file in a directory in another part of the tree. Next you can see the path used to locate the image directory that is provided with the sample programs for this text. The @ character at the start of the string literal marks the string as a verbatim string. This means that any escape characters in the string will be ignored. This is useful because otherwise the backslash characters in the string might be interpreted as escape characters.
string imagePath = @"..\..\..\..\images");
The program is running in the debug directory. The path must “climb” up through four parent directories to find the images directory. The diagram in Figure 4-4 shows how the directories are structured.
)
FIGURE 4-4 Navigating a relative path
An absolute path includes the drive letter and identifies all the sub-directories in the path to the file. The statement here gives the path to the document test.txt in the Documents folder on a machine.
string absPath = @"c:\users\rob\Documents\test.txt"
The path to a file contains two elements: the directories in the path and the name of the file in the directory. The Path class provides a lot of very helpful methods that can be used to work with paths in programs. It provides methods to remove filenames from full paths, change the extension on a filename, and combine filenames and directory paths. Listing 4-11 shows some of the ways that Path can be used.
LISTING 4-11 Using Path
string fullName = @"c:\users\rob\Documents\test.txt";

string dirName = Path.GetDirectoryName(fullName);
string fileName = Path.GetFileName(fullName);
string fileExtension = Path.GetExtension(fullName);
string lisName = Path.ChangeExtension(fullName, ".lis");
string newTest = Path.Combine(dirName, "newtest.txt");

Console.WriteLine("Full name: {0}", fullName);
Console.WriteLine("File directory: {0}", dirName);
Console.WriteLine("File name: {0}", fileName);
Console.WriteLine("File extension: {0}", fileExtension);
Console.WriteLine("File with lis extension: {0}", lisName);
Console.WriteLine("New test: {0}", newTest);
When you run the program in Listing 4-11 it produces the following output:
Full name: c:\users\rob\Documents\test.txt
File directory: c:\users\rob\Documents
File name: test.txt
File extension: .txt
File with lis extension: c:\users\rob\Documents\test.lis
New test: c:\users\rob\Documents\newtest.txt
The Path class is very useful and should always be used in preference to manually working with the path strings. The Path class also provides methods that can generate temporary filenames.
Searching for files
The DirectoryInfo class provides a method called GetFiles that can be used to get a collection of FileInfo items that describe the files in a directory. One overload of GetFiles can accept a search string. Within the search string the character * can represent any number of characters and the character ? can represent a single character.
The program in Listing 4-12 uses this form of GetFiles to list all of the C# source files that are in the example programs. Note that this program also provides a good demonstration of the use of recursion, in that the FindFiles method calls itself to deal with any directories found inside a given directory.
LISTING 4-12 C sharp programs
static void FindFiles(DirectoryInfo dir, string searchPattern)
{
    foreach (DirectoryInfo directory in dir.GetDirectories())
    {
        FindFiles(directory, searchPattern);
    }

    FileInfo[] matchingFiles = dir.GetFiles(searchPattern);
    foreach(FileInfo fileInfo in matchingFiles)
    {
        Console.WriteLine(fileInfo.FullName);
    }
}
static void Main(string[] args)
{
    DirectoryInfo startDir = new DirectoryInfo(@"..\..\..\..");
    string searchString = "*.cs";

    FindFiles(startDir, searchString);

    Console.ReadKey();
}
The Directory class provides a method called EnumerateFiles that can also be used to enumerate files in this way.
Read and write from the network by using classes in the System.Net namespace
The .NET Framework provides a range of application programming interfaces that can interact with a TCP/IP (Transmission Control Protocol/Internet Protocol) network. C# programs can create network socket objects that can communicate over the network by sending unacknowledged datagrams using UDP (User Datagram Protocol) or creating managed connections using TCP (Transmission Control Protocol).
In this section we are going to focus on the classes in the System.Net namespace that allow a program to communicate with servers using the HTTP (HyperText Transport Protocol). This protocol operates on top of a TCP/IP connection. In other words, TCP/IP provides the connection between the server and client systems and HTTP defines the format of the messages that are exchanged over that connection.
An HTTP client, for example a web browser, creates a TCP connection to a server and makes a request for data by sending the HTTP GET command. The server will then respond with a page of information. After the response has been returned to the client the TCP connection is closed.
The information returned by the server is formatted using HTML (HyperText Markup Language) and rendered by the browser. In the case of an ASP (Active Server Pages) application (for example the one that we created at the beginning of Chapter 3) the HTML document may be produced dynamically by software, rather than being loaded from a file stored on the server.
HTTP was originally used for the sharing of human-readable web pages. However, now an HTTP request may return an XML or JSON formatted document that describes data in an application.
The REST (REpresentational State Transfer) architecture uses the GET, PUT, POST and DELETE operations of HTTP to allow a client to request a server to perform functions in a client-server application. The fundamental operation that is used to communicate with these and other servers is the sending of a “web request” to a server to perform an HTML command on the server, and now we are going to discover how to do this. Let’s look at three different ways to interact with web servers and consider their advantages and disadvantages. These are WebRequest, WebClient, and HttpClient.
WebRequest
The WebRequest class is an abstract base class that specifies the behaviors of a web request. It exposes a static factory method called Create, which is given a universal resource identifier (URI) string that specifies the resource that is to be used. The Create method inspects the URI it is given and returns a child of the WebRequest class that matches that resource. The Create method can create HttpWebRequest, FtpWebRequest, and FileWebRequest objects. In the case of a web site, the URI string will start with “http” or “https” and the Create method will return an HttpWebRequest instance.
The GetResponse method on an HttpWebRequest returns a WebResponse instance that describes the response from the server. Note that this response is not the web page itself, but an object that describes the response from the server. To actually read the text from the webpage a program must use the GetResponseStream method on the response to get a stream from which the webpage text can be read. Listing 4-13 shows how this works.
LISTING 4-13 httpWebRequest
WebRequest webRequest = WebRequest.Create("https://www.microsoft.com");
WebResponse webResponse = webRequest.GetResponse();

using (StreamReader responseReader = new StreamReader(webResponse.GetResponseStream()))
{
    string siteText = responseReader.ReadToEnd();
    Console.WriteLine(siteText);
}
Note that the use of using around the StreamReader ensures that the input stream is closed when the web page response has been read. It is important that either this stream or the WebResponse instance are explicitly closed after use, as otherwise the connection will not be reused and a program might run out of web connections.
Using WebRequest instances to read web pages works, but it is rather complicated. It does, however, have the advantage that a program can set a wide range of properties on the web and request to tailor it to particular server requirements. This flexibility is not available on some of the other methods we are going to consider.
The code in Listing 4-13 is synchronous, in that the program will wait for the web page response to be generated and the response to be read. It is possible to use the WebRequest in an asynchronous manner so that a program is not paused in this way. However, the programmer has to create event handlers to be called when actions are completed.
WebClient
The WebClient class provides a simpler and quicker way of reading the text from a web server. Listing 4-14 shows how this is achieved. There is now no need to create a stream to read the page contents (although you can do this if you wish) and there is no need to deal with the response to the web request before you can obtain the reply from the server. Listing 4-14 shows how this works.
LISTING 4-14 WebClient
WebClient client = new WebClient();
string siteText = client.DownloadString("http://www.microsoft.com");
Console.WriteLine(siteText);
The WebClient class also provides methods that can be used to read from the server asynchronously. Listing 4-15 is used in a Windows Presentation Foundation (WPF) application to read the contents of a web page for display in a window.
LISTING 4-15 WebClient async
async Task<string> readWebpage(string uri)
{
    WebClient client = new WebClient();
    return await client.DownloadStringTaskAsync(uri);
}
HttpClient
The HTTPClient is important because it is the way in which a Windows Universal Application can download the contents of a website. Unlike the WebRequest and the WebClient classes, an HTTPClient only provides asynchronous methods. It can be used in a very similar manner to the WebClient, as shown in Listing 4-16.
LISTING 4-16 HttpClient
async Task<string> readWebpage(string uri)
{
    HttpClient client = new HttpClient();
    return await client.GetStringAsync(uri);
}
Exception handling
As with file handling, loading information from the Internet is prone to error. Network connections may be broken or servers may be unavailable. This means that web request code should be enclosed in appropriate exception handlers. The code next is part of the program in Listing 4-16; it catches exceptions thrown by the asynchronous loading method and displays a MessageDialog containing error information.
try
{
    string webText = await readWebpage(PageUriTextBox.Text);
    ResultTextBlock.Text = webText;
}
catch (Exception ex)
{
    var dialog = new MessageDialog(ex.Message, "Request failed");
    await dialog.ShowAsync();
}
Implement asynchronous I/O operations
Up until now all the file input/output in our example programs has been synchronous. A program calling a method to perform a file operation must wait for the method to complete before it can move onto the next statement. A user of the program has to wait for the file action to complete before they can do anything else, which might lead to a very poor user experience.
In Chapter 1, in the Skill “Using async and await,” you saw that a program can use tasks to perform asynchronous background execution of methods. It is worth taking a look at that section to refresh your understanding of these elements before reading further.
The file operations provided by the File class do not have any asynchronous versions, so the FileStream class should be used instead. Listing 4-17 shows a function that writes an array of bytes to a specified file using asynchronous writing.
LISTING 4-17 Asynchronous file writing
async Task WriteBytesAsync(string filename, byte [] items)
{
    using (FileStream outStream = new FileStream(filename, FileMode.OpenOrCreate, FileAccess.Write))
    {
        await outStream.WriteAsync(items, 0, items.Length);
    }
}
The demonstration program is a Windows Presentation Foundation application that contains both synchronous and asynchronous file writing methods. Figure 4-5 shows the program display. The user can write a large number of values to a file either synchronously or asynchronously depending on which start button they select. They can also test the responsiveness of the application by selecting the Get Time button, which will display the current time. When the synchronous version of the writer is running, they should note that the user interface becomes unresponsive for a short while.
)
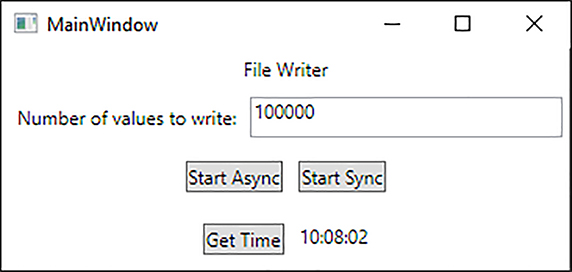
FIGURE 4-5 Async File Writer demo
Handling exceptions in asynchronous methods
If any exceptions are thrown by the asynchronous file write method they must be caught and a message displayed for the user. This will only happen if the WriteBytesAsync method returns a Task object that is awaited when the WriteBytesAsync method is called. Listing 4-18 shows a button event handler that does this correctly and catches exceptions that may be thrown by the file write action.
LISTING 4-18 File exceptions
private async void StartTaskButton_Click(object sender, RoutedEventArgs e)
{
    byte[] data = new byte[100];

    try
    {
        // note that the filename contains an invalid character await
           WriteBytesAsyncTask("demo:.dat", data);
    }
    catch (Exception writeException)
    {
        MessageBox.Show(writeException.Message, "File write failed");
    }
}
When you run the example program for Listing 4-18 the program displays a menu that lets you select between two write methods; one which returns a Task and the other of which is void. Both writes will throw an exception, but only the write that returns a Task will catch the exception correctly (see Figure 4-6) and display a message box. The other exception will not be handled correctly.
)

FIGURE 4-6 Catching file exceptions
The only asynchronous methods that should return void are the actual event handlers for the windows controls. Every other asynchronous method must return either a result or a Task, so that any exceptions thrown by the method can be dealt with correctly.