Design and implement Azure PaaS compute and web and mobile services
- By Michele Leroux Bustamante, Ike Ellis, Zoiner Tejada
- 4/7/2018
- Skill 4.1: Design Azure App Service Web Apps
- Skill 4.2: Design Azure App Service API Apps
- Skill 4.3: Develop Azure App Service Logic Apps
- Skill 4.4: Develop Azure App Service Mobile Apps
- Skill 4.5: Implement API Management
- Skill 4.6: Implement Azure Functions and WebJobs
- Skill 4.7: Design and Implement Azure Service Fabric apps
- Skill 4.8: Design and implement third-party Platform as a Service (PaaS)
- Skill 4.9: Design and implement DevOps
- Thought experiment
- Thought experiment answers
- Chapter summary
Skill 4.2: Design Azure App Service API Apps
Azure API Apps provide a quick and easy way to create and consume scalable RESTful APIs, using the language of your choice, in the cloud. As part of the Azure infrastructure, you can integrate API Apps with many Azure services such as API Management, Logic Apps, Functions, and many more. Securing your APIs can be done with a few clicks, whether you are using Azure Active Directory, OAuth, or social networks for single sign-on.
If you have existing APIs written in .NET, Node.js, Java, Python, or PHP, they can be brought into App Services as API Apps. When you need to consume these APIs, enable CORS support so you can access them from any client. Swagger support makes generating client code to use your API simple. Once you have your API App set up, and clients are consuming it, it is important to know how to monitor it to detect any issues early on.
Create and deploy API Apps
There are different ways you can create and deploy API Apps, depending on the language and development environment of choice. For instance, if you are using Visual Studio, you can create a new API Apps project and publish to a new API app, which provisions the service in Azure. If you are not using Visual Studio, you can provision a new API App service using the Azure portal, Azure CLI, or PowerShell.
Creating a new API App from the portal
To create a new API app in the portal, complete the following steps:
Navigate to the portal accessed via https://portal.azure.com.
Select New on the command bar.
Within the Marketplace (Figure 4-29) search text box, type API App, and press Enter.
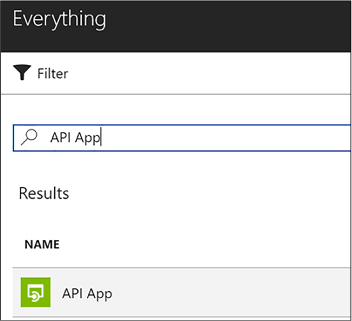
FIGURE 4-29 Marketplace search for API App
Select API App from the results.
On the API App blade, select Create.
On the Create API App blade, choose your Azure subscription, select a Resource Group, select or create an App Service Plan, select whether you want to enable Application Insights, and then click Create.
Creating and deploying a new API app with Visual Studio 2017
Visual Studio 2017 comes preconfigured with the ability to create an API app when you have installed the ASP.NET and web development, as well as Azure development workloads. Follow these steps to create a new API app with Visual Studio 2017:
Launch Visual Studio, and then select File > New > Project.
In the New Project dialog, select ASP.NET Web Application (.NET Framework) within the Cloud category (Figure 4-30). Provide a name and location for your new project, and then click OK.
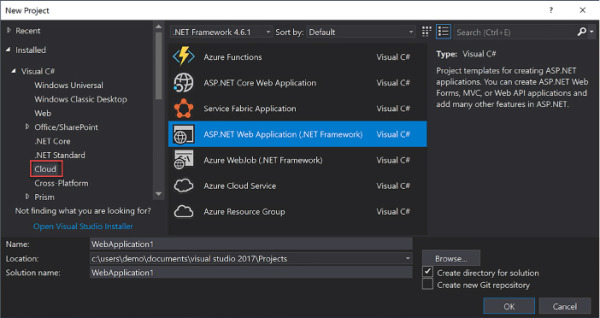
FIGURE 4-30 The ASP.NET Web Application Cloud project type
Select the Azure API App template (Figure 4-31), and then click OK.
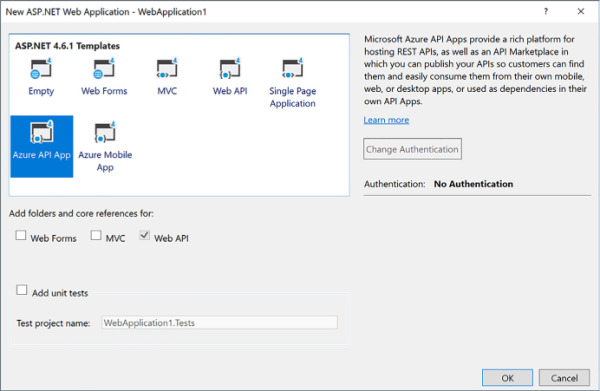
FIGURE 4-31 The Azure API App template
)
)
Visual Studio creates a new API App project within the specified directory, adding useful NuGet packages, such as:
Newtonsoft.Json for deserializing requests and serializing responses to and from your API app.
Swashbuckle to add Swagger for rich discovery and documentation for your API REST endpoints.
In addition, Web API and Swagger configuration classes are created in the project’s startup folder. All you need to do from this point, to deploy your API app is to complete your Controller actions, and publish from Visual Studio.
Follow these steps to deploy your API app from Visual Studio:
Right-click your project in the Visual Studio Solution Explorer (Figure 4-32), then click Publish.
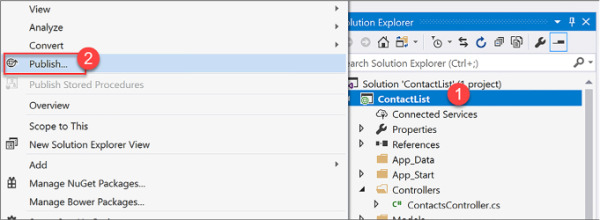
FIGURE 4-32 Publish solution context menu
In the Publish dialog (Figure 4-33), select the Create New option underneath Microsoft Azure App Service, and then click Publish. This creates a new API app in Azure and publishes your solution to it. You could alternately select the Select Existing option to publish to an existing API App service.
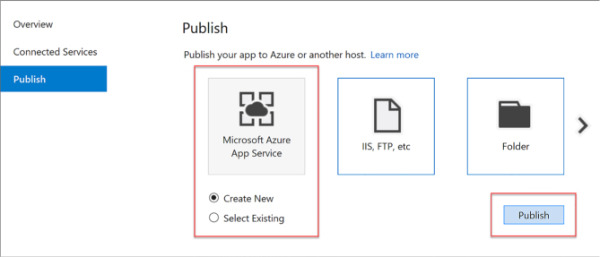
FIGURE 4-33 The Publish dialog
In the Create App Service dialog (Figure 4-34), provide a unique App name, select your Azure subscription and resource group, select or create an App Service Plan, and then click Create.
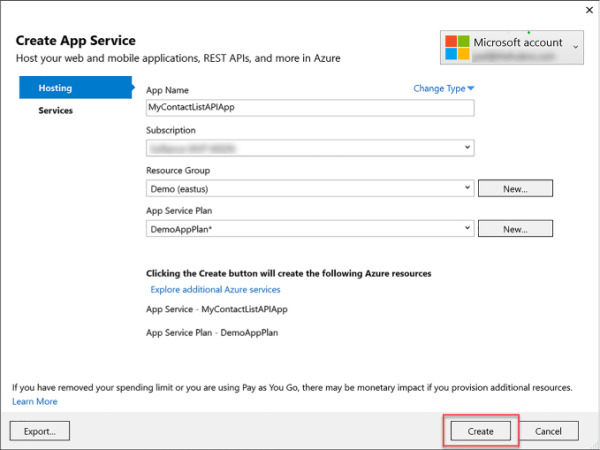
FIGURE 4-34 Create App Service dialog
When your API app is finished publishing, it will open in a new web browser. When the page is displayed, navigate to the /swagger path to view your generated API details, and to try out the REST methods. For example http://<YOUR-API-APP>.azurewebsites.net/swagger/ (Figure 4-35).
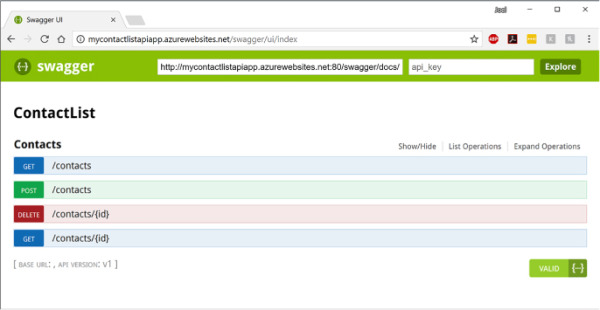
FIGURE 4-35 The Swagger interface for the published API App
)
)
)
)
Automate API discovery by using Swashbuckle
Swagger is a popular, open source framework backed by a large ecosystem of tools that helps you design, build, document, and consume your RESTful APIs. The previous section included a screenshot of the Swagger page generated for an API App. This was generated by the Swashbuckle NuGet package.
The core component of Swagger is the Swagger Specification, which is the API description metadata in the form of a JSON or YAML file. The specification creates the RESTful contract for your API, detailing all its resources and operations in a human and machine-readable format to simplify development, discovery, and integration with other services. This is a standardized OpenAPI Specification (OAS) for defining RESTful interfaces, which makes the generated metadata valuable when working with a wide range of consumers. Included in the list of consumers that can read the Swagger API metadata are several Azure services, such as Microsoft PowerApps, Microsoft Flow, and Logic Apps. Meaning, when you publish your API App service with Swagger, these Azure services and more immediately know how to interact with your API endpoints with no further effort on your part.
Beyond other Azure services being able to more easily use your API App, Swagger RESTful interfaces make it easier for other developers to consume your API endpoints. The API explorer that comes with swagger-ui makes it easy for other developers (and you) to test the endpoints and know what the data format looks like that need to be sent and should be returned in kind.
Generating this Swagger metadata manually can be a very tedious process. If you build your API using ASP.NET or ASP.NET Core, you can use the Swashbuckle NuGet package to automatically do this for you, saving a lot of time initially creating the metadata, and maintaining it. In addition to its Swagger metadata generator engine, Swashbuckle also contains an embedded version of swagger-ui, which it will automatically serve up once Swashbuckle is installed.
Use Swashbuckle in your API App project
Swashbuckle is provided by way of a set of NuGet packages: Swashbuckle and Swashbuckle.Core. When you create a new API App project using the Visual Studio template, these NuGet packages are already included. If you don’t have them installed, follow these steps to add Swashbuckle to your API App project:
Install the Swashbuckle NuGet package, which includes Swashbuckle.Core as a dependency, by using the following command from the NuGet Package Manager Console:
Install-Package Swashbuckle
The NuGet package also installs a bootstrapper (App_Start/SwaggerConfig.cs) that enables the Swagger routes on app start-up using WebActivatorEx. You can configure Swashbuckle’s options by modifying the GlobalConfiguration.Configuration.EnableSwagger extension method in SwaggerConfig.cs. For example, to exclude API actions that are marked as Obsolete, add the following configuration:
public static void Register()
{
            var thisAssembly = typeof(SwaggerConfig).Assembly;
            GlobalConfiguration.Configuration
                .EnableSwagger(c =>
                    {
                        …
                        …
                        // Set this flag to omit descriptions for any actions
                        decorated with the Obsolete attribute
                          c.IgnoreObsoleteActions();
                          …
                          …
                      });
}
Modify your project’s controller actions to include Swagger attributes to aid the generator in building your Swagger metadata. Listing 4-1 illustrates the use of the SwaggerResponseAttribute at each controller method.
Swashbuckle is now configured to generate Swagger metadata for your API endpoints with a simple UI to explore that metadata. For example, the controller in Listing 4-1 may produce the UI shown in Figure 4-36.

FIGURE 4-36 The Swagger interface for the published API App
)
LISTING 4-1 C# code showing Swagger attributes added to the API App’s controller actions
        /// <summary>
        /// Gets the list of contacts
        /// </summary>
        /// <returns>The contacts</returns>
        [HttpGet]
        [SwaggerResponse(HttpStatusCode.OK,
            Type = typeof(IEnumerable<Contact>))]
        [Route("~/contacts")]
        public async Task<IEnumerable<Contact>> Get()
        {
            …
        }

        /// <summary>
        /// Gets a specific contact
        /// </summary>
        /// <param name="id">Identifier for the contact</param>
        /// <returns>The requested contact</returns>
        [HttpGet]
        [SwaggerResponse(HttpStatusCode.OK,
            Description = "OK",
            Type = typeof(IEnumerable<Contact>))]
        [SwaggerResponse(HttpStatusCode.NotFound,
            Description = "Contact not found",
            Type = typeof(IEnumerable<Contact>))]
        [SwaggerOperation("GetContactById")]
        [Route("~/contacts/{id}")]
        public async Task<Contact> Get([FromUri] int id)
        {
            …
        }

        /// <summary>
        /// Creates a new contact
        /// </summary>
        /// <param name="contact">The new contact</param>
        /// <returns>The saved contact</returns>
        [HttpPost]
        [SwaggerResponse(HttpStatusCode.Created,
            Description = "Created",
            Type = typeof(Contact))]
        [Route("~/contacts")]
        public async Task<Contact> Post([FromBody] Contact contact)
        {
            …
        }
You can test any of the API methods by selecting it from the list. Here we selected the /contacts/{id} GET method and tested it by entering a value of 2 in the id parameter, and clicking the Try It Out! button. Notice that Swagger details the return model schema, shows a Curl command and a Request URL for invoking the method, and shows the actual response body after clicking the button (Figure 4-37).
)
FIGURE 4-37 An API method and result after testing with Swagger
Enable CORS to allow clients to consume API and Swagger interface
Before clients, such as other web services or client code generators, can consume your API endpoints and Swagger interface, you need to enable CORS on the API App in Azure. To enable CORS, follow these steps:
Navigate to the portal accessed via https://portal.azure.com.
Open your API App service. You can find this by navigating to the Resource Group in which you published your service.
Select CORS from the left-hand menu (Figure 4-38). Enter one or more allowed origins, then select Save. To allow all origins, enter an asterisk (*) in the Allowed Origins field and remove all other origins from the list.
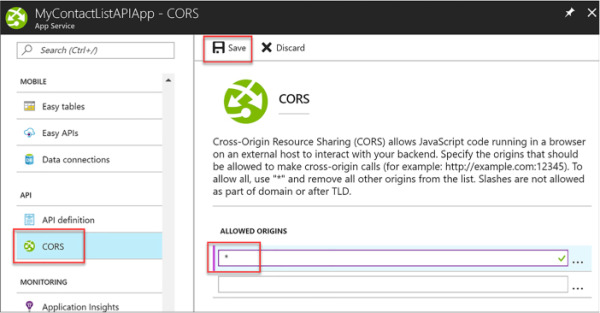
FIGURE 4-38 Enabling cross-origin calls for all sources
)
Use Swagger API metadata to generate client code for an API app
There are tools available to generate client code for your API Apps that have Swagger API definitions, like the swagger.io online editor. The previous section demonstrated how you can automatically generate the Swagger API metadata, using the Swashbuckle NuGet package.
To generate client code for your API app that has Swagger API metadata, follow these steps:
Find your Swagger 2.0 API definition document by navigating to http://<your-api-app/swagger/docs/v1 (v1 is the API version). Alternately, you can find it by navigating to the Azure portal, opening your API App service, and selecting API definition from the left-hand menu. This displays your Swagger 2.0 API definition URL (Figure 4-39).
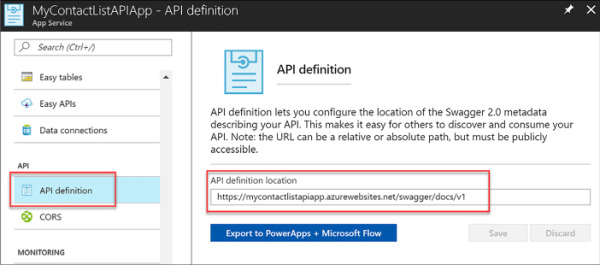
FIGURE 4-39 Steps to find the API App’s Swagger 2.0 metadata URL
Navigate to https://editor.swagger.io to use the Swagger.io Online Editor.
Select File > Import URL. Enter your Swagger 2.0 metadata URL in the dialog box and click OK (Figure 4-40).
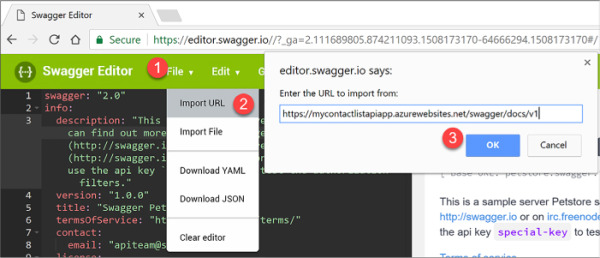
FIGURE 4-40 Steps to import the Swagger 2.0 metadata
After a few moments, your Swagger metadata appears on the left-hand side of the editor, and the discovered API endpoints will be displayed on the right. Verify that all desired API endpoints appear, and then select Generate Client from the top menu. Select the desired language or platform for the generated client app. This initiates a download of a zip file containing the client app (Figure 4-41).

FIGURE 4-41 Steps to generate client code in Swagger.io
)
)
)
Monitor API Apps
App Service, under which API Apps reside, provides built-in monitoring capabilities, such as resource quotas and metrics. You can also set up alerts and automatic scaling based on these metrics. In addition, Azure provides built-in diagnostics to assist with debugging an App Service web or API app. A combination of the monitoring capabilities and logging should provide you with the information you need to monitor the health of your API app, and determine whether it is able to meet capacity demands.
Using quotas and metrics
API Apps are subject to certain limits on the resources they can use. The limits are defined by the App Service plan associated with the app. If the application is hosted in a Free or Shared plan, and then the limits on the resources the app can use are defined by Quotas, as discussed earlier for Web Apps.
If you exceed the CPU and bandwidth quotas, your app will respond with a 403 HTTP error, so it’s best to keep an eye on your resource usage. Exceeding memory quotas causes an application reset, and exceeding the filesystem quota will cause write operations to fail, even to logs. If you need to increase or remove any of these quotas, you can upgrade your App Service plan.
Metrics that you can view pertaining to your apps are the same as shown earlier in Table 4-3. As with Web Apps, metrics are accessed from the Overview blade of your API App within the Azure portal by clicking one of the metrics charts, such as Requests or Average Response Time. Once you click a chart, you can customize it by clicking it and selecting edit chart. From here you can change the time range, chart type, and metrics to display.
Enable and review diagnostics logs
By default, when you provision a new API App, diagnostics logs are disabled. These are detailed server logs you can use to troubleshoot and debug your app. To enable diagnostics logging, perform the following steps:
Navigate to the portal accessed via https://portal.azure.com.
Open your API App service. You can find this by navigating to the Resource Group in which you published your service.
Select Diagnostics logs from the left-hand menu (Figure 4-42). Turn on any logs you wish to capture. When you enable application diagnostics, you also choose the Level. This setting allows you to filter the information captured to informational, warning, or error information. Setting this to verbose will log all information produced by the application. This is also where you can go to retrieve FTP information for downloading the logs.
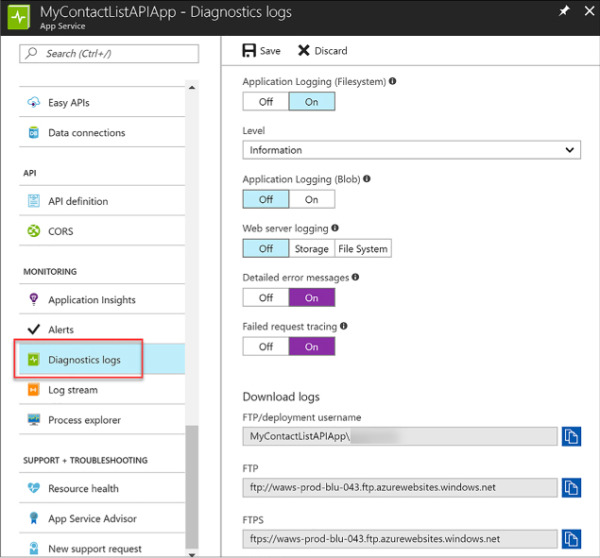
FIGURE 4-42 Steps to enable diagnostics logs
)
)
You can download the diagnostics logs via FTP, or they can be downloaded as a zip archive by using PowerShell or the Azure CLI.
The types of logs and structure for accessing logs follow that described for Web Apps and shown in Table 4-2.