Work with apps and notifications
- By Joan Lambert
- 2/20/2018
- Locate and start apps
- Explore built-in apps
- Install Store apps
- Manage app notifications
- Key points
- Practice tasks
In this sample chapter from Windows 10 Step by Step, 2nd Edition, learn how to locate and start apps, explore built-in apps and accessories, manage notifications, and more.
In this chapter
Locate and start apps
Explore built-in apps
Install Store apps
Manage app notifications
The Windows 10 operating system provides the interface through which you communicate with your computer. When you do or create something on your computer, you’re using software applications, or apps, that runs on Windows to accomplish that task.
There are many types of apps, and you can get them from many sources. Wherever you get your apps, after you install them on your Windows 10 computer, you can run them and manage access to them in the same ways.
Many apps communicate status, new activity, and other information to you in the form of notifications. These might pop up in the corner of your screen—to notify you of a message that has arrived or an update that is available. When these pop-up windows appear (they are sometimes called pop-ups or toast because they pop up like a piece of toast from a toaster), you can select them to open or dismiss them. In Windows 10, recent notifications are available from the Action Center that opens from the notification area of the taskbar.
This chapter guides you through procedures related to locating and starting installed apps, exploring built-in apps and accessories, installing apps from the Windows Store, and managing app notifications.
Locate and start apps
At the time of this writing, software programs that install components on a computer or mobile device that runs Windows are divided into two groups: desktop apps and Store apps. Store apps are those that you install on your Windows 10 device from the Windows Store, which is called simply Store. (Somewhat confusingly, Store itself is an app.) In general, Store apps have a smaller installation footprint than desktop apps, and aren’t as powerful as desktop apps.
When you purchase a new computer, it’s likely that the computer will have a variety of apps installed on it by the computer manufacturer. These apps generally fall into the following categories:
Apps provided by Microsoft with the Windows operating system. These are installed with Windows 10 regardless of whether you upgrade to this version of the operating system or have a clean installation.
Apps that are specific to the management of the hardware elements of your computer, such as a touchpad or network adapter. These are usually related to hardware support and firmware update functions.
Free full or trial versions of apps. Software companies often allow computer manufacturers to provide full or limited-use versions of apps with their computers as a way to add value to the package. You’re usually required to register your information with the software company to use the app, and they can then offer you updates and upgrades over time. This is a win-win for the hardware and software manufacturers, and sometimes for you.
You can start an app by selecting it in the app list on the Start menu, or by selecting a Start menu, desktop, or taskbar shortcut to the app.
 SEE ALSO
For more information about app shortcuts, see “Create and manage app shortcuts” in Chapter 3, “Work with shortcuts and tiles.”
The app list provides access to most of the apps and tools that are installed on your computer. These include apps that are installed as part of Windows 10, by the computer manufacturer, and by you. The app list is integrated into the Start menu.

It is also an alternative view on the full-size Start screen.
)
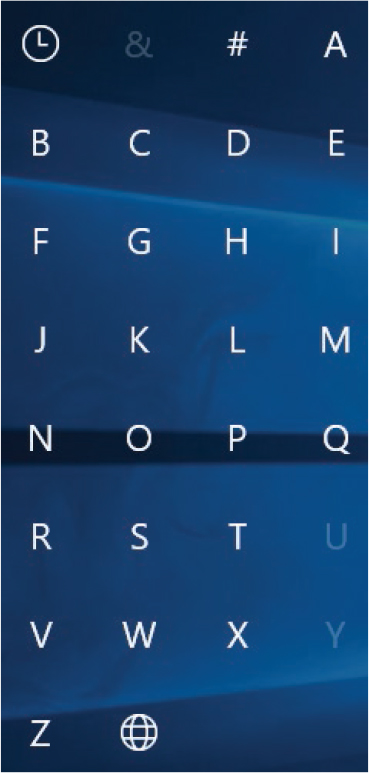
The app list on the Start menu provides an alphabetical listing of apps, separated by index letters. You can scroll through the menu manually or select any index letter to display a menu from which you can go directly to recently added apps (represented by a clock); apps with names that begin with a symbol (represented by an ampersand), a number, or a specific letter; or apps with names that begin with characters that aren’t in the alphabetical index (represented by a globe). When an index letter has no menu entries, the letter is dimmed. This is a nice improvement over the All Programs menu that was available in earlier versions of Windows.
Most apps in the app list are in order by app name, but some are in folders and therefore don’t appear on the menu where you might expect them to.
 TIP
TIP
As software development models and installation footprints have changed, so has terminology. At one time, there were only software applications, which were called programs. With the development of small-footprint mobile technology came apps. Over time, different types of apps were referred to as desktop apps, Windows apps, modern apps, gadgets, and other terms. In this book, unless there’s a specific reason to differentiate among app types, we simply refer to programs in both categories as apps.

This is one reason why it’s almost always faster to locate an app by entering the first few letters of its name in the search box, and selecting it from the search results list.
 IMPORTANT
Many apps and services start automatically when Windows starts. This can be very helpful, but it can also add unnecessary overhead to your computer’s startup tasks, and slow down the process. You can identify and disable apps that start automatically. For more information, see “Manage app startup” in Chapter 14, “Work more efficiently.”
To display the app list
Open the Start menu.
Open the full-size Start screen and then select the All apps button.
TIPYou can navigate through the Start menu by pressing the arrow keys.
To scroll the app list to apps beginning with a specific letter
In the app list, select any index letter to display the alphanumeric index.
In the index, select any letter or symbol to jump to those entries on the menu.
TIPThe clock symbol represents recently installed apps. The ampersand represents numbers and symbols. The globe symbol represents international apps (with names that begin with characters that aren’t in the alphabetical index).
To start an app
In the app list, select the app name.
On the Start screen, select the app tile.
On the taskbar, select the app button.
Enter the app name in the taskbar search box. In the search results, select the app name, or select the Apps heading and then select the app name in the filtered results pane.
To start a second instance of a running app
On the taskbar, right-click the button and then select the app name.
TIPOn a touchscreen device, select and release instead of right-clicking. For more information about touchscreen interaction, see the appendix “Keyboard shortcuts and touchscreen tips.”
TIP
If you experience problems with a desktop app, it might be necessary to run the app with elevated permissions so you can resolve the issue. To do so, right-click the app, select More, and then select Run As Administrator. The Run As Administrator command is available only for desktop apps. It is not available for Store apps.