Managing Group Policy Application and Infrastructure in Windows Server 2012 R2
- By Orin Thomas
- 6/2/2014
Practice exercises
The goal of this section is to provide you with hands-on practice with the following:
- Creating, backing up, and restoring GPOs
- Delegating GPO permissions
- Enabling loopback processing
- Configuring blocking and enforcement
- Configuring GPO security filtering
To perform the exercises in this section, you need access to an evaluation version of Windows Server 2012 R2. You should also have access to virtual machines SYD-DC, MEL-DC, CBR-DC, and ADL-DC, the setup instructions for which are described in the Introduction. You should ensure that you have a checkpoint of these virtual machines that you can revert to at the end of the practice exercises. You should revert the virtual machines to this initial state prior to beginning these exercises.
Exercise 1: Prepare GPOs, security groups, and OUs
In this exercise, you prepare GPOs. To complete this exercise, perform the following steps:
- Sign in to SYD-DC with the Contoso\Administrator account.
- In Server Manager, click the Tools menu, and click Group Policy Management.
Expand the Forest: Contoso.com\Domains\Contoso.com node and click Group Policy Objects, as shown in Figure 5-22.
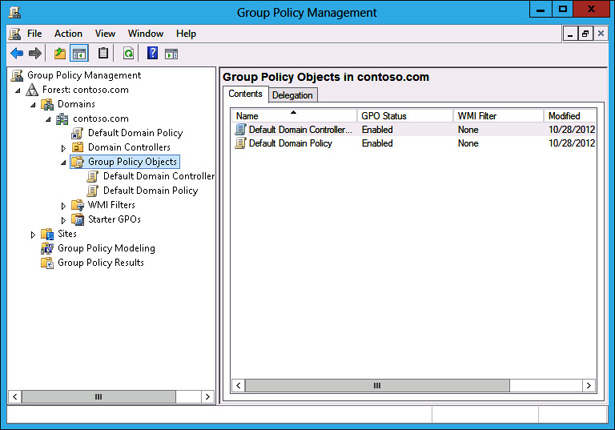
FIGURE 5-22 Clicking Group Policy Objects
- On the Action menu, click New.
In the New GPO dialog box, type Melbourne, as shown in Figure 5-23, and click OK.
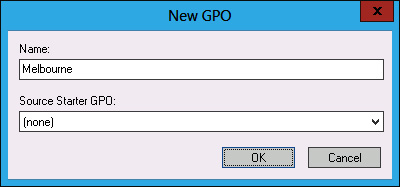
FIGURE 5-23 New GPO dialog box
- Repeat steps 4 and 5 to create new GPOs named Sydney and Adelaide.
Verify that there are five GPOs listed, as shown in Figure 5-24.
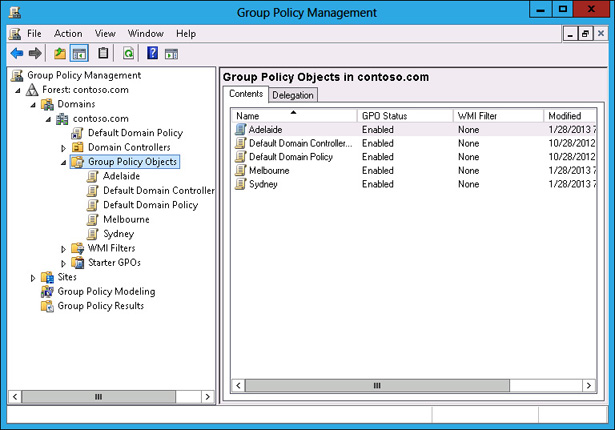
FIGURE 5-24 Three new GPOs
- In Server Manager, click Active Directory Administrative Center.
In Active Directory Administrative Center, click Contoso (Local), and then click Users, as shown in Figure 5-25.
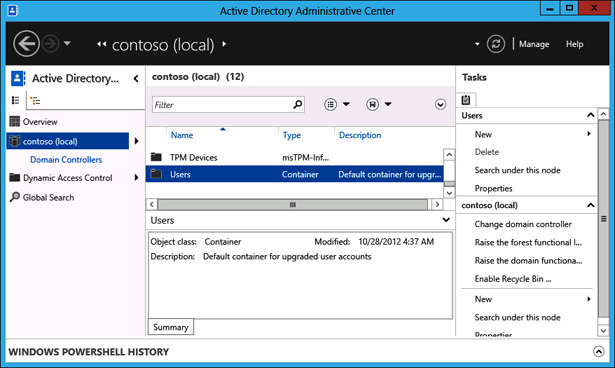
FIGURE 5-25 Users container
- In the Tasks pane, click New, and click Group.
In the Create Group dialog box, type the group name Melbourne_GPO_Editors; click Security, Global, and Protect From Accidental Deletion, as shown in Figure 5-26; then click OK.
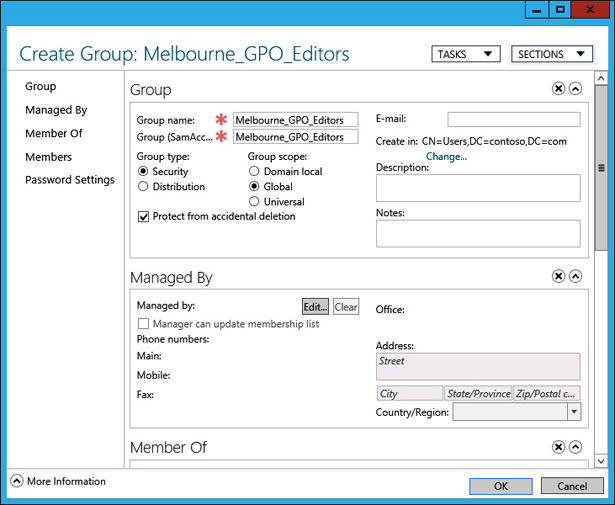
FIGURE 5-26 Creating a security group
- Repeat steps 10 and 11 to create the Adelaide_Computers security group.
- In the Active Directory Administrative Center, in the Tasks pane, under Contoso (Local), click New, and then click Organizational Unit.
In the Create Organizational Unit dialog box, type the name Melbourne_Computers, as shown in Figure 5-27, and click OK.
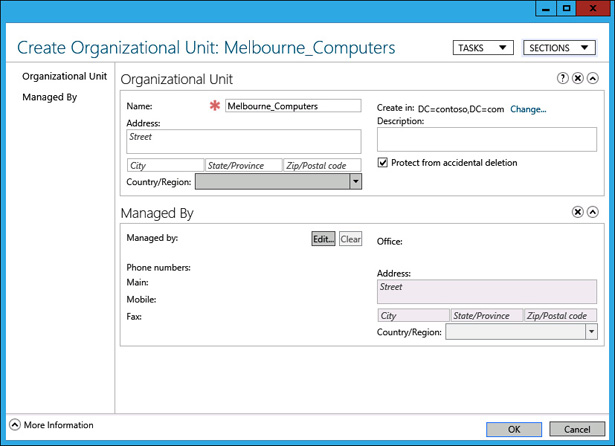
FIGURE 5-27 Create Organizational Unit dialog box
- Close the Active Directory Administrative Center.
- On the taskbar, click File Manager.
- In File Manager, click Computer, and then double-click Local Disk (C:).
- On the title bar of the Local Disk (C:) window, click the New Folder icon.
- Name the new folder GPO_Backup.
- Close the Local Disk (C:) window.
)
)
)
)
)
Exercise 2: Manage GPOs
In this exercise, you perform several Group Policy management-related tasks. To complete this exercise, perform the following steps:
- In the GPMC, click the Melbourne GPO.
When the Melbourne GPO is selected, click the Delegation tab, as shown in Figure 5-28.
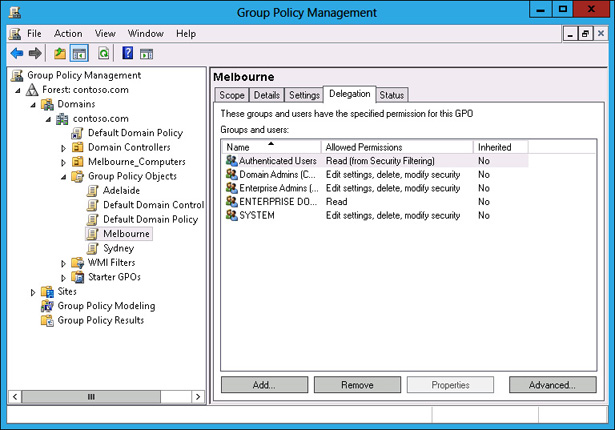
FIGURE 5-28 OU Delegation tab
- On the Delegation tab, click Add.
- In the Select User, Computer, Or Group dialog box, type Melbourne_GPO_Editors, click Check Names, and click OK.
In the Add Group Or User dialog box, use the drop-down menu to select Edit Settings, Delete, Modify Security, as shown in Figure 5-29, and click OK.
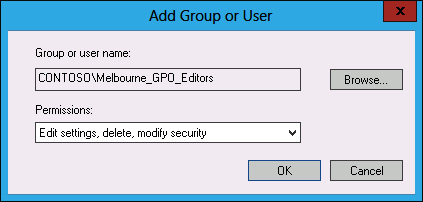
FIGURE 5-29 OU Delegation tab
- In the GPMC, click the Sydney GPO.
- On the Action menu, click Back Up.
In the Back Up Group Policy Object dialog box, type C:\GPO_Backup as the location, as shown in Figure 5-30, and click Back Up.
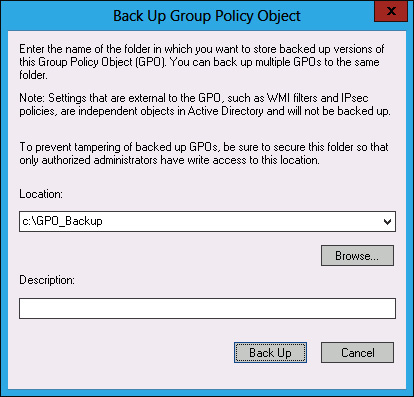
FIGURE 5-30 Back Up Group Policy Object dialog box
- In the Backup dialog box, click OK.
- In the GPMC, click the Sydney GPO.
- On the Action menu, click Delete.
- In the Group Policy Management dialog box, click Yes.
Verify that the Sydney GPO is no longer listed under Group Policy Objects, as shown in Figure 5-31.
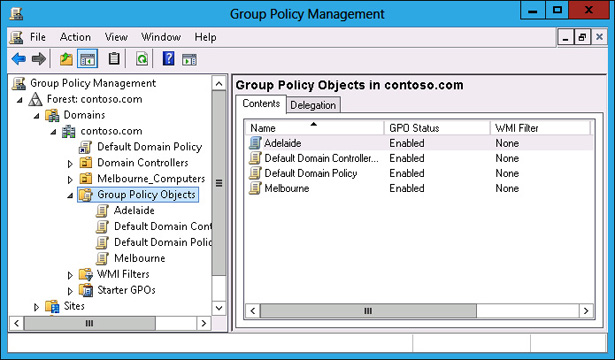
FIGURE 5-31 Verify deleted GPO
- Click Group Policy Objects. On the Action menu, click Manage Backups.
In the Manage Backups dialog box, click the Sydney GPO, as shown in Figure 5-32, and click Restore.
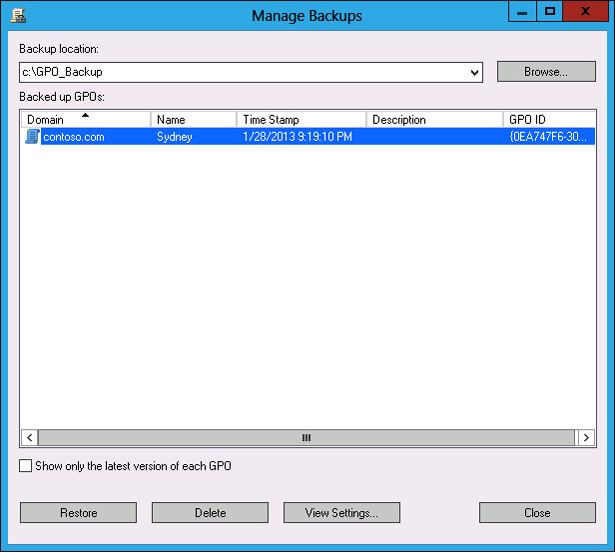
FIGURE 5-32 Manage Backups dialog box
- In the Group Policy Management dialog box, click OK.
- In the Restore dialog box, click OK.
- In the Manage Backups dialog box, click Close.
- Verify the presence of the Sydney GPO in the list of Group Policy Objects.
)
)
Exercise 3: Manage Group Policy processing
In this exercise, you perform Group Policy management tasks related to Group Policy processing. To complete this exercise, perform the following steps:
- In the GPMC, click the Adelaide GPO.
- On the Action menu, click Edit.
In the Group Policy Management Editor, expand the Computer Configuration\Administrative Templates\System\Group Policy node and select the Configure User Group Policy loopback processing mode policy, as shown in Figure 5-33.
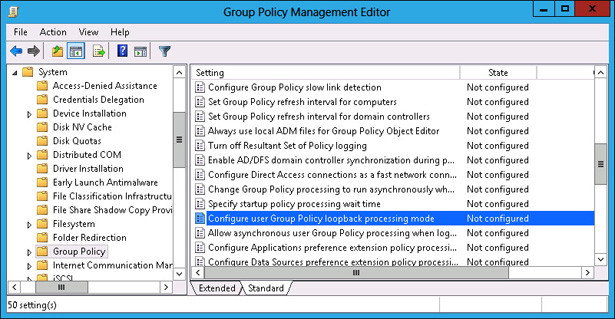
FIGURE 5-33 Select Group Policy loopback processing mode policy
- On the Action menu, click Edit.
In the Configure User Group Policy Loopback Processing Mode dialog box, click Enabled. Set the mode to Replace, as shown in Figure 5-34, and click OK.

FIGURE 5-34 Configure replace mode
- Close the Group Policy Management Editor.
- In the GPMC, click the Adelaide GPO, and click the Scope tab.
- On the Scope tab, click the Authenticated Users group, and click Remove.
- In the Group Policy Management dialog box, click OK.
- Under Security Filtering, click Add.
- In the Select User, Computer, Or Group dialog box, type Adelaide_Computers, click Check Names, and click OK.
Verify that the security filtering properties of the Adelaide GPO match those in Figure 5-35.
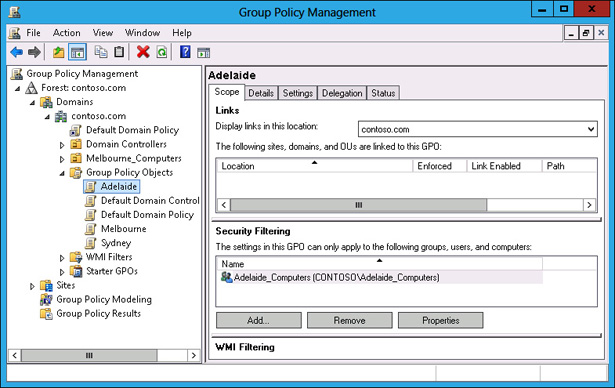
FIGURE 5-35 Configuring security filtering properties
- In the GPMC, click Contoso.com, and click the Linked Group Policy Objects tab.
- Click Contoso.com. On the Action menu, click Link An Existing GPO.
In the Select GPO dialog box, click Adelaide, as shown in Figure 5-36, and click OK.
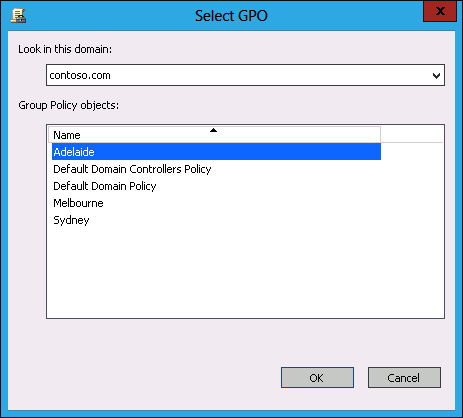
FIGURE 5-36 Selecting the GPO to link
In the GPMC, verify that the Adelaide GPO and the Default Domain Policy GPO are linked to the domain, as shown in Figure 5-37.
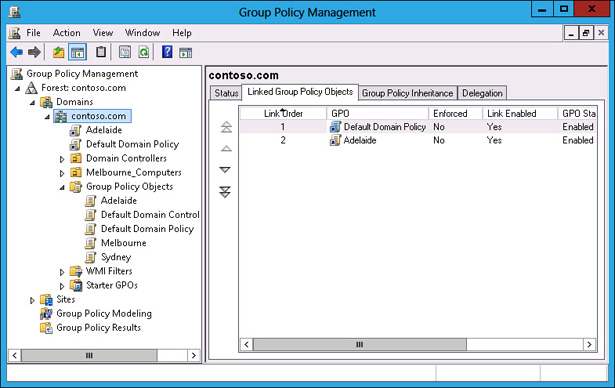
FIGURE 5-37 GPOs linked to the domain
)
)
)
)
Exercise 4: Group Policy inheritance and enforcement
In this exercise, you will perform Group Policy management tasks related to Group Policy processing. To complete this exercise, perform the following steps:
- In the GPMC, click the Melbourne_Computers OU.
- On the Action menu, click Block Inheritance.
- In the GPMC, click Contoso.com.
- On the Action menu, click Link An Existing GPO.
- In the Select GPO dialog box, click Melbourne, and then click OK.
- Click the Melbourne GPO under Contoso.com.
- On the Action menu, click Enforced.
Verify that the GPMC shows the Melbourne policy as Enforced and the Melbourne_Computers OU set to Block Inheritance, as shown in Figure 5-38.
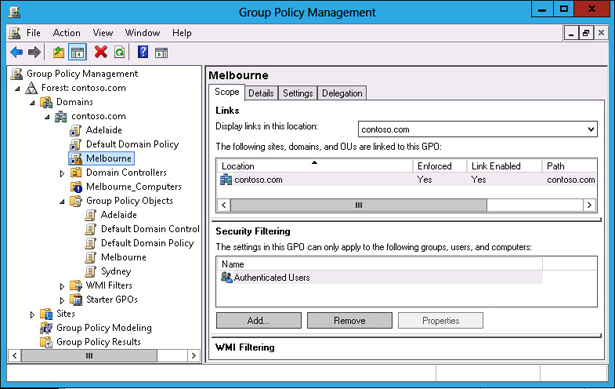
FIGURE 5-38 Block Inheritance and Enforced GPOs
- In the GPMC, click the Group Policy Modeling node.
- On the Action menu, click Group Policy Modeling Wizard.
- On the Welcome page of the Group Policy Modeling Wizard, click Next.
- On the Domain Controller Selection page, click This Domain Controller, and click SYD-DC.contoso.com. Click Next.
- On the User And Computer Selection page, click Browse next to Container in the Computer Information section.
- In the Choose Computer Container dialog box, click Melbourne_Computers, and click OK.
Verify that the User And Computer Selection page matches Figure 5-39, and click Next.
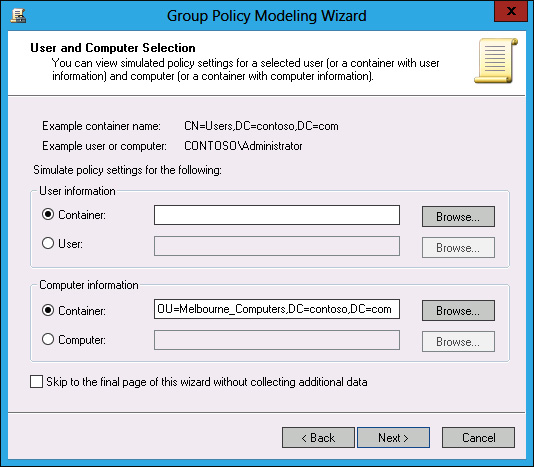
FIGURE 5-39 Group Policy Modeling Wizard
- On the Summary Of Selections page, click Next, and then click Finish.
- In the Warning dialog box, click OK.
Verify that the report for the Melbourne_Computers OU matches Figure 5-40, and that only the Melbourne GPO is listed.

FIGURE 5-40 Group Policy Modeling results
)
)
)
)
)
)
)
)