Hypertext Markup Language (HTML)
- By Rob Miles
- 9/10/2021
- HTML and the World Wide Web
- What is HTML?
- Making active web pages
- Egg timer
- An image display program
- What you have learned
Making active web pages
There are lots of other things that I could tell you about HTML. The language can be used to create numbered and unnumbered lists and tables. However, this is not a book about HTML; it is about programming. What we want is a way of getting JavaScript code to run inside a web page. Then we can start exploring the language.
You already know that a JavaScript program can sit alongside an HTML page design. You saw that in Chapter 1 when you used the developer view (obtained by pressing F12) in the browser to take look at the hidden program inside the hello.html web page. That HTML file contained a script element holding some JavaScript code. We used the console to run a JavaScript function. Now we are going to trigger a function by pressing a button.
Using a button
One way to create an active web page is by using a button. This HTML code creates a button that contains the text “Say Hello”:
<button onclick="doSayHello();">Say Hello</button>
The button is displayed in the normal flow of the text in the page, as shown in Figure 2-9.
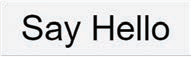
Figure 2-9 Say Hello button
The button has an onclick attribute. One of the great things about JavaScript is that most of the time, the names make sense. The onclick attribute specifies a function that is to be used when the button is clicked. In this case, the attribute specifies a JavaScript function called “doSayHello”. A JavaScript function is a sequence of JavaScript statements that have been given a name. (We will take a detailed look at functions in Chapter 8.)
function doSayHello() {
  alert("Hello");
}
This function only performs a single action; it displays an alert that says “Hello” to the user when it is called. The line of JavaScript that displays the alert is called a statement. The end of a statement is marked by a semicolon character. A function can contain many statements, each of which is ended with a semicolon (;).
<!DOCTYPE html>
<html lang="en">
<head>
  <title>Ch02-06 Buttons</title>
</head>

<body>
  <h1>Buttons</h1>
  <p>
    <button onclick="doSayHello();">Say Hello</button>
  </p>

  <script>
    function doSayHello() {
      alert("Hello");
    }

  </script>
This is the complete HTML text of the web page. The <script> element is at the bottom of the body of the document. The page displays the Say Hello button, and when the button is pressed, the alert is displayed, as shown in Figure 2-10.
)
FIGURE 2-10 Say Hello alert
Reading input from a user
The button tag lets us create an element in a web page that responds to a user action. Next, we need a way of getting input from a user. The input tag lets us do just that:
<input type="text" id="alertText" value="Alert!">
It has three attributes:
type The type attribute tells the browser the type of input that is being read. In the code above, we are reading text, so the attribute type is set to text. If you set the type attribute to password, the contents of the input are replaced with other characters (usually * or .) as they are being typed in. This is how JavaScript programs read passwords in web pages.
id The id attribute gives an element a unique name. This name can be used in the JavaScript code to locate the element. If we had two input elements, we would use a different name for each. I’ve called the element alertText because this nicely reflects what the element is being used for.
value The value attribute specifies the value in this element tag. This is how we can prepopulate an input with text. When this input element is displayed, it will have the text “Alert!” in it. If we want the input to be blank when it is displayed, we can set the value to an empty string.
<p>
  <input type="text" id="alertInputText" value="Alert!">
  <button onclick="doShowAlert();">Show Alert</button>
</p>
<script>
  function doShowAlert() {
    var element = document.getElementById("alertInputText");
    alert(element.value);
  }
</script>
The web page contains the input element, a button element that will call a function to display the alert, and the function that uses the input text in an alert. The user can type their own text into the input and then press the Show Alert button to have the text displayed in an alert. Figure 2-11 shows what the program looks like when it is used.
)
If you run the example, you will notice that when you press the Show Alert button, the text you have entered in the input area is displayed in the alert.
HTML and JavaScript
It’s worth spending some time discovering how HTML and JavaScript work together, as this underpins almost all of the programs that we are going to write. The JavaScript program needs a way of interacting with the HTML document it is part of. This interaction is provided by methods, which are part of the document object model, or DOM, that the browser creates to represent the HTML document it is displaying for the user. The DOM is a software object that is held in the memory of the computer. The DOM contains methods alongside the HTML elements that make up the page. Our program uses the getElementByID method to get a reference to the element on the page. It then gets the text out of this element and displays that text in an alert.
If you’re not sure about this, perhaps an analogy would help. Think of the HTML document as “Rob’s Car Rental.” When someone comes to pick up a car, they will say, “I’ve come to pick up car registration ABC 123.” I will then hand them the keys and say “It’s over in bay E6”. They can then go find the car. I don’t hand the car to the customer over the counter because I’m not strong enough for that. I just tell them where the car is, so they can go and find it.
In the case of the HTML document, each of the elements in the document is like a car in the parking lot for my rental business. An element can be given an ID just like a car has a registration plate. In our document, the ID is alertInputText. The method getElementById is the means by which a JavaScript program can ask the document where an element is:
var element = document.getElementById("alertInputText");
On the right-hand side of the statement above, you can see the use of getElementByID to get the location of the text element with the alertInputText ID. The left-hand side of the statement creates a variable to hold this location. The word var creates a JavaScript variable. A variable is a named location that stores some information that the program wants to remember.
At “Rob’s Car Rental,” I would offer to write down the location of a car for a customer who was afraid of forgetting where their car was. I’d give them a piece of paper with “Car Location” (the name of the “variable”) and “Bay E6” (the value of the variable) written on it. In the JavaScript above, the variable we are creating is called element (because it refers to an element in the document) and the value is the location of the text input element. This operation is called an assignment because the program is assigning a value to a variable. An assignment operation is denoted using the equals (=) character. (We will discuss variables in detail in Chapter 4.)
Now that the program has a variable called element that contains a reference to the input, we can extract the text value from this element and store it in a variable called message:
var message = element.value;
The variable called message now contains the text that was typed into the input by the user. (Remember that we set this to “Alert!” in the HTML.) The program can now display this text in an alert:
alert(message);
It is very important that you understand what is going on here. Up until now, everything has seemed quite reasonable, and then suddenly, you’ve been hit with something really complicated. I’m sorry about that. Just go through the code and try to map the statements back to what the program is trying to do. And remember that the equals character (=) means “set this variable to the value.” It does not mean that the program is testing to see if one thing is equal to another.
If you are confused about how the various parts of the program fit together, consider that the program is doing exactly the same thing as if I had given a car rental customer the location of their car and then asked them to come back and tell me how much fuel there was in that car. That sequence would go as follows:
Get the location of the car.
Go to the car.
Get the value from the fuel-level display.
Bring that value back to me.
In the case of the JavaScript program that is displaying the message, the sequence is:
Use getElementById method to get a reference to the input element.
Follow the reference to the element.
Get the text value from the input element.
Display that text in an Alert.
Display text output
In the previous section, we used a JavaScript program to read data from a web page by getting a reference to an element on the page and then reading information from that element. Displaying text on the screen is a similar process. A JavaScript program can use a reference to an object to change attributes of the element. We are going to write a program that changes the text in a paragraph into a string of text that we have entered. The complete HTML file looks like this:
)
)
This example is an extension of the previous one. Instead of displaying text using an alert, this example sets the textContent attribute of a paragraph to the text that the user enters into the dialog box. The behavior of this program is given in four lines.
      var inputElement = document.getElementById("inputText");
      var outputElement = document.getElementById("outputParagraph");
      var message = inputElement.value;
      outputElement.textContent = message;
The first two lines set up variables that refer to the input and output elements. The third line gets the message to be displayed, and the fourth puts this message onto the web page, as shown in Figure 2-12.
)
FIGURE 2-12 Paragraph Update message