Exam MO-400: Manage messages in Outlook 2019
- By Joan Lambert
- 1/12/2022
In this sample chapter from MOS Study Guide for Microsoft Outlook Exam MO-400, you will explore ways to add content to outgoing messages and how to organize incoming messages in Outlook 2019.
Objective 2.1: Create messages
This objective examines candidates’ ability to address messages to recipients; attach files to messages; configure outgoing message options such as follow-up flags, importance, and sensitivity; reply to messages; and forward messages.
You can send a message from any account for which you have permission. Valid sending accounts include those that are configured on your computer and other accounts for which you have been delegated permission.
In addition to the To and Cc fields, which are displayed by default in the message composition window, you can display the From field and the Bcc field. When you display or hide these optional message header fields in an individual message, Outlook retains the setting for all message composition windows.
)
Use the Cc (courtesy copy) field to send the message to someone to whom you want to provide the message information but from whom you don’t need a reply. Use the Bcc (blind courtesy copy) field to blind-copy someone on the message. Bcc recipients aren’t visible to other message recipients and therefore aren’t included when other recipients reply to the message.
To create an original message
 In the Mail module, on the Home tab, in the New group, click New Email.
- In the Mail module, press Ctrl+N.
- In any module, on the Home tab, in the New group, click New Items, and then click Email Message.
- In any module, press Ctrl+Shift+M.
To display or hide optional address fields
- On the Options tab of the message window, in the Show Fields group, click Bcc.
Add or remove message attachments
A convenient way to distribute a file (such as a Microsoft Word document, Excel workbook, PowerPoint presentation, or picture) is by attaching the file to an email message. Message recipients can preview or open the file from the Reading Pane, open it from the message window, forward it to other people, or save it to their computers.
When you attach a file from a shared online location, such as a OneDrive folder or a SharePoint document library, Outlook gives you the option to share a link to the online file or to send a copy of the file. In the attachments area of the message form, a cloud on the file icon indicates a link and the icon label indicates both the file name and the file permissions. You can change a linked file to a copy from the menu that expands from the file icon.
Converting a shared file to an attachment
You can also attach Outlook items, such as other messages, calendar items, contact records, notes, and tasks, to outgoing messages. Recipients can save attached items in their own Outlook installations.
To attach one or more files to a message
- Drag the file or files you want to attach to the message from File Explorer into the message area of the message window.
Or
On the Message tab or Insert tab of the message window, in the Include group, click Attach File.
On the Attach File menu, do one of the following:
If the file you want to attach is in the Recent Items list, click the file in the list.
Click Browse Web Locations, click the file storage location, and browse to and select the file you want to attach.
Click Browse This PC to open the Insert File dialog box. Locate and click the file you want to attach, and then click Insert.
If the selected file is in a shared storage location, select Share link or Attach as copy in the How do you want to attach this file? window.
To convert a shared link to a copy of the file
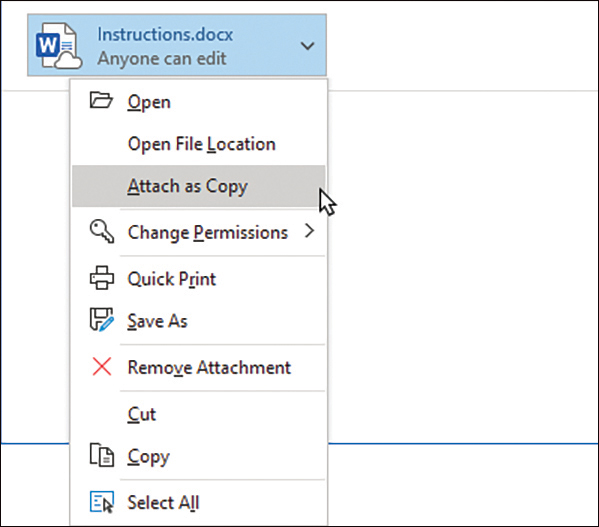
- In the attachment area of the message header, point to the attachment, click the arrow that appears, and then click Attach as Copy.
To attach an Outlook item to a message
- Drag the item you want to attach to the message from the content pane into the message area of the message window.
Or
Do either of the following:
On the Message tab of the message window, in the Include group, click Attach Item, and then click Outlook Item.
On the Insert tab of the message window, in the Include group, click Outlook Item.
In the Insert Item dialog box, locate and click the item you want to attach.
With Attachment selected in the Insert as area, click OK.
To remove an attachment from an outgoing email message
- In the attachment area of the message header, point to the file attachment, click the arrow that appears, and then click Remove Attachment.
Reply to and forward messages
After you read a message, Outlook indicates its status as Read by removing the bold formatting and blue bar from the message header. You can change the read status of a message to provide visual cues or to affect the number that appears after the folder name in the Folder Pane.
You can respond to most email messages that you receive by clicking a response button in the message header, in the Respond group on the Message tab of the message window, or in the Respond group on the Home tab of the program window.
The most standard response to a message is a reply. When you reply to a message, Outlook fills in one or more of the address boxes for you, as follows:
Reply Creates an email message, addressed to only the original message sender, that contains the original message text.
Reply All Creates an email message, addressed to the message sender and all recipients listed in the To and Cc boxes, that contains the original message text. The message is not addressed to recipients of blind courtesy copies (Bcc recipients).
Reply with Meeting Creates a meeting invitation addressed to all message recipients. The message text is included in the meeting window content pane. Outlook suggests the current date and an upcoming half-hour time slot for the meeting.
Message replies include the original message header and text, preceded by a space in which you can respond. Replies do not include any attachments from the original message.
You can add, change, and delete recipients from any reply before sending it.
You can forward a received message to any email address (regardless of whether the recipient uses Outlook) provided the message was not sent with restricted permissions.
Outlook 2019 has the following message-forwarding options:
Forward Creates a new message that contains the text of the original, and retains any attachments from the original message.
Forward As Attachment Creates a blank message that contains no text but includes the original message as an attachment. The original message text and any attachments are available to new recipients when they open the attached message.
When you forward a message, Outlook does not fill in the recipient boxes for you (the assumption being that you want to forward the message to someone who wasn’t included on the original message).
To reply only to the message sender
- On the Home tab, in the Respond group, click the Reply button.
- In the Reading Pane, in the message header, click the Reply button.
- Press Ctrl+R.
To reply to all message recipients
- On the Home tab, in the Respond group, click the Reply All button.
- In the Reading Pane, in the message header, click the Reply All button.
- Press Ctrl+Shift+R.
To forward a message
- On the Home tab, in the Respond group, click the Forward button.
- In the Reading Pane, in the message header, click the Forward button.
- Press Ctrl+F.
Configure message options
When you send a message, you can include visual indicators of the importance, sensitivity, or subject category of a message or other Outlook item, flag a message for follow-up, restrict other people from changing or forwarding message content, provide a simple feedback mechanism in the form of voting buttons, and specify message delivery options to fit your needs.
Common message settings and delivery options include the following:
Flags and reminders You can place an outgoing message on your task list, add an informational reminder to it, or set a reminder to appear at a certain time and date, for yourself and for message recipients.
Importance You can indicate the urgency of a message by setting its importance to High or Low. A corresponding banner appears in the message header, and if the Importance field is included in the view, an importance icon appears in the Inbox or other message folder.
Sensitivity You can indicate that a message should be kept private by setting its sensitivity to Confidential, Personal, or Private. No indicator appears in the message folder, but a banner appears in the message header to indicate a sensitivity level other than Normal.
Security If you have a digital ID, you can digitally sign the message, or you can encrypt the contents of the message.
Voting options If you and your message recipients have Microsoft Exchange Server accounts, you can add voting buttons to your messages so that recipients can quickly select from multiple-choice response options.
Tracking options You can track messages by requesting delivery receipts and read receipts. These receipts are messages automatically generated by the recipient’s email server when it delivers the message to the recipient and when the recipient opens the message.
Delivery options You can have reply messages delivered to an email address other than yours, specify a date and time for the message to be delivered and to expire, and set advanced attachment format and encoding options.
Categories You can assign a message to a color category that will be visible to recipients if they view the message in Outlook.
)
The most commonly used options are available in the Tags group on the Message tab of the message window. You can access other options from the Properties dialog box, which you open by clicking the Tags dialog box launcher or the Tracking or More Options dialog box launcher on the Options tab of the message window.
)
To designate a message as high or low priority
- On the Message tab of the message window, in the Tags group, click the High Importance or Low Importance button.
Or
On the Message tab of the message window, click the Tags dialog box launcher.
In the Properties dialog box, in the Importance list, click High or Low. Then click Close.
To change a message from high or low priority to normal priority
- On the Message tab of the message window, in the Tags group, click the High Importance or Low Importance button to clear the selection.
Or
On the Message tab of the message window, click the Tags dialog box launcher.
In the Properties dialog box, in the Importance list, click Normal. Then click Close.
To set the sensitivity of a message
On the Message tab of the message window, click the Tags dialog box launcher.
In the Properties dialog box, click the option you want in the Sensitivity list, and then click Close.
To flag an outgoing message for follow-up by you
- On the Message tab of the message window, click the Follow Up button, and then click the flag date you want to set.
To flag an outgoing message for follow-up by recipients
On the Message tab of the message window, click the Follow Up button, and then click Custom.
In the Custom dialog box, select the Flag for Recipients check box.
If you want to set a reminder for recipients, select the Reminder check box and specify the reminder date and time.
Click OK to set the flag, which will appear in the message header as Recipients receive: Follow up or Recipients receive: Follow up by followed by the specified date and time.
Objective 2.1 practice tasks
The practice files for these tasks are in the MOSOutlook2019\Objective2 practice file folder. Before you begin, alert a friend, classmate, or coworker that you will be sending them a message as part of your practice.
 Create a new message to yourself with the subject MOS Secret, and do the following:
 Flag the message as both high priority and confidential.
- Send the message.
- After you receive the MOS Secret message, do the following:
- Forward the message.
- Address the forwarded message to a friend, classmate, or coworker.
- Change the message priority to Normal.
- Flag the message for your friend to follow up by tomorrow at 9:00 A.M.
- Blind-copy yourself on the message.
- Send the message.
- After the message arrives, do the following:
- Open the message and verify that the message header doesn’t include you as a message recipient.
- Create a new message to yourself with the subject MOS Files, and do the following:
- Attach the Outlook_2-1 document to the message.
- Use a different technique to attach the Outlook_2-1 presentation to the message.
- Send the message to yourself.
- After you receive the message, preview each of the attachments in the Reading Pane. Scroll through the full content of each.
- Open the Outlook_2-1 document and Outlook_2-1 presentation. Scroll through the document and run the slideshow to identify any differences between the preview and the file content.
- Create a new message to yourself with the subject MOS Items, and do the following:
- Attach any contact record (not a business card) and any calendar item (not a calendar) to the message.
- Send the message.
- After you receive the message, preview each of the attachments in the Reading Pane.
- Open the contact record.
- Close the open document, presentation, contact record, and email messages.