Using Windows 10
- By Ed Bott and Craig Stinson
- 3/6/2021
- An overview of the Windows 10 user experience
- Using and customizing the Windows 10 Start menu
- Using and customizing the taskbar
- Using and customizing Action Center
- Switching tasks
- Reviewing, revisiting, resuming with Timeline
- Switching between virtual desktops
- Managing and arranging windows
- Using a keyboard and mouse in Windows 10
- Using Windows 10 on a touchscreen device
- Using the Windows Ink workspace
- Working with fonts
Using and customizing the Windows 10 Start menu
Touchscreens might represent the future of computing, but the present is still ruled by more-or-less conventional desktop and laptop PCs, each equipped with a keyboard and a mouse or touchpad. For that type of device, the desktop is where you’ll likely spend most of your time, and it’s what we concentrate on in this section. We discuss Tablet Mode separately, later in this chapter. (See “Using Windows 10 on a touchscreen device.”)
Using and customizing Start
The interface element popularly known as the Start menu is officially called Start in Windows 10, although you’ll find references to both terms scattered throughout Windows 10 and its online help files. You open Start by clicking the Windows icon at the far-left end of the taskbar or pressing the Windows key. Start is divided into three segments. At the very left is a thin column, near the bottom of which appear the current user’s name and picture and icons for the Documents and Pictures folders, as well as for Settings and Power. You can display descriptive labels alongside each of those icons by hovering the mouse pointer anywhere within this column.
Next to the thin column is a wider column that includes a list of any recently added apps, the apps you use most often, and a scrolling list of all your apps. In the app list, you’ll find the names and icons for your programs, listed in alphabetical order. You can move through the list by swiping directly on a touchscreen, using two-finger scrolling gestures on a touchpad, or using the scroll wheel with a mouse. Often the quickest way to get from one part of the list to another is by clicking any of the letter headings. That produces an index menu, like this:
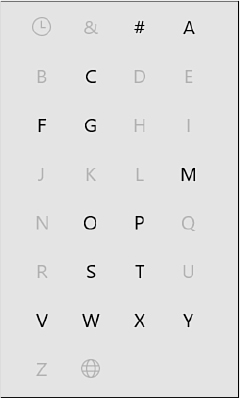
You can click or tap any letter or symbol in this menu to jump to the associated part of the all-apps list.
Obviously, you can launch any item in the app list by tapping or clicking it. Alternatively, if you’re comfortable typing, you can skip all the scrolling, tap the Windows key to position the insertion point in the search box, and then begin typing the name of an item you want in the search box, directly to the right of the Start button. (Refer to Figure 3-1.) What you’re looking for will soon appear at or near the top of the search results. This approach is especially handy when you’re not sure exactly where in the app list the item you desire is located. (Where’s Notepad, for example? Its default location is within the Windows Accessories folder, several clicks or taps away from the top of the list. You’ll get to it more quickly by typing.)
The remainder of Start consists of tiles. This is the remnant of the Start screen that filled the desktop in Windows 8. As in Windows 8, tiles can be live or not. The live ones update their appearance periodically with relevant content. Windows gives you some tiles to get you going (including some that you might want to get rid of), but, of course, this part of Start is completely customizable, as we discuss shortly.
You can change the size and shape of Start by dragging it up (to a maximum height that is 100 pixels below the top of the display), to the right, or both ways.
Customizing the contents of Start
If you’re accustomed to the extensive array of customization options for items on the Start menu in earlier Windows versions, you’ll need to make some adjustments. You can remove programs from the Most Used section, but you can’t pin program shortcuts to the left side of Start.
You can, however, add or remove certain folder shortcuts from the narrow column of options at the left edge of Start. The Documents and Pictures folders are there by default, but you can put various others there as well. You might want to have File Explorer or Network accessible on the narrow strip, for example. To see the list of possibilities, go to Settings > Personalization > Start, and then click or tap Choose Which Folders Appear On Start.
What if you actually prefer the visual style of Windows 8.1 and would rather work only with tiles instead of program names? To express this preference, visit Settings > Personalization > Start, and turn Show App List In Start Menu to Off. To emulate the look of Windows 8.1 more closely, turn on Use Start Full Screen. Windows 10 will respond by spreading your Start tiles across the full expanse of your screen.
If you choose to hide the alphabetical app list, you can easily redisplay it when you need it. With the app list absent, Windows adds two new buttons, called Pinned Tiles and All Apps, near the top of the narrow strip at the left of Start. Clicking All Apps produces a display comparable to the one shown in the following illustration. Clicking Pinned Tiles then restores the visual style of Windows 8.1:
)
)
INSIDE OUT: USE THE POWERFUL “OTHER” START MENU
Here’s some good news for anyone who misses the system shortcuts from earlier iterations of the Start menu. Most of those tools are available as part of a hidden menu, called the Quick Link menu, that appears when you right-click the Start button or press Windows key+X, as shown here.
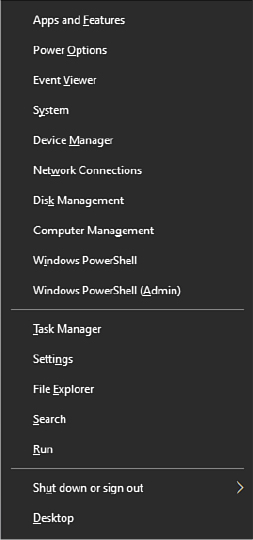
Most of the major system management and troubleshooting tools are on that list, including Disk Management, Event Viewer, and the Computer Management console.
Windows traditionalists will appreciate the fact that the Shut Down Or Sign Out menu item is here, along with links to Settings and Task Manager. The menu also includes the current command-line shell (Windows PowerShell or Command Prompt). The default in Windows 10 version 2004 and later versions is PowerShell. If you’re not a PowerShell user, you can use an option in Settings > Personalization > Taskbar to replace the two PowerShell options with Command Prompt equivalents.
Adding and arranging tiles
Clicking a tile has the same effect as clicking a program shortcut on the Start menu’s apps list or a pinned taskbar button. What makes tiles different is the variety of sizes and their ability to display information or notifications from the app, making a tile live.
To pin a program as a tile to the right side of Start, drag it from the app list or the Most Used list on the left side of Start into position. As an alternative, right-click its entry in the app list or the Most Used list on the left side of Start, and then click or tap Pin To Start. The item will take up residence as a medium-sized tile in the first available empty space, and from there you can move and resize it as needed.
To remove a program from the right side of Start, right-click it and then click Unpin From Start.
You can adjust the size of any tile by right-clicking the tile to see the menu shown in Figure 3-3.
)
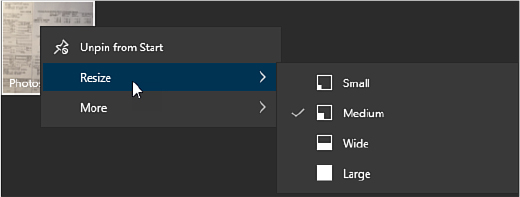
Figure 3-3 These options are available for most modern apps, including those you acquire from the Microsoft Store. Not all apps support this full list of sizes.
Note that not all tiles support the full range of sizes shown in this figure. Windows desktop programs and Progressive Web Apps pinned to Start, for example, offer only the Small and Medium options.
On a touchscreen, you can accomplish the same tile customization tasks with a long press on the tile. That produces two options shown in white circles on the right side of the tile. Tapping the top option unpins the tile, while tapping the ellipsis at the bottom right reveals the same shortcut menu you get with a right-click. (The options on the right-click menu vary slightly depending on the type of app.)
 For an explanation of the differences, see Chapter 6, “Installing and configuring modern apps and desktop apps.”
Tiles can be arranged into groups, with or without custom group names. Drag tiles, one at a time, into the position you prefer. If the position you choose is sufficiently far from the edge of an existing group, your tile ends up in a new group of its own. You can move it back to an existing group or add other tiles to the new group.
A slim bar sits above every group of tiles. Click (as we have in Figure 3-4) to display a text box where you can type a group name of your choosing. (We created a group named Useful Accessories.) Click the horizontal lines to the right of the name box to drag the entire group to a new location.
)
Figure 3-4 Click above any group of tiles to give that group a descriptive label.
Gathering tiles into folders
Another technique for grouping tiles is to create a folder. A folder of tiles looks like an ordinary tile with small icons inside, representing the contents of the folder. The following is a folder of Microsoft Office apps:
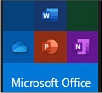
When you click or tap a folder, the folder opens to reveal the individual tiles contained within, like this:
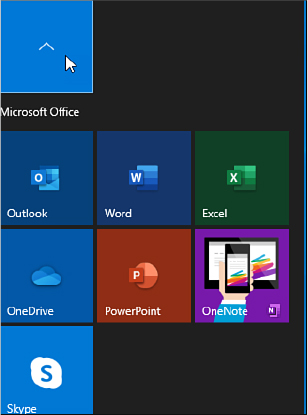
With the folder thus expanded, you can launch any of the apps it contains in the usual way, or return the folder to its former state by clicking the upward arrow.
To create a folder, drag one tile and drop it on top of another. To drop additional apps into the folder, drag them to the existing folder. To remove an app from a folder while leaving it available on the Start menu, expand the folder and then drag the app to the place where you want it to appear.