Modify the structure and appearance of text
- 7/23/2019
Apply built-in styles to text
You don’t have to know much about character and paragraph formatting to be able to format your documents in ways that will make them easier to read and more professional looking. With a couple of mouse clicks or screen taps, you can easily change the look of words, phrases, and paragraphs by using styles. More importantly, you can build a document outline that is reflected in the Navigation pane and use it to create a table of contents.
![]() SEE ALSO
SEE ALSO
For information about tables of contents, see “Create and modify tables of contents” in Chapter 13, “Reference content and content sources,” of Microsoft Word 2019 Step by Step, by Joan Lambert (Microsoft Press, 2018).
Apply styles
Styles can include character formatting (such as font, size, and color), paragraph formatting (such as line spacing and outline level), or a combination of both. Styles are stored in the template attached to a document. By default, blank new documents are based on the Normal template. The Normal template includes a standard selection of styles that fit the basic needs of most documents. These styles include nine heading levels, various text styles including those for multiple levels of bulleted and numbered lists, index and table of contents entry styles, and many specialized styles such as those for hyperlinks, quotations, placeholders, captions, and other elements.
By default, most common predefined styles are available in the Styles gallery on the Home tab. You can add styles to the gallery or remove those that you don’t often use.
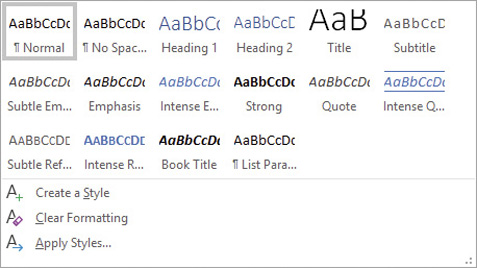
The Styles gallery in a new, blank document based on the Normal template
Styles stored in a template are usually based on the Normal style and use only the default body and heading fonts associated with the document’s theme, so they all go together well. For this reason, formatting document content by using styles produces a harmonious effect. After you apply named styles, you can easily change the look of an entire document by switching to a different style set that contains styles with the same names but different formatting.
![]() SEE ALSO
SEE ALSO
For information about document theme elements, see “Change the document theme,” later in this chapter.
Style sets are available from the Document Formatting gallery on the Design tab.
)
 TIP
TIP
Style sets provide a quick and easy way to change the look of an existing document. You can also modify style definitions by changing the template on which the document is based. For more information about styles and templates, see Chapter 15, “Create custom document elements,” of Microsoft Word 2019 Step by Step, by Joan Lambert (Microsoft Press, 2018).
To open the Styles pane
On the Home tab, select the Styles dialog box launcher.
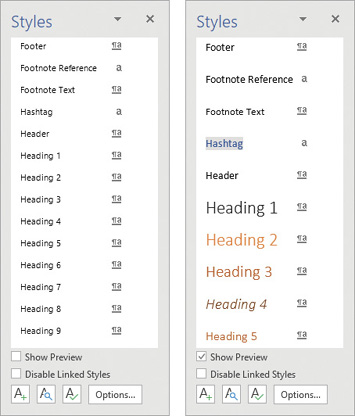
The Styles pane can display style names and previews
TIP
If the Styles pane floats above the page, you can drag it by its title bar to the right or left edge of the app window to dock it.
To change which styles are displayed in the Styles pane
Open the Styles pane, and then select Options.
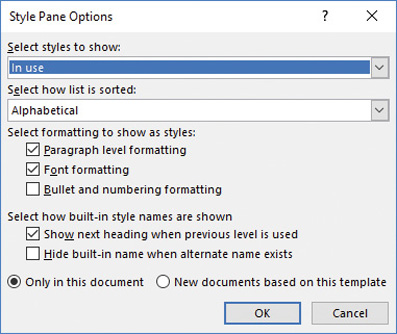
To make it easier to find specific styles, sort the list alphabetically
In the Style Pane Options dialog box, do any of the following, and then select OK:
In the Select styles to show list, select one of the following:
Recommended Displays styles that are tagged in the template as recommended for use
In use Displays styles that are applied to content in the current document
In current document Displays styles that are in the template that is attached to the current document
All styles Displays built-in styles, styles that are in the attached template, and styles that were brought into the document from other templates
In the Select how list is sorted list, select Alphabetical, As Recommended, Font, Based on, or By type.
In the Select formatting to show as styles area, select each check box for which you want to display variations from named styles.
In the Select how built-in style names are shown area, select the check box for each option you want to turn on.
To display or hide style previews in the Styles pane
Open the Styles pane, and then select or clear the Show Preview check box.
To add a style to the Styles gallery
In the Styles pane, point to the style, select the arrow that appears, and then select Add to Style Gallery.
To remove a style from the Styles gallery
In the Styles pane, point to the style, select the arrow that appears, and then select Remove from Style Gallery.
In the Styles gallery, right-click the style, and then select Remove from Style Gallery.
To apply a built-in style
Select the text or paragraph to which you want to apply the style.
TIPIf the style you want to apply is a paragraph style, you can position the cursor anywhere in the paragraph. If the style you want to apply is a character style, you must select the text.
In the Styles gallery on the Home tab, or in the Styles pane, select the style you want to apply.
To change the style set
On the Design tab, in the Document Formatting group, select the More button if necessary to display all the style sets.
Point to any style set to preview its effect on the document.
Select the style set you want to apply.
Manage outline levels
Styles can be used for multiple purposes: to affect the appearance of the content, to build a document outline, and to tag content as a certain type so that you can easily locate it.
)
Each paragraph style has an associated Outline Level setting. Outline levels include Body Text and Level 1 through Level 9. (Most documents make use only of body text and the first three or four outline levels. )
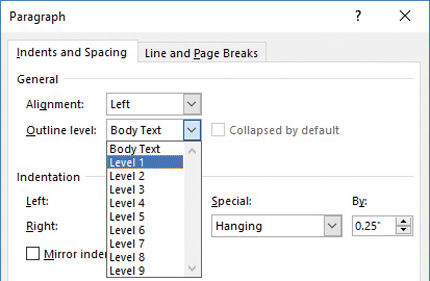
Most documents use only two to four of the outline levels
Paragraphs that have the Level 1 through Level 9 outline levels become part of the hierarchical structure of the document. They appear as headings in the Navigation pane and act as handles for the content that appears below them in the hierarchy. You can collapse and expand the content below each heading and move entire sections of content by dragging the headings in the Navigation pane.
To display the document outline in the Navigation pane
In the Navigation pane, select Headings to display the document structure.
TIPOnly headings styled with the document heading styles appear in the Navigation pane.
To expand or collapse the outline in the Navigation pane
In the Navigation pane, do either of the following
If there is a white triangle to the left of a heading, select it to expand that heading to show its subheadings.
If there is a downward-angled black triangle to the left of a heading, select it to collapse the subheadings under that heading.
TIPIf there is no triangle next to a heading, that heading does not have subheadings.
To expand or collapse sections in the document
In a document that contains styles, point to a heading to display a triangle to its left. Then do either of the following
If the triangle is a downward-angled gray triangle, select the triangle to hide the content that follows the heading.
If the triangle is a white triangle, select the triangle to display the hidden document content.