Bootstrapping ASP.NET MVC
- By Dino Esposito
- 1/2/2019
- Enabling the MVC Application Model
- Configuring the Routing Table
- Map of ASP.NET MVC Machinery
- Summary
In this sample chapter from Programming ASP.NET Core, Dino Esposito explains the preliminary actions required to set up the ASP.NET MVC Core pipeline and pick up the handler responsible for the actual processing of any incoming requests.
It is not down in any map; true places never are.
—Herman Melville, “Moby Dick”
ASP.NET Core fully supports the specific ASP.NET Model-View-Controller (MVC) application model in which the URL of an incoming request is resolved to a pair of controller/action items. The controller item identifies a class name; the action item identifies a method on the controller class. The processing of the request, therefore, is a matter of executing the given action method of the given controller class.
The ASP.NET MVC application model in ASP.NET Core is nearly identical to the MVC application model available in classic ASP.NET, and it doesn’t even differ too much from implementations of the same MVC pattern you find in other web platforms such as CakePHP for PHP, Rails for Ruby, and Django for Python. The MVC pattern is also pretty popular among front-end frameworks, most notably Angular and KnockoutJS.
In this chapter, we’ll go through the preliminary steps that ultimately set up the ASP.NET MVC Core pipeline and pick up the handler responsible for the actual processing of any incoming requests.
Enabling the MVC Application Model
If you’re coming to ASP.NET Core from an ASP.NET background, having to explicitly enable the MVC application model might seem strange. First and foremost, ASP.NET Core is a fairly generic web framework that allows requests to be handled through a centralized endpoint—the terminating middleware.
Also, ASP.NET supports a more sophisticated endpoint based on controller actions. However, if this is the application model you want, then you have to enable it so that the terminating middleware—the Run method we discussed in Chapter 2—is bypassed.
Registering the MVC Service
The beating heart of the MVC application model is the MvcRouteHandler service. Although publicly documented, the service is not one that you want to use directly in your application code. However, its role is crucial for the whole ASP.NET MVC machinery. The MVC route handler is the engine responsible for resolving the URL to an MVC route, invoking the selected controller method, and processing the results of the action.
 NOTE
NOTE
MvcRouteHandler is also the name of a class used in the implementation of classic ASP.NET MVC. In classic ASP.NET MVC, however, the class played a more limited role than it does in ASP.NET Core. For capturing the big picture of what the class does in ASP.NET Core, rather than just relying on the ability of a search engine, it is preferable to look directly at its implementation, which can be found at http://bit.ly/2kOrKcJ.
Adding the MVC Service
To add the MVC route handler service to the ASP.NET host, you proceed in the same way as for any other application service such as static files, authentication, or Entity Framework Core. You just add a line of code to the ConfigureServices method of the startup class.
public void ConfigureServices(IServiceCollection services)
{
    // Package required: Microsoft.AspNetCore.Mvc or Microsoft.AspNetCore.All (only in 2.0)
    services.AddMvc();
}
Note that the code requires a reference to an additional package that the IDE (Visual Studio, for instance) typically offers to restore for you. The AddMvc method has two overloads. The parameter-less method accepts all default settings for the MVC service. The second overload, as below, allows you to select ad hoc options.
// Receives an instance of the MvcOptions class
services.AddMvc(options =>
{
    options.ModelBinderProviders.Add(new SmartDateBinderProvider());
    options.SslPort = 345;
});
Options are specified through an instance of the MvcOptions class. The class is a container of configuration parameters you can change in the MVC framework. For example, the code snippet above adds a new model binder that parses specific strings into valid dates and specifies the SSL port to be used when the controller class is decorated with the RequireHttpsAttribute. The full list of configurable options can be found here: http://docs.microsoft.com/en-us/aspnet/core/api/microsoft.aspnetcore.mvc.mvcoptions.
Additional Services Enabled
The AddMvc method is only an umbrella method under which many other services are initialized and added to the pipeline. Table 3-1 provides the full list.
TABLE 3-1 List of MVC services enabled by the AddMvc method
Service |
Description |
MVC Core |
Set of core services of the MVC application model including routing and controllers |
API Explorer |
Service responsible for gathering and exposing information about controllers and actions for dynamic discovery of capabilities and help pages |
Authorization |
Service behind authentication and authorization |
Default Framework Parts |
Service that adds input tag helpers and URL resolution helpers to the list of application parts |
Formatter Mappings |
Service that sets up default media type mappings |
Views |
Service to process action results as HTML views |
Razor Engine |
Registers the Razor view and page engine into the MVC system |
Tag Helpers |
Service to reference the part of the framework about tag helpers |
Data Annotations |
Service to reference the part of the framework about data annotations |
JSON Formatters |
Service to process action results as JSON streams |
CORS |
Service to reference the part of the framework about cross-origin resource sharing (CORS) |
For more details, see the method’s source code at http://bit.ly/2l3H8QK.
If you have memory constraints—for example, you’re hosting the application in the cloud—you might want the application to reference nothing but the bare metal of the framework. The list of services in Table 3-1 can be made shorter; how much shorter mostly depends on the actual features you need to have in the application. The following code is enough to serve plain HTML views without more advanced features, such as data annotations for form validation and tag helpers.
public void ConfigureServices(IServiceCollection services)
{
    var builder = services.AddMvcCore();
    builder.AddViews();
    builder.AddRazorViewEngine();
}
The code above, though, is not enough to return formatted JSON data. To add that capability as well, you just add:
builder.AddJsonFormatters();
Note that some of the services in Table 3-1 are useful only if you are exposing a web API. These services are API Explorer, Formatter Mappings, and CORS. Tag helpers and default application parts can also be blissfully dropped if you’re happy to content yourself with a programming experience like that of classic ASP.NET MVC.
Activating the MVC Service
In the Configure method of the startup class, you call the UseMvc method to configure the ASP.NET Core pipeline to support the MVC application model. At this point, everything around the MVC application model is completely set up except conventional routing. As we’ll see in a moment, conventional routing consists of a bunch of pattern rules that identify all valid URLs the application intends to process.
In the MVC application model, that’s not the only way to bind actions to URLs. For example, if you decide to associate actions to URLs through attributes (as we’ll see in Chapter 4), then you’re done. Otherwise, for the MVC service to be effective, you also must list the URL routes that the application intends to handle.
A route is a URL template that your application can recognize and process. A route is ultimately mapped to a pair of controller and action names. As we’ll see in a moment, you can add as many routes as you wish, and those routes can take nearly any shape you like them to be. An internal MVC service is responsible for request routing; it is automatically registered when you enable MVC Core services.
Enabling Conventional Routing
To be usable, your application should provide rules to select the URLs it wants to handle. However, not all feasible URLs must be listed explicitly; one or more URL templates with placeholders will do the job. A default routing rule exists, which is sometimes referred to as conventional routing. Usually, the default route is enough for the entire application.
Adding the Default Route
If you don’t have any special concerns about routes, the simplest and easiest method is to use the default route only.
public void Configure(IApplicationBuilder app)
{
    app.UseMvcWithDefaultRoute();
}
The actual code behind the UseMvcWithDefaultRoute method is shown below.
public void Configure(IApplicationBuilder app)
{
    app.UseMvc(routes =>
    {
        routes.MapRoute(
            name: "default",
            template: "{controller=Home}/{action=Index}/{id?}");
    });
}
As per the previous code, any requested URL will be parsed in segments:
The first segment right after the server name will be matched to a route parameter named controller.
The second segment will be matched to a route parameter named action.
The third segment (if any) will be matched to an optional route parameter named id.
In light of this, the URL Product/List will be matched to a controller name of Product and an action method of List. If the URL contains fewer than two segments, default values apply. For example, the root URL of the website will match a controller name of Home and an action method of Index. The default route also supports an optional third segment whose content is matched to a named value of Id. Note that the ? symbol indicates that the argument is optional.
Route parameters—and in particular, route parameters named controller and action—play a key role in the overall processing of an incoming request because they point in some way to the code that will actually produce the response. Any request successfully mapped to a route will be processed by executing a method on a controller class. The route parameter named controller identifies the controller class, and the route parameter named action identifies the method to invoke. We’ll cover controllers in detail in the next chapter.
When No Routes Are Configured
The UseMvc method can also be invoked without parameters. When this happens, the ASP.NET MVC application is fully functional but has no configured routes it can handle.
public void Configure(IApplicationBuilder app)
{
    app.UseMvc();
}
Note that the code above is fully equivalent to the snippet below:
app.UseMvc(routes => { });
It would be interesting to see what happens when no routes are configured. For doing so, let me briefly anticipate how a simple controller class might look. Say you add a new class to the project, named HomeController.cs, and then invoke the home/index URL from the address bar.
public class HomeController : Controller
{
    public IActionResult Index()
    {
       // Writes out the Home.Index text
       return new ContentResult { Content = "Home.Index" };
    }
}
Conventional routing would map the URL home/index to the Index method of the Home controller. As a result, you should see a blank page with the text Home.Index printed. If you use conventional routing with the above configuration, all you get is an HTTP 404 page-not-found error.
Let’s add now some terminating middleware to the pipeline and try it again. Figure 3-1 shows the new output you get.
)
app.Run(async (context) =>
{
    await context.Response.WriteAsync(
          "I,d rather say there are no configured routes here.");
});
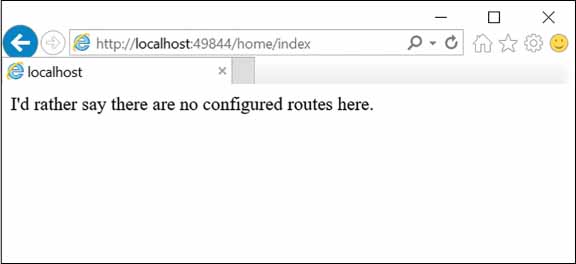
FIGURE 3-1 No routes are configured in the application
Now, let’s go back the default route and try again. Figure 3-2 shows the result.
)
public void Configure(IApplicationBuilder app)
{
    app.UseMvcWithDefaultRoute();
    app.Run(async (context) =>
    {
        await context.Response.WriteAsync(
              "I,d rather say there are no configured routes here.");
    })
}
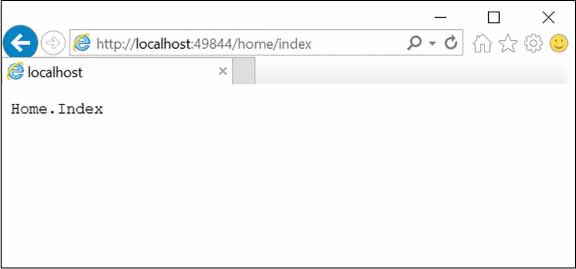
FIGURE 3-2 The default route is configured in the application
The conclusion is twofold. On the one hand, we can say that UseMvc changes the structure of the pipeline bypassing any terminating middleware you may have defined. On the other hand, if a matching route can’t be found, or doesn’t work (as a result of a missing controller or method), then the terminating middleware regains a place in the pipeline and runs as expected.
Let’s learn a bit more about the internal behavior of the UseMvc method.
The Routing Service and the Pipeline
Internally, the UseMvc method defines a route builder service and configures it to use the provided routes and a default handler. The default handler is an instance of the MvcRouteHandler class. This class is responsible for finding a matching route and for extracting controller and action method names from the template.
Also, the MvcRouteHandler class will also try to execute the action method. If successful, it marks the context of the request as handled so that no further middleware will ever touch the generated response. Otherwise, it lets the request proceed through the pipeline until fully processed. Figure 3-3 summarizes the workflow with a diagram.
)
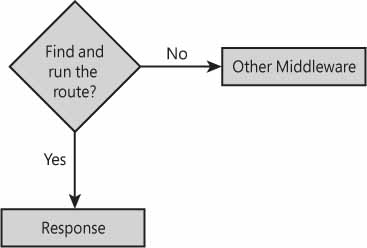
FIGURE 3-3 Routes and pipeline
NOTE
In classic ASP.NET MVC, failing to find a matching route for a URL would result in an HTTP 404 status code. In ASP.NET Core, instead, any terminating middleware is given a chance to process the request.