The 5 Principles and 10 Building Blocks of Persuasive Visual Storytelling

- By Cliff Atkinson
- 11/22/2018
- Introducing the BBP Story Template
- The Five Principles of Visual Storytelling
- Principle 1: Nail Down the Story Before the Slides
- Principle 2: Reformat Your Information for a Yes-No Decision
- Principle 3: Start with No to Get to Yes
- Principle 4: Always Keep the End In Mind
- Principle 5: Think Like a Storyboard
- The 10 Building Blocks of a Persuasive Storyboard
- Building Blocks 1-4: The Hook, The Relevance, The Challenge, and The Desire
- Building Blocks 5-7: The Map, The Anchors, and The Explanation
- Building Blocks 8-10: The Headlines, The Visuals, and The Flow
- Sketching the First Five Slides
- Sketching the Remaining Slides
- Applying Custom Layouts
- Adding Graphics to the First Five Slides
- Adding Graphics to the Remaining Slides
- Stepping Into the Screen
- Documenting the Experience
- Getting Started with the BBP Story Template
- Writing Headlines Using Three Ground Rules
Building Blocks 8-10: The Headlines, The Visuals, and The Flow
After you transform your Word story template into a PowerPoint storyboard, you’ll read the next building block of a storyboard—the headlines—across the story frames. From this point forward, you’ll work with your storyboard in Slide Sorter view to review your story structure and sequence, check your pacing and flow, and add the visuals to tie together the various parts of your story. This planning ensures that you continually build on and improve your strong story foundation with a single unified set of visuals and words.
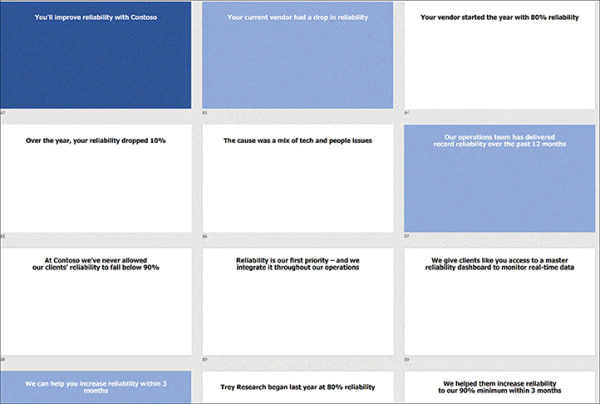
Next, you’ll quickly apply layouts with slide backgrounds that indicate the three hierarchical levels of Act II slides, as shown in Figure 3-12, to set up preliminary visual cues that designate which slides are more important than others and how those slides fit into a sequence. After you do this, you’ll be able to easily see the three most important slides in your presentation—shown in dark blue. You’ll also be able to see your second-most important slides—shown in light blue—and your third-most important slides—shown in white—to easily locate and hide them if you need to quickly scale down the presentation to a shorter amount of time. These slides are the foundation for the fully designed layouts and backgrounds you use to cue working memory when you add graphics.

FIGURE 3-12 You’ll cue working memory by applying layouts with preliminary slide backgrounds to the three hierarchical levels of Act II slides.
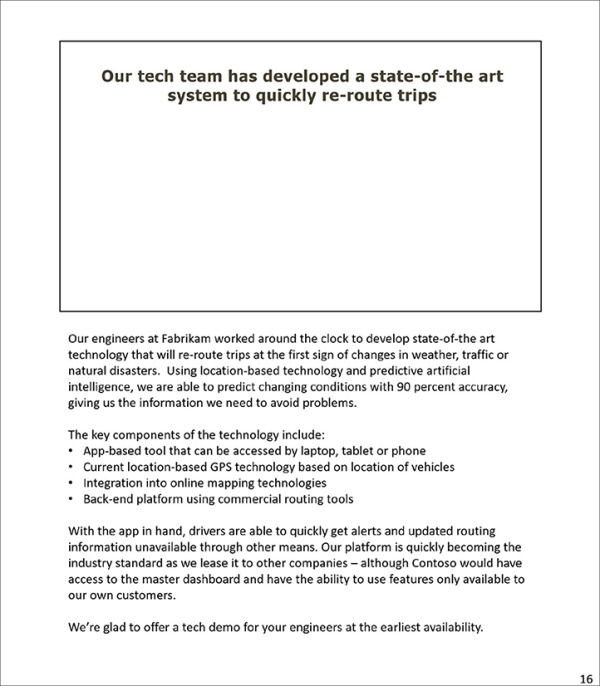
Next, you’ll plan the narrated soundtrack of the presentation by writing out the verbal explanation for each headline in the off-screen text box in Notes Page view, as shown in Figure 3-13. If you don’t have time to write out your full narration, just take a few notes here. In line with the dual-channels theory described in Chapter 2, this helps you seamlessly integrate each visual with its verbal explanation. After capturing a record of the rich verbal explanation that will accompany the slide and placing it in the notes area, you then choose the simplest possible visual to illustrate the headline of each slide. After you add the visuals as described next, you’ll create the flow in your presentation by visually and verbally connecting points from one to the next as you engage your audience.

FIGURE 3-13 First, you write out what you’ll say for each headline in the off-screen notes area (bottom). After you have recorded the information that you’ll convey with your voice, you next add a simple graphic to the on-screen slide area (top).
