Create charts and objects
- By Joan Lambert
- 7/6/2017
- Objective 5.1: Create charts
- Objective 5.1 practice tasks
- Objective 5.2: Format charts
- Objective 5.2 practice tasks
- Objective 5.3: Insert and format objects
- Objective 5.3 practice tasks
Objective 5.3: Insert and format objects
Although graphics are not frequently associated with the storage of data within Excel workbooks, it is worthwhile to note that when preparing to present data, you can incorporate almost all of the graphic elements available in Microsoft Word and PowerPoint into an Excel workbook. This can be particularly useful when creating summary pages or when a workbook must provide a standalone information source for text content in addition to data.
Insert text boxes and shapes
To convey information more succinctly, you can add text. When you add text directly to a worksheet, you are restricted by the width and height of the worksheet cells in which you must insert the text. To bypass that restriction or to distinctly separate the text from the worksheet data, you can insert the text in a text box or shape that you can position independently on the worksheet. You can also use shapes as simple navigational aids that use hyperlinks to move to a specific location.
)
Shapes can be simple, such as lines, circles, or squares; or more complex, such as stars, hearts, and arrows. You can enter text inside a shape, and apply formatting effects to both the shape and the text. You format both text boxes and shapes by using commands on the Format tool tab for Drawing Tools.
)
Easily apply formatting that matches the color scheme of other workbook elements
To insert a text box on a worksheet
On the Insert tab, in the Text group, click Text Box.
In the worksheet, click to insert a small (one character) text box that expands when you enter text, or drag to draw the text box the size that you want.
Enter or paste the text you want to display in the text box.
To draw a shape
On the Insert tab, in the Illustrations group, click the Shapes button.
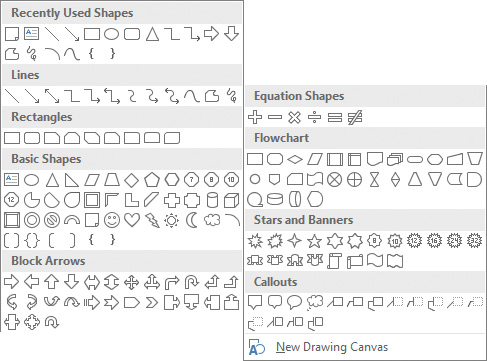
More than 150 shapes are available as starting points for a custom shape
In the Shapes gallery, click the shape you want, and then do one of the following:
Click anywhere on the page to insert a standard-size shape.
Drag anywhere on the page to draw a shape of the size and aspect ratio that you want.
To add text to a shape
Click the shape to select it, and then enter the text.
Right-click the shape, click Add Text or Edit Text, and then enter the text.
To format a selected text box or shape
To change the shape, on the Format tool tab, in the Insert Shapes group, click Edit Shape, click Change Shape, and then click the shape you want.
To change the shape fill, outline, or effects, on the Format tool tab, use the formatting options in the Shape Styles group.
To rotate the shape, on the Format tool tab, in the Arrange group, click Rotate Objects, and then click the rotation option you want.
To resize a text box or shape
Click the text box or shape to select it, and then do any of the following:
Drag the top or bottom sizing handle to change the height.
Drag the left or right sizing handle to change the width.
Drag a corner sizing handle to change the width and height and maintain the aspect ratio.
On the Format tool tab, in the Size group, enter or select the Height and Width dimensions.
On the Format tool tab, in the Size group, click the dialog box launcher. In the Format Object dialog box that opens, select the Lock aspect ratio check box if you want to maintain the aspect ratio, and then enter or select the height or width.
To format text in a text box or shape
Select the text box or shape. On the Format tool tab, use the formatting options in the WordArt Styles group.
Select the text, and then use the formatting options on the Mini Toolbar or in the Font group on the Home tab.
Insert images
You can enhance workbook content by adding an image, perhaps a company logo, a product image, or an image that represents the concept you want to convey to the workbook viewer.
)
After you insert an image in a document, you can modify it in many ways. For example, you can crop or resize a picture, change the picture’s brightness and contrast, recolor it, apply artistic effects to it, and compress it to reduce the size of the document containing it. You can apply a wide range of preformatted styles to a picture to change its shape and orientation, in addition to adding borders and picture effects.
You format images by using commands on the Format tool tab for Pictures.
)
You can format an image in Excel in the same ways that you do in PowerPoint or Word
To insert a picture on a worksheet
On the Insert tab, in the Illustrations group, click the Pictures button.
In the Insert Picture dialog box, browse to and click the file you want. Then do one of the following:
Click Insert to insert the picture into the worksheet.
In the Insert list, click Link to File to insert a picture that will update automatically if the picture file changes.
In the Insert list, click Insert and Link to insert a picture that you can manually update if the picture file changes.
To apply artistic effects to a selected picture on a worksheet
On the Format tool tab, in the Adjust group, click Artistic Effects, and then in the gallery, click the effect you want to apply.
To apply a style to a selected picture on a worksheet
On the Format tool tab, in the Picture Styles group, expand the Quick Styles gallery, and then click the style you want to apply.
Or
On the Format tool tab, click the Picture Styles dialog box launcher.
In the Format Picture pane, on the Fill & Line and Effects pages, choose the options that you want to apply.
To change the size and/or shape of a selected picture on a worksheet
Drag its sizing handles.
On the Format tool tab, in the Size group, change the Height and Width settings.
On the Format tool tab, click the Size dialog box launcher. Then on the Size & Properties page of the Format Picture pane, change the Height, Width, and Scale settings.
To move a picture on a worksheet
Drag the picture to a new location.
To copy a picture to a new location on a worksheet
Hold down the Ctrl key and drag the picture to the second location.
To format a selected picture
Use the commands in the Adjust group on the Format tool tab to remove the picture background; adjust the sharpness, brightness, and contrast; apply artistic effects; and compress the picture to minimize the file size.
Use the commands in the Picture Styles group on the Format tool tab to apply preconfigured combinations of effects or to apply a border, shadow, reflection, glow, soft edge, beveled edge, or three-dimensional effect.
Use the commands in the Arrange group on the Format tool tab to control the relationship of the picture to the sheet and to other pictures on the sheet, and to rotate or flip the picture.
Use the commands in the Size group on the Format tool tab to change the picture height and width and to crop the picture manually, to a specific aspect ratio, to a shape, or to fill or fit a specific space.
Provide alternative text for accessibility
Alternative text (also referred to as alt text) is descriptive text assigned to an Excel table, chart, image, or other object that either might not show up correctly on the page or might not be available to screen reading software. The alternative text provides readers with information about the object content or purpose. In a PDF file, for example, if your content includes alternative text, a reader can point to an image on the screen to display a description of the image.
You assign alternative text to an object as an object property. You can assign both a title and a description to an image.
To add alternative text to an object
Do one of the following:
Right-click the chart area of a chart, and then click Format Chart Area.
Right-click a text box or shape, and then click Format Shape.
Right-click an image, and then click Format Picture.
In the Format Object pane, click the Size & Properties button, and then click the Alt Text heading to display the input boxes, if they aren’t already visible.
In the Title box, enter a short title for the object. People who use screen reading software will hear the title first and can then choose whether to have the description read.
In the Description box, enter a description that provides the information you intend for a reader to get from looking at the object.
)
Excel saves your changes in the object properties.