Manage schedules
- By Joan Lambert
- 1/30/2017
- Objective 3.1: Create and manage calendars
- Objective 3.1 practice tasks
- Objective 3.2: Create appointments, meetings, and events
- Objective 3.2 practice tasks
- Objective 3.3: Organize and manage appointments, meetings, and events
- Objective 3.3 practice tasks
- Objective 3.4: Create and manage notes and tasks
- Objective 3.4 practice tasks
Objective 3.3: Organize and manage appointments, meetings, and events
Configure settings for calendar items
As you can with other Outlook items, you can set the importance of a calendar item. Unlike other items, however, the importance is visible only in the open item window. However, you can use the importance setting, as you can any tag, as a way of locating specific calendar items.
By default, Outlook displays a reminder message 15 minutes before the start time of an appointment or meeting, and 18 hours before an all-day event—you can change the reminder to occur as far as two weeks in advance, or you can turn it off completely if you want to.
You might find it necessary to change the date, time, or location of an appointment, meeting, or event. When you are the meeting organizer, you can change any information in a meeting request at any time, including adding or removing invited attendees, or canceling the meeting.
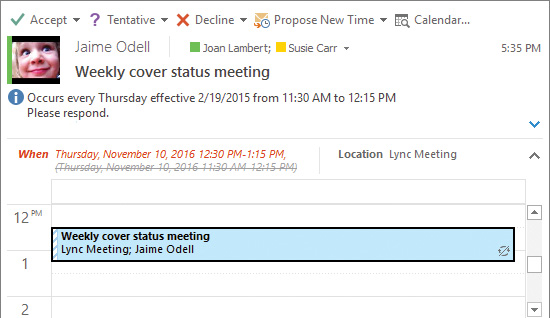
Meeting updates alert attendees to changes and provide response options
After you edit or cancel a meeting, Outlook sends an updated meeting request to the invited attendees to keep them informed. If the only change you make is to the attendee list, Outlook gives you the option of sending an update only to the affected attendees.
To categorize calendar items
On the item-specific tab of the item window, in the Tags group, click Categorize, and then click the category you want to assign.
In the Calendar pane, select the calendar item. On the item-specific tool tab, in the Tags group, click Categorize, and then click the category you want to assign.
In the Calendar pane, right-click the calendar item, click Categorize, and then click the category you want to assign.
To set calendar item importance
On the item-specific tab of the item window, in the Tags group, click the High Importance button or Low Importance button.
In the Calendar pane, select the item. On the item-specific tool tab, in the Tags group, click the High Importance button or Low Importance button.
To configure reminders
On the item-specific tab of the item window, in the Options group, in the Reminder list, click the amount of time prior to the item start time that you want the reminder time to appear.
In the Calendar pane, select the item. On the item-specific tool tab, in the Options group, in the Reminder list, click the amount of time prior to the item start time that you want the reminder time to appear.
To update calendar items
Double-click the item on your calendar.
If the item is one of a series (a recurring item), click to indicate whether you want to edit the series or only the selected instance.
Make the changes you want, and then save the item.
If the item is a meeting, send the meeting update to the attendees.
Manage meeting options
When you receive a meeting request from another Outlook user, the meeting appears on your calendar with your time scheduled as Tentative. Until you respond to the meeting request, the organizer doesn’t know whether you plan to attend.
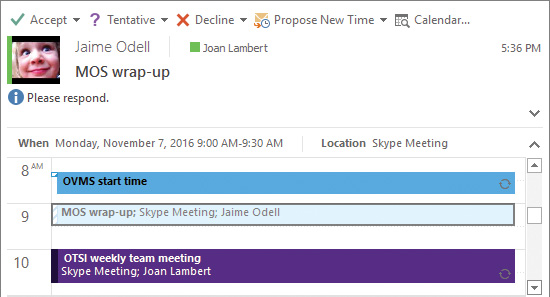
Meetings are marked as Tentative and details are dimmed until you accept the request
By default, meeting requests that you send include a standard set of response options. You can respond to a meeting request in one of these four ways:
Accept the request. Outlook deletes the meeting request and adds the meeting to your calendar.
Tentatively accept the request, which indicates that you might be able to attend the meeting but are undecided. Outlook deletes the meeting request and shows the meeting on your calendar as tentatively scheduled.
Propose a new meeting time. Outlook sends your request to the meeting organizer for confirmation and shows the meeting with the original time on your calendar as tentatively scheduled.
Decline the request. Outlook deletes the meeting request and removes the meeting from your calendar.
In addition to these, you have the option to reply to the meeting organizer or to all attendees, or to forward the meeting request. When you forward a meeting request for which you are not the organizer, the meeting request is sent from you “on behalf of” the meeting organizer, and responses are sent to the meeting organizer.
If you don’t respond to a meeting request, the meeting remains on your calendar with your time shown as tentatively scheduled and the meeting details in gray font rather than black.
)
If you’re unsure whether a meeting time works for you, you can click the ‘Calendar Preview link in the meeting request to display your calendar for the time period immediately surrounding the meeting, or you can click the Calendar button at the top of the meeting request to open your default calendar for the suggested meeting day in a separate window. If the meeting time doesn’t work for you, you can propose a new time.
)
When accepting or declining a meeting, you can choose whether to send a response to the meeting organizer. If you don’t send a response, your acceptance will not be tallied, and the organizer will not know whether you are planning to attend the meeting. If you do send a response, you can add a message to the meeting organizer before sending it.
If you are the meeting organizer, you can add an attendee to a meeting at any time. If this is the only change you make to the attendee list, Outlook gives you the option of sending an update only to the new attendee.
You can take notes for any meeting in Microsoft OneNote. If you originate the notes from within the meeting request, the notes are linked to the meeting request and include all the information from the meeting request, in addition to a link back to it. If you store the notes in a shared OneNote notebook, you can make the notes available to other meeting attendees.
To respond to meeting invitations
In the meeting window, in the Reading Pane, or on the shortcut menu that appears when you right-click the meeting request, click Accept, Tentative, or Decline.
Choose whether to send a standard response, a personalized response, or no response at all.
To propose a new time for a meeting
In the meeting window or in the Reading Pane, click Propose New Time, and then click Tentative and Propose New Time or Decline and Propose New Time to open the Propose New Time dialog box.
In the Propose New Time dialog box, change the meeting start and end times to the times you want to propose, either by dragging the start time and end time bars or by changing the date and time in the lists, and then click Propose Time.
In the meeting response window that opens, enter a message to the meeting organizer if you want to, and then click Send to send your response and add the meeting to your calendar as tentatively scheduled for the original meeting time. If the meeting organizer approves the meeting time change, you and other attendees will receive updated meeting requests showing the new meeting time.
To forward meeting requests
In the meeting window, on the Meeting or Meeting Series tab, in the Respond group, click Respond, and then click Forward.
Enter the recipient’s email address and send the meeting request.
To add meeting participants
Display the meeting window and enter new attendees by using any of the previously described methods.
To the left of the To box, click Send Update.
In the Send Update to Attendees dialog box, click Send updates only to added or deleted attendees, and then click OK.
To share meeting notes
In the meeting window, on the Meeting or Meeting Series tab, in the Meeting Notes group, click Meeting Notes.
In the Meeting Notes window, click Share notes with the meeting or Take notes on your own.
In the Choose Notes to Share with Meeting or Select Location in OneNote dialog box, select the OneNote location in which you want to store the meeting notes, and then click OK.
Record your meeting notes in the OneNote window that opens.