Create tables and lists
- By Joan Lambert and Steve Lambert
- 2/6/2017
- Objective 3.1: Create tables
- Objective 3.1 practice tasks
- Objective 3.2: Modify tables
- Objective 3.2 practice tasks
- Objective 3.3: Create and modify lists
- Objective 3.3 practice tasks
Objective 3.3: Create and modify lists
Lists are paragraphs that start with a character and are formatted with a hanging indent so that the characters stand out on the left end of each list item. You can format an existing set of paragraphs as a bulleted, numbered, or multilevel list, or create the list as you enter information into the document. You can choose list starting characters from a library of preselected bullet symbols and numbering patterns, or you can create your own.
)
After you create a bulleted or numbered list, you can modify the content and formatting of the list items, or even change the list type. You can change the bullet symbols, numeric characters, and list item levels. When working with numbered lists, you can manage the numbering so that the values start or restart as necessary.
Create and manage bulleted lists
To create a bulleted list
Enter the list items as separate paragraphs, and then select the paragraphs.
On the Home tab, in the Paragraph group, do either of the following:
To use the standard bullet, click the Bullets button.
To select a bullet, click the Bullets arrow and then, in the Bullet Library, click the bullet symbol you want to display before each list item.
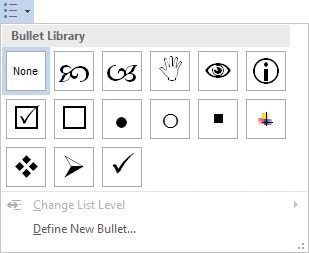
The symbols in your Bullet Library include default symbols and those you’ve recently used in lists
Or
Enter * (an asterisk) at the beginning of a paragraph, press the Spacebar or the Tab key, enter the first list item, and then press Enter.
Enter items and press Enter to add subsequent bulleted items.
To end the list, do one of the following:
To start the next paragraph at the left margin, press Enter twice.
To indent the next paragraph at the same level as the list, press Enter and then press Backspace or click None in the Bullet Library.
To change the bullet symbol of bulleted list items
Select the list items you want to change the symbol for, or, to change all items in a list, click anywhere in the list.
On the Home tab, in the Paragraph group, click the Bullets arrow, and then in the Bullet Library, click the symbol you want to use.
To define custom bullets
On the Home tab, in the Paragraph group, click the Bullets arrow, and then click Define New Bullet.
In the Define New Bullet dialog box, do one of the following, and then click OK to add the bullet to the Bullet Library.
Click the Symbol button. In the Symbol dialog box, locate and click the bullet symbol you want to use, and then click OK.
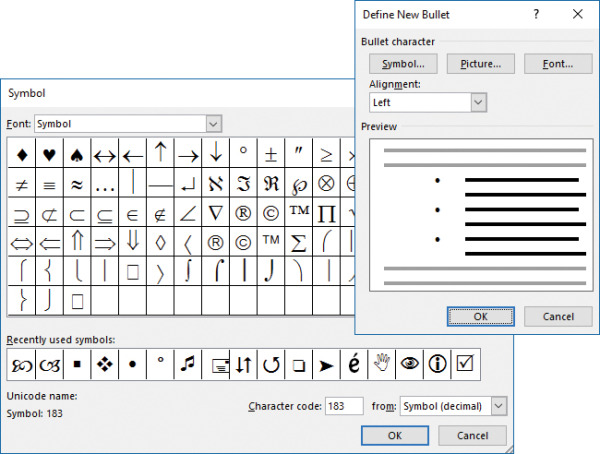
Choose a symbol from the Symbol font or choose a different font in the Font list
Click the Picture button. In the Insert Pictures dialog box, locate and click the bullet graphic you want to use, and then click OK.
To override the document font, click the Font button, select the font attributes you want in the Font dialog box, and then click OK.
In the Alignment list, click Left, Centered, or Right to specify the bullet alignment.
)
)
Create and manage numbered lists
To create a numbered list
Select the paragraphs you want to include in the list. On the Home tab, in the Paragraph group, do one of the following:
Click the Numbering button to apply the standard numbered list format.
Click the Numbering arrow and then click the numbering format you want the list to follow.
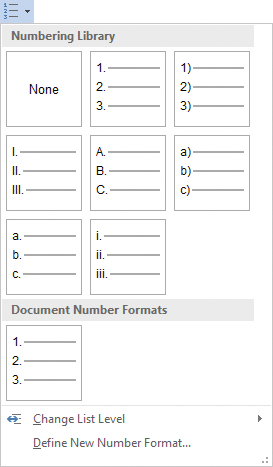
The standard number formats include a mix of numbers and roman numerals
Or
Enter 1. (the number 1 followed by a period) at the beginning of a paragraph, press the Spacebar or the Tab key, enter the first list item, and then press Enter.
Enter items and press Enter to add subsequent numbered items.
To end the list, do one of the following:
To start the next paragraph at the left margin, press Enter twice.
To indent the next paragraph at the same level as the list, press Enter and then press Backspace or click None in the Numbering Library.
To change the level of an active list item
Select the list item or items you want to change, and then do any of the following:
Press Tab to demote the items or Shift+Tab to promote the items.
On the Home tab, in the Paragraph group, click the Increase Indent button to demote the items or the Decrease Indent button to promote the items.
On the Home tab, in the Paragraph group, click the Bullets arrow or the Numbers arrow, click Change List Level, and then in the Change List Level gallery, click the level you want.
To change the number format of numbered list items
Select the list items you want to format, or, to format all items in a list, click anywhere in the list.
On the Home tab, in the Paragraph group, click the Numbering arrow, and then click the number pattern you want to use.
To define a custom number format
On the Home tab, in the Paragraph group, click the Numbering arrow, and then click Define New Number Format.
In the Define New Number Format dialog box, do any of the following, and then click OK to add the number format to the Numbering Library area of the Numbering menu:
In the Number style list, click the numbering style you want to use.
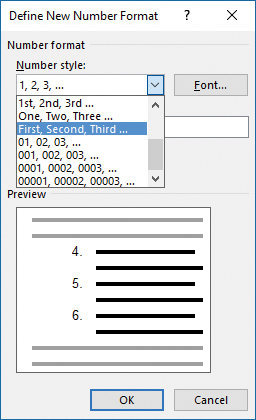
Specify the numbering style and any unchanging characters you want to display before or after the number
If you want to override the document font, click the Font button, select the font attributes you want in the Font dialog box, and then click OK.
In the Number format box, enter any characters (such as a period or the word Level) that you want to insert before or after the number.
In the Alignment list, click Left, Centered, or Right to specify the number alignment.
To restart the numbering of a numbered list
Right-click the number of the first list item you want to change, and then click Restart at 1.
Or
Position the cursor in the list item from which you want to restart. (Subsequent list items will renumber to follow the value you set.)
On the Numbering menu, click Set Numbering Value.
In the Set Numbering Value dialog box, click Start new list, and then click OK.
To continue the numbering of a numbered list
Right-click the number of the first list item you want to change, and then click Continue Numbering.
Or
Position the cursor in the first list item you want to change.
On the Numbering menu, click Set Numbering Value.
In the Set Numbering Value dialog box, click Continue from previous list.
If you want to skip over numbered lists that are between the original list and the continuation, select the Advance value check box and then, in the Set value to box, enter the number you want to assign to the list item.
In the Set Numbering Value dialog box, click OK.
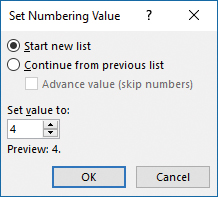
To set the starting value for all or part of a numbered list
Right-click the number of the first list item you want to change, and then click Set Numbering Value.
You can specify a list item number at the beginning of or within a list; the following items continue from the custom value
In the Set Numbering Value dialog box, in the Set value to box, enter or select the number you want to assign to the list item. Then click OK.