Using SharePoint 2013 with Excel and Access
- 8/15/2013
- Importing data from an Excel spreadsheet to a list in SharePoint
- Exporting a SharePoint list to an Excel spreadsheet
- Exporting an Excel table to a SharePoint site
- Building an Access app
- Creating a table in an Access app
- Working with an Access app in the browser
- Exporting data from an Access desktop database to a list
- Importing a list
- Linking to a list
- Moving data from a desktop database to a list
- Working offline
- Key points
Exporting an Excel table to a SharePoint site
Creating a SharePoint list from within Excel is known as exporting an Excel table. Once the table data is placed on the SharePoint site, users can see the Excel data without opening Excel. As in the first exercise of this chapter, you can maintain a link between the SharePoint list and the Excel data, but any changes in the Excel spreadsheet are not reflected in the SharePoint list. You can only synchronize changes in the SharePoint list to the Excel spreadsheet.
The export to SharePoint process uses a two-step wizard. When you export an Excel table to SharePoint, Excel checks the data in each column to ensure that the data belongs to a data type supported by SharePoint. If it doesn’t, Excel usually applies the Text data type to each column. Excel also checks whether each column contains only one type of data. If a column contains a mixture of data types, such as numbers and text, then Excel chooses Text as the data type. Once Excel completes its check, the second step of the wizard appears, which identifies the data types that will be used to create the columns in SharePoint, and identifies cells that contain different data values than the rest of the cells in a column. Any formulas are also removed.
Once the export process is complete, the spreadsheet contains two extra columns, Item Type and Path. On the Design contextual tab, you can use commands in the External Table data group to alter the properties of a range of cells, open the connected SharePoint list in a browser, or unlink a list.
)
In the following exercise, you will export a spreadsheet to a SharePoint list.
In Excel 2013, in the Protected View notification area, click Enable Editing, if displayed, and then click any cell within the data. If you are using an Excel spreadsheet other than the practice file, and the data that you want to export is already found within an Excel 2010 table, skip to step 4.
On the Home tab, in the Styles group, click Format as Table, and then select a table style.
When the Format As Table dialog box appears, click OK.
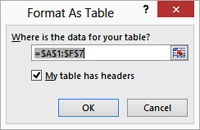
The data is converted into a table and the Design tab on the Table Tools tab set appears.
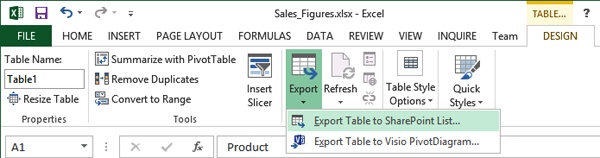
On the Design tab, in the External Table Data group, click Export, and then, from the drop-down list, click Export Table to SharePoint List.
The first step of the two-step Export Table to SharePoint List wizard appears.
In the Address box, type the name of the site where you want to export the data, such as http://wideworldimporters.
Select the Create a read-only connection to the new SharePoint list check box.
In the Name box, type SalesFigures, and in the Description box, type This list contains furniture sales for this year.
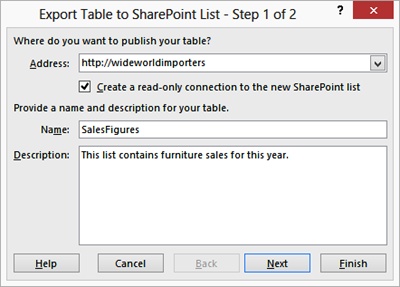
Click Next to display the second step of the wizard.

In the Key Cell column, notice that cell $C$4 in the Q2 column contains a different data type from the rest of the cells in that column. Also, the formulas are removed from the Total column. If you have the region and language format (also known as the date, time, or number format) of your operating system set to English (United States), then columns Q1, Q3, Q4, and Total have a data type of Currency; otherwise, they will have a data type of Number.
Click Finish. A Microsoft SharePoint Foundation dialog box appears with the URL of your new SharePoint list.
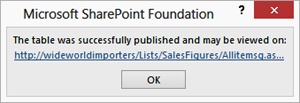
Click the URL of your new SharePoint list. A new browser window opens, displaying the new SharePoint list.
)
)